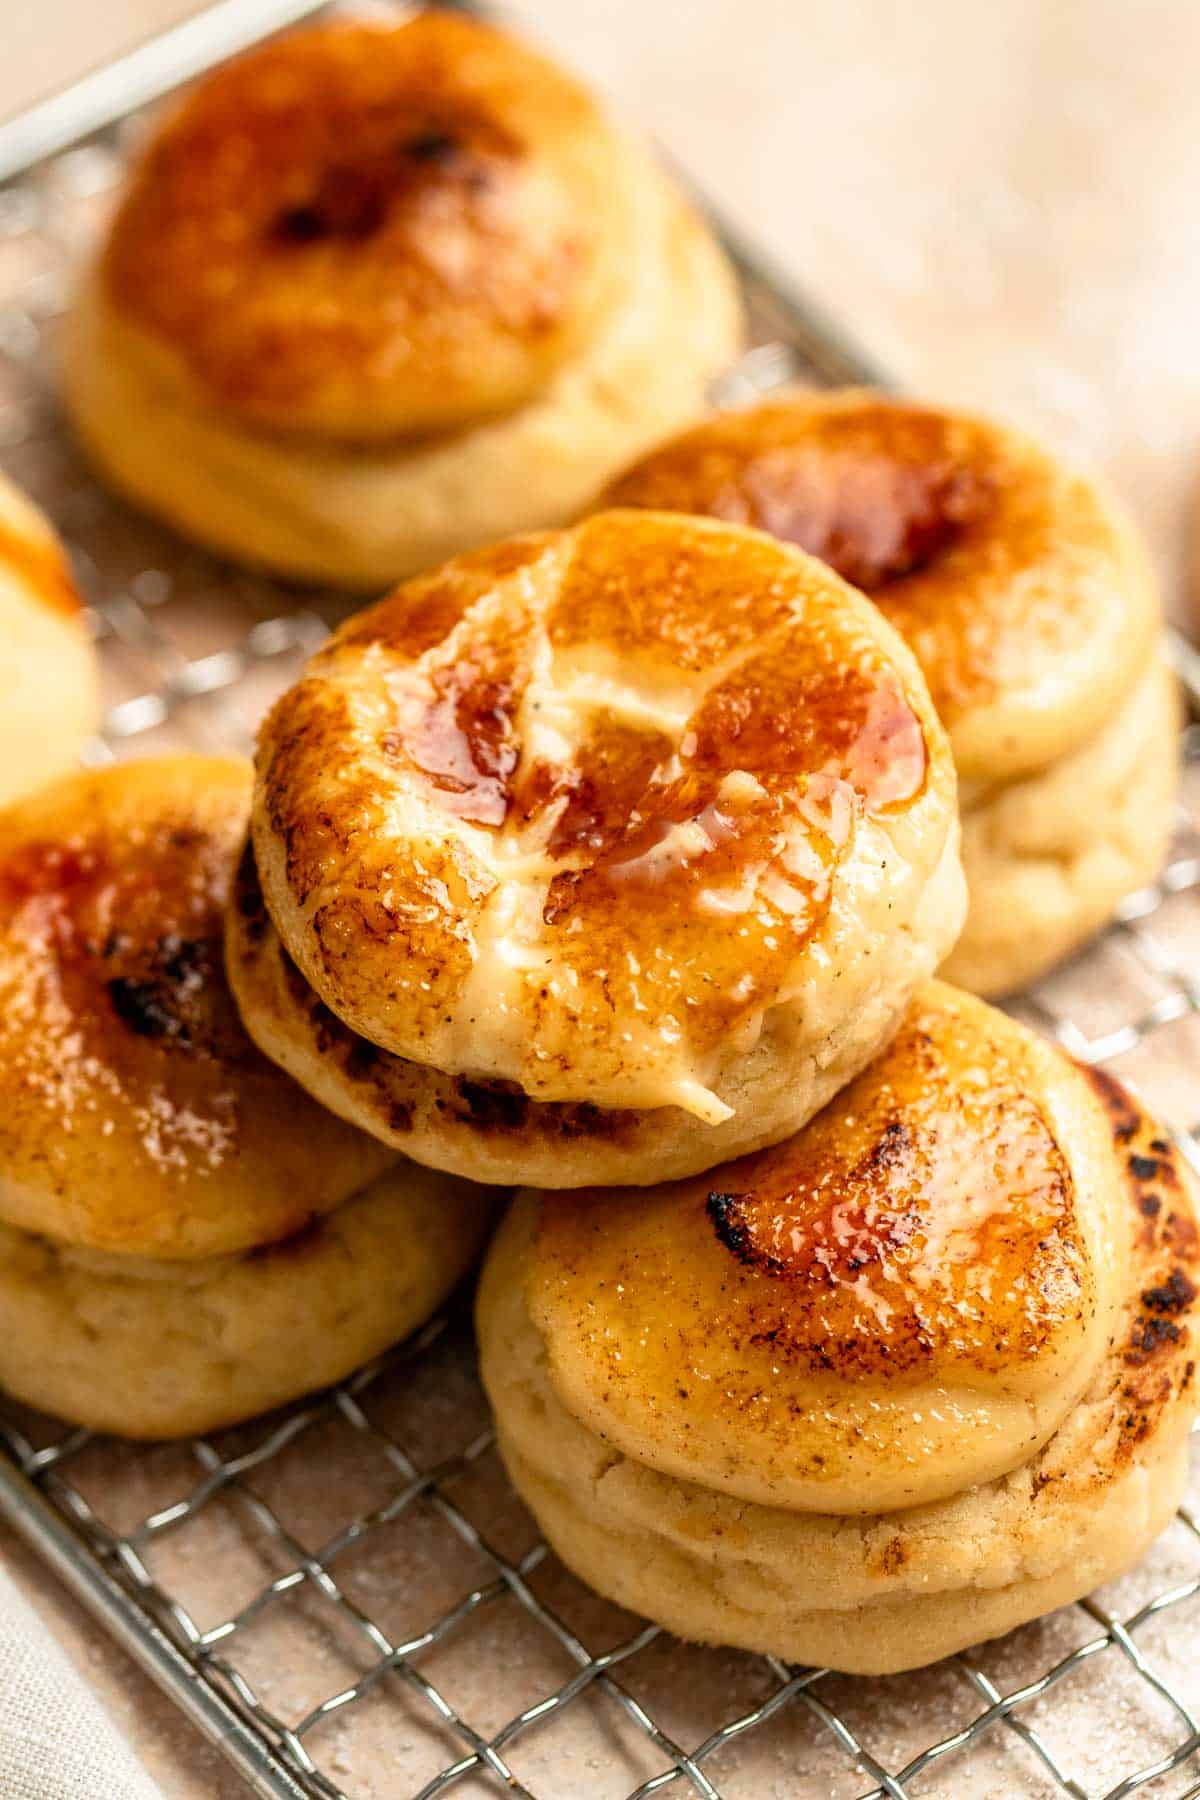
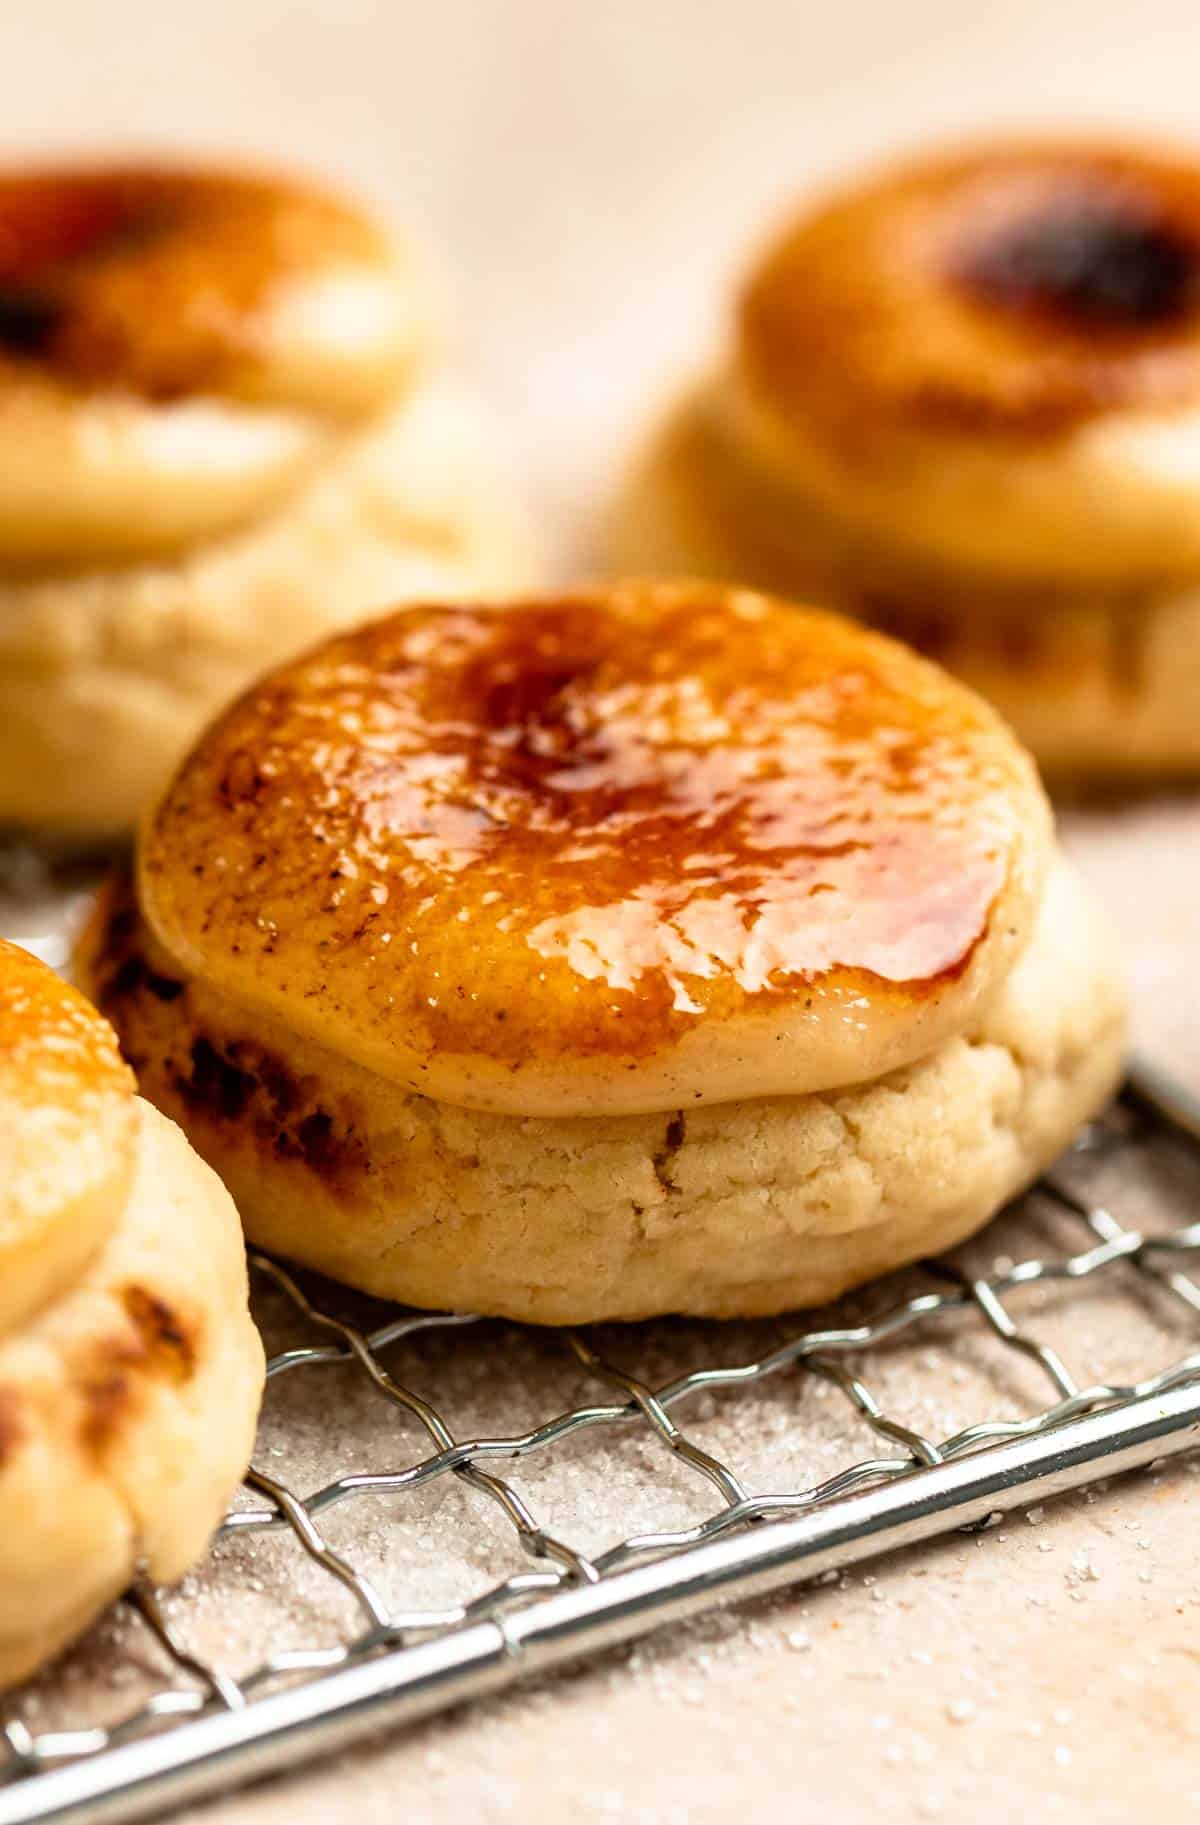
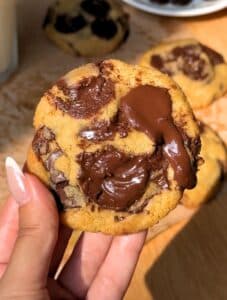
These Crème Brûlée Cookies feature a soft-baked butter cookie base topped with silky, vanilla bean pastry cream and a caramelized shell.
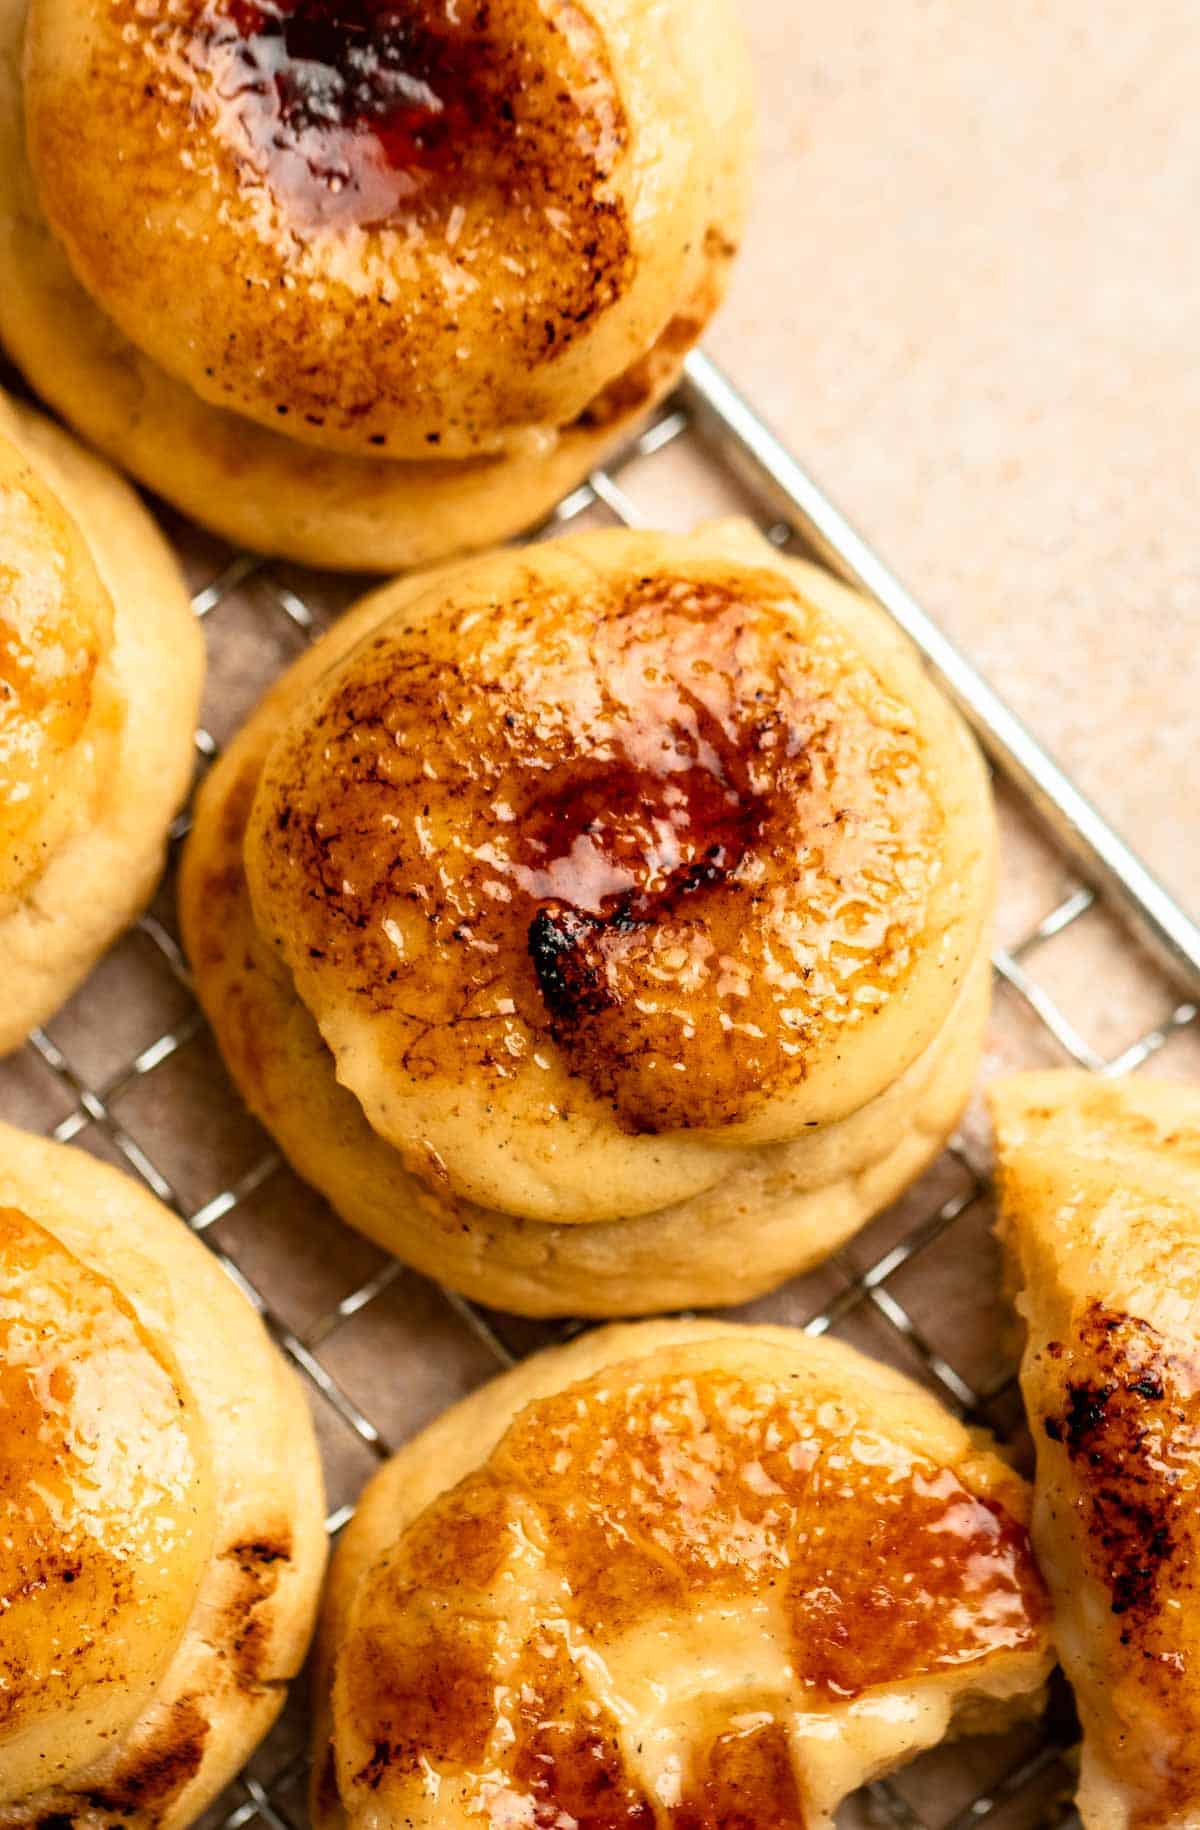
I use a thick pastry cream and a double-torch method to give you a real custard crunch. This keeps the topping firm and crisp on top of the cookie.
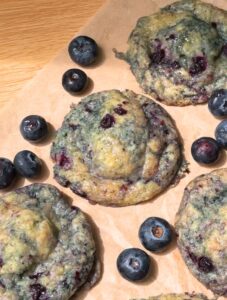
More Cookie Favorites: Try my Banana Bread Cookies, 5-Ingredient Peanut Butter Cookies, or Coffee Cookies.
Jump to:
Why this recipe works
- High-Stability Custard: A high cornstarch-to-yolk ratio creates a pastry cream that holds its structure under the heat of a torch without liquefying.
- Localized Heat Control: Using a torch instead of a broiler prevents the cookie base from over-baking while achieving a 2-second caramelization of the sugar.
- Sturdy Cookie Base: The butter-to-flour ratio is engineered to support the weight of the chilled cream without crumbling or becoming soggy.
- Flavor Density: Vanilla bean paste provides a more concentrated flavor and visual "speckles" compared to standard extract.
Ingredients
Before you start to make this recipe, measure and prepare your ingredients so the cooking process will go smoothly and easily.
Full measurements are in the recipe card below.
The Cookie Base
- Unsalted Butter (Room Temperature): Must be soft to the touch to ensure it creams properly with the sugar for a light, tender texture.
- Granulated Sugar: Provides sweetness and structure.
- Large Egg (Room Temperature): Emulsifies easily into the creamed butter without causing the dough to separate.
- Vanilla Extract: Adds a deep, floral base layer of flavor.
- All-Purpose Flour: Provides the structural "bones" of the cookie.
- Baking Powder & Salt: Ensures a soft chew and balances the sugar.
The Vanilla Pastry Cream
- Whole Milk: The base for a rich, creamy custard.
- Egg Yolks (Room Temperature): Adds the essential "brûlée" richness and golden color.
- Granulated Sugar & Cornstarch: Sweetens the cream and creates the stability needed for piping.
- Vanilla Bean Paste: High-intensity flavor with signature gourmet speckles.
- Unsalted Butter (Cold): Whisked into the hot custard at the end to create a silky, high-gloss finish.
The Brûlée Topping
- Granulated Sugar: Specifically used for torching to create that iconic, crackly shell.
Instructions
Make the pastry cream
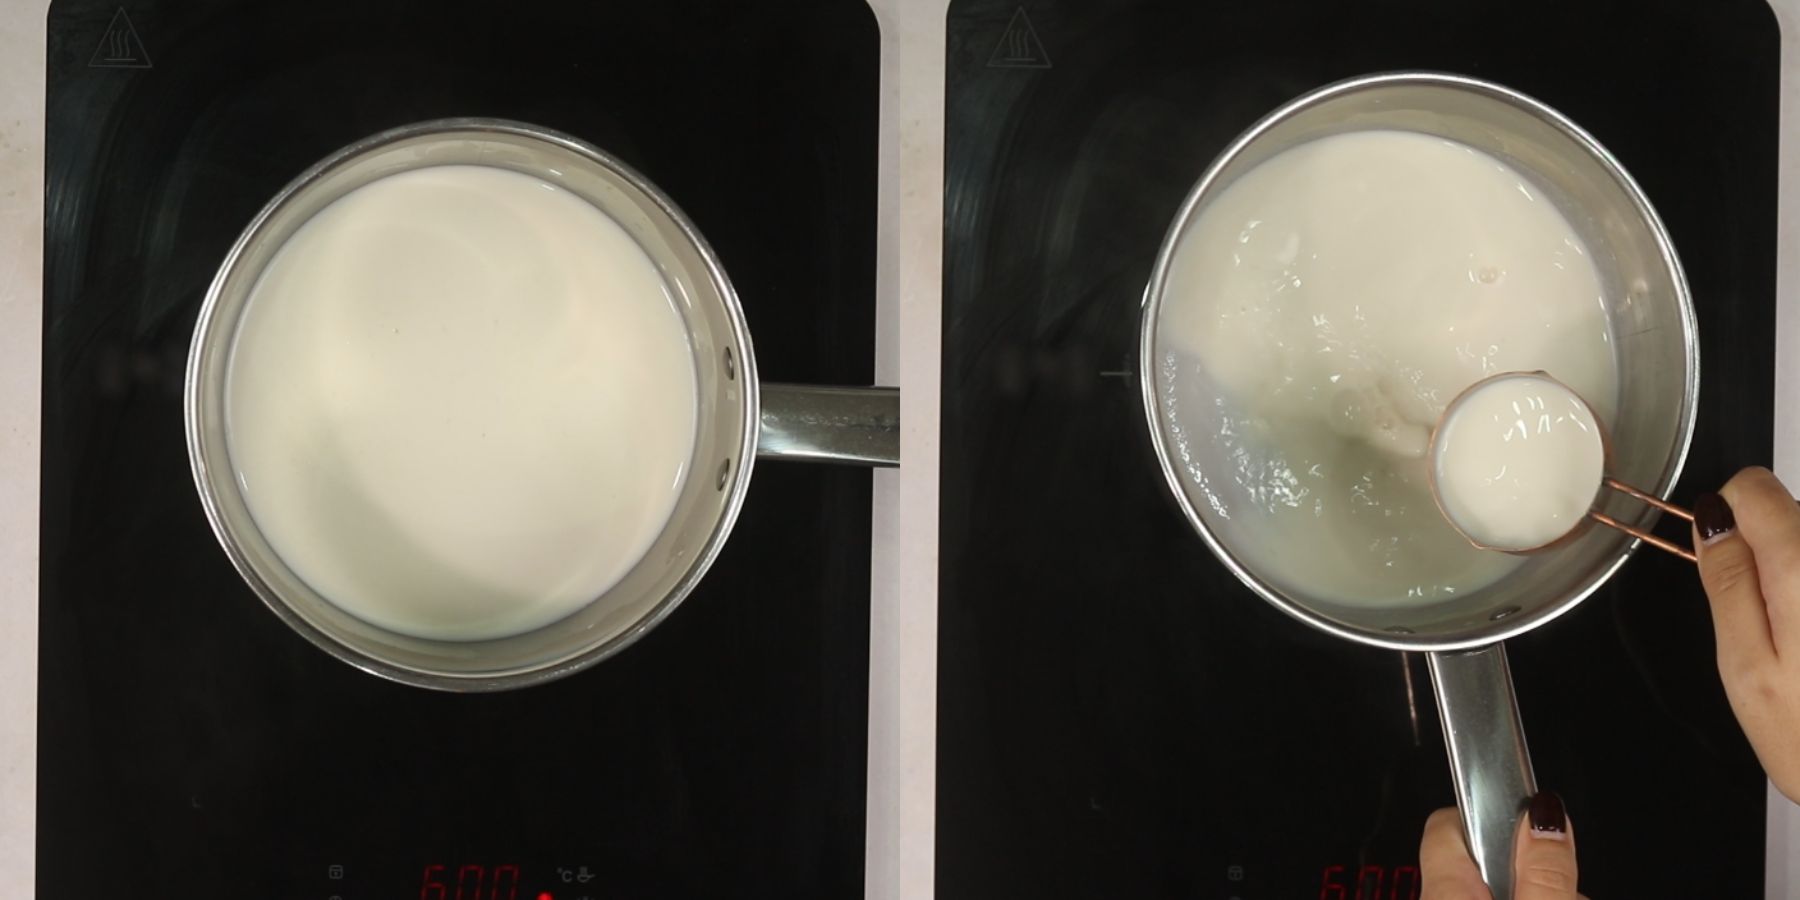
Start by bringing the milk and vanilla bean paste to a gentle simmer in a saucepan over medium heat, removing it the moment small bubbles appear.
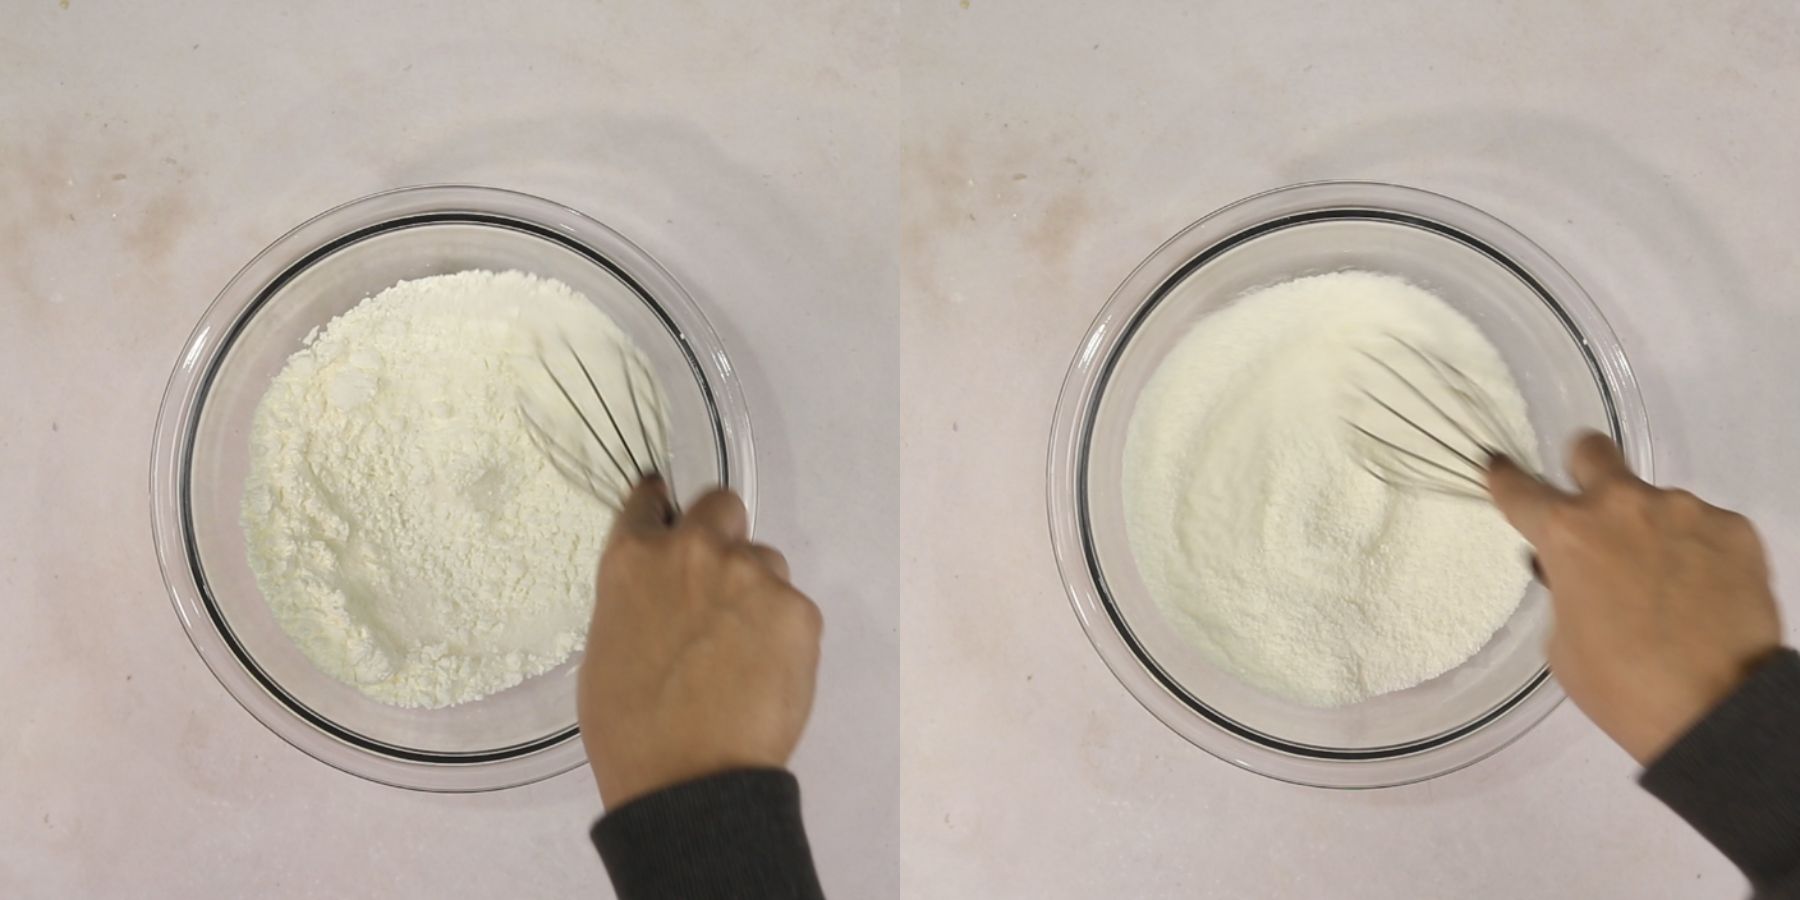
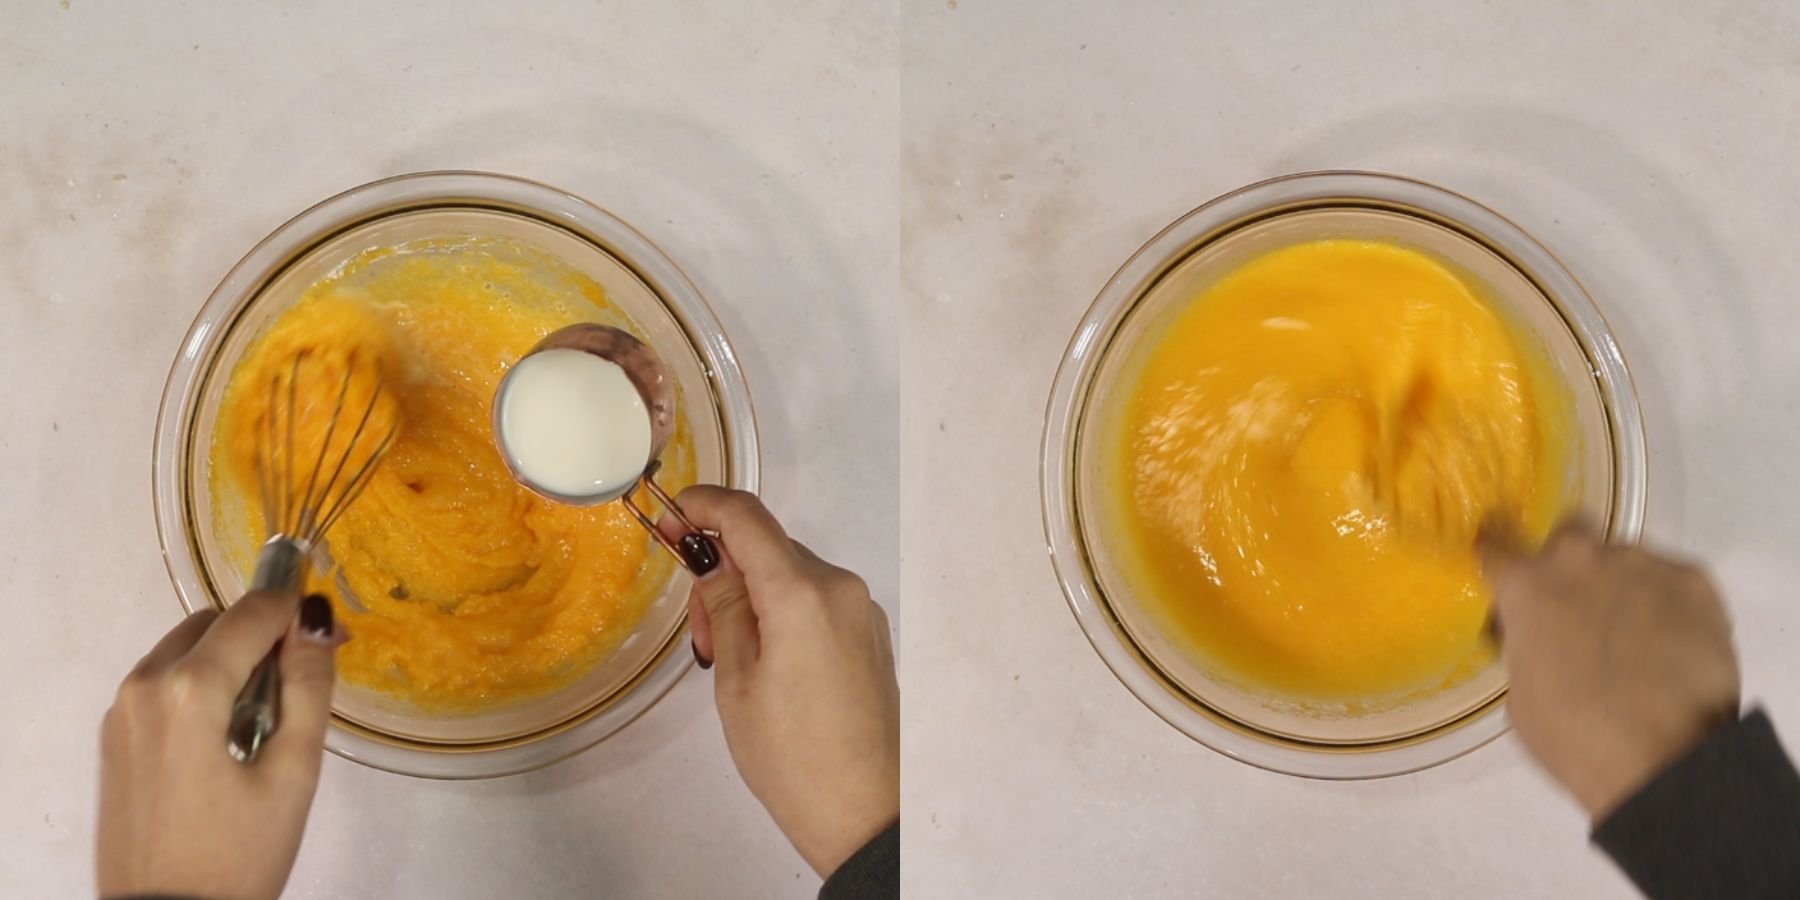
In a separate heat-proof bowl, whisk the egg yolks, sugar, and cornstarch until the mixture turns a pale, creamy yellow.
Gradually stream about a quarter-cup of the hot milk into the yolk mixture while whisking vigorously; this tempering process ensures the eggs don't scramble.
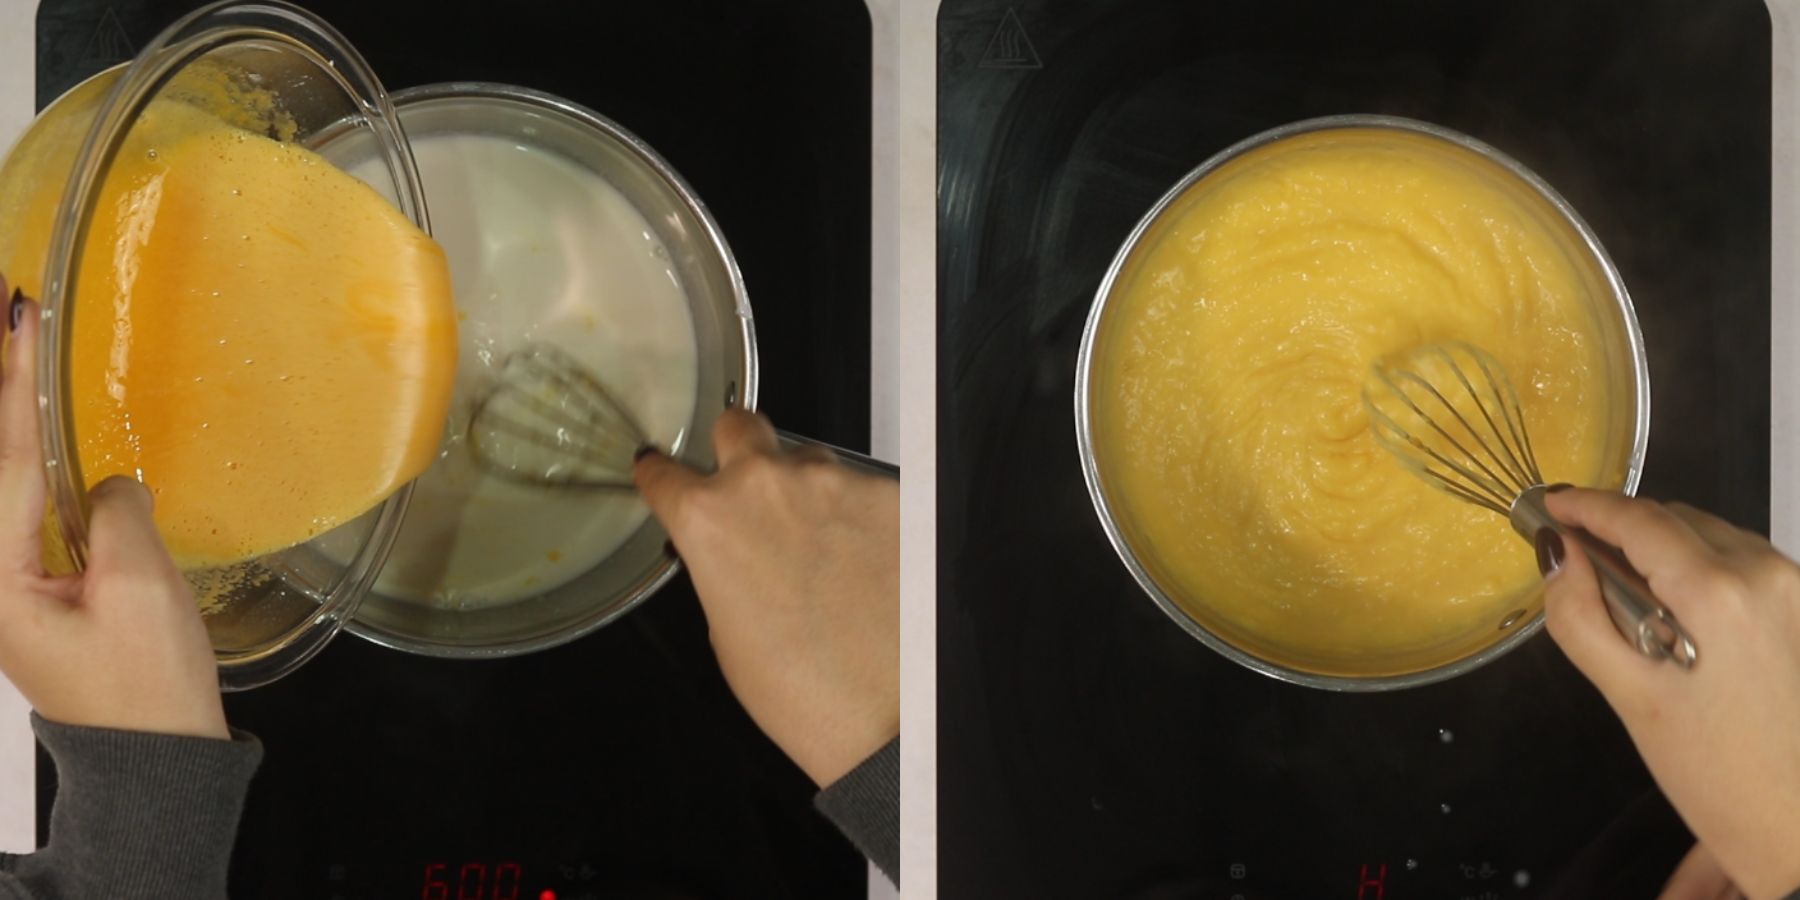
Return the entire mixture to the saucepan over low heat, whisking constantly as it thickens into a dense custard.
To ensure the cornstarch is fully activated for a stable, pipeable set, allow the cream to bubble gently for exactly one minute before removing it from the heat.
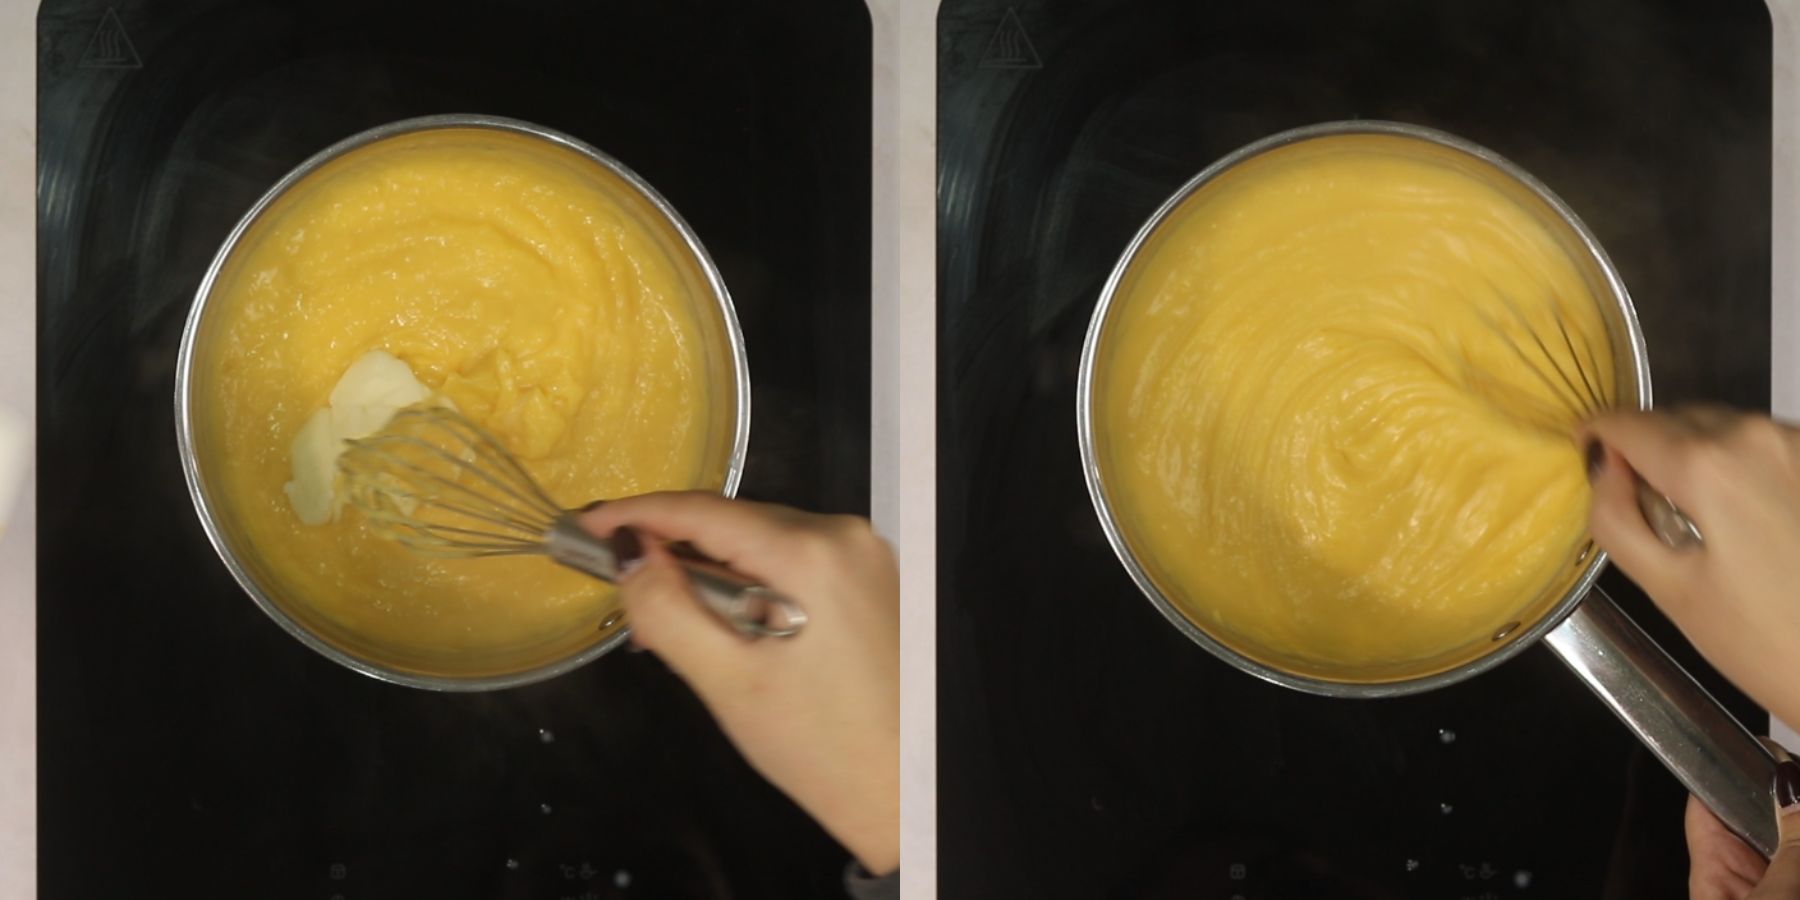
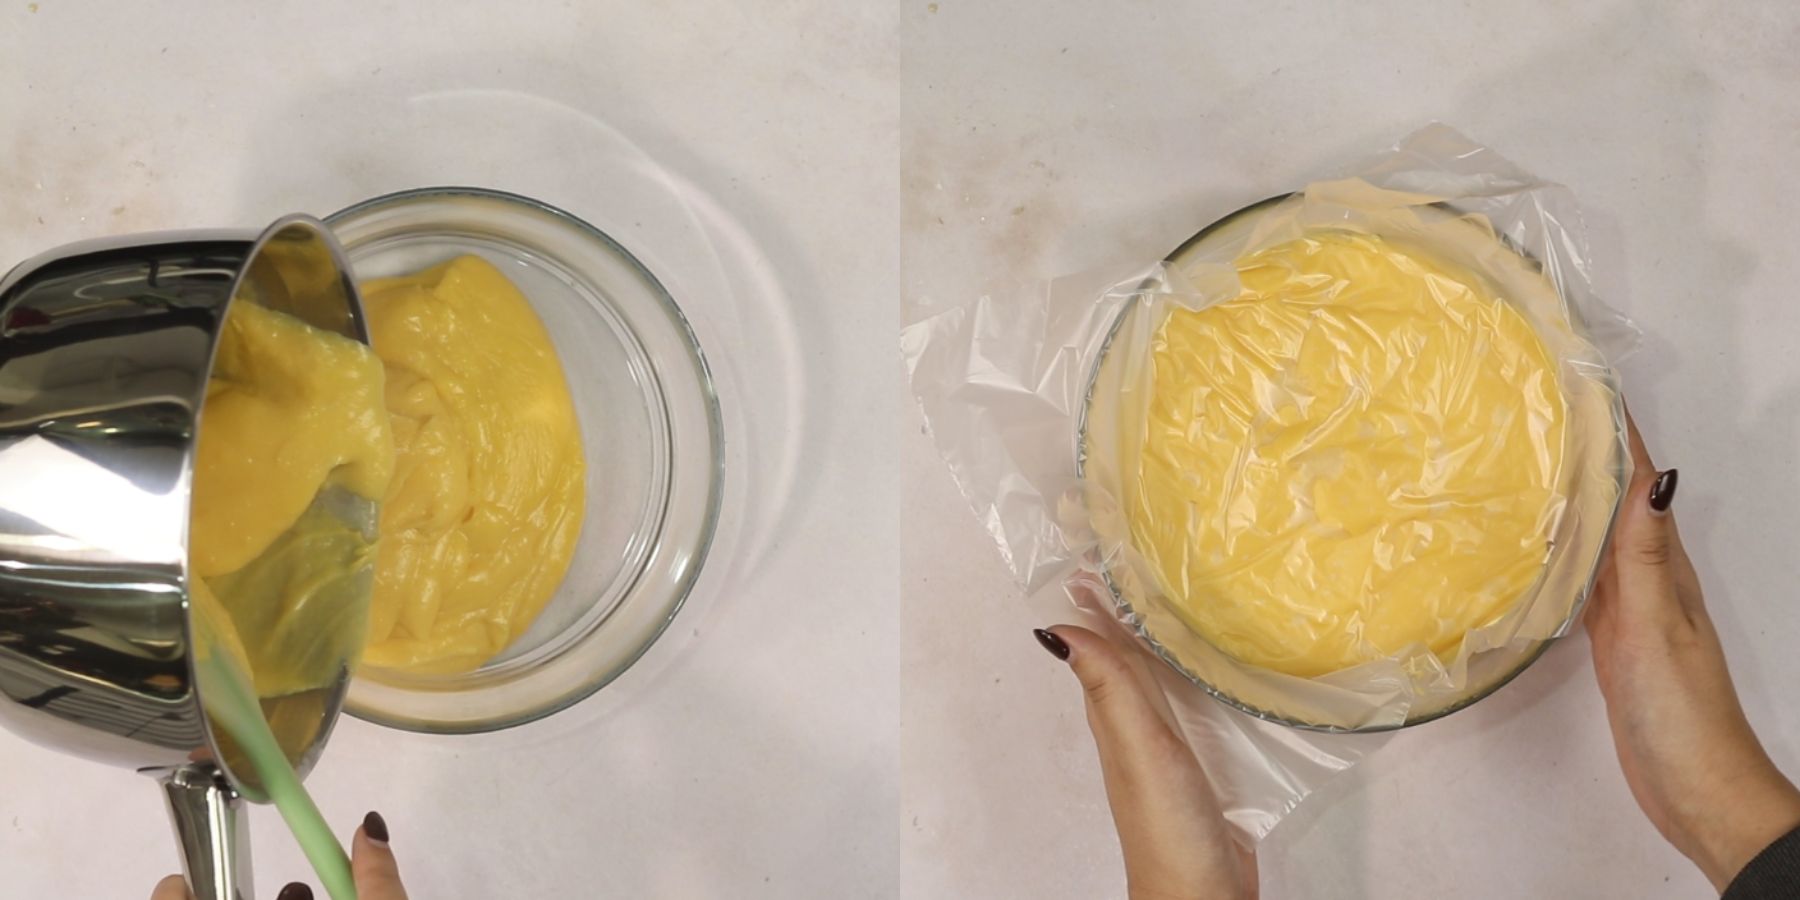
Whisk in the cold butter until the surface is glossy and silk-like, then transfer to a bowl and press plastic wrap directly onto the surface of the cream.
Chill for at least three hours to allow the molecular structure to firm up.
Make the cookie dough
Preheat your oven to 180°C (350°F) and prepare a parchment-lined baking sheet.
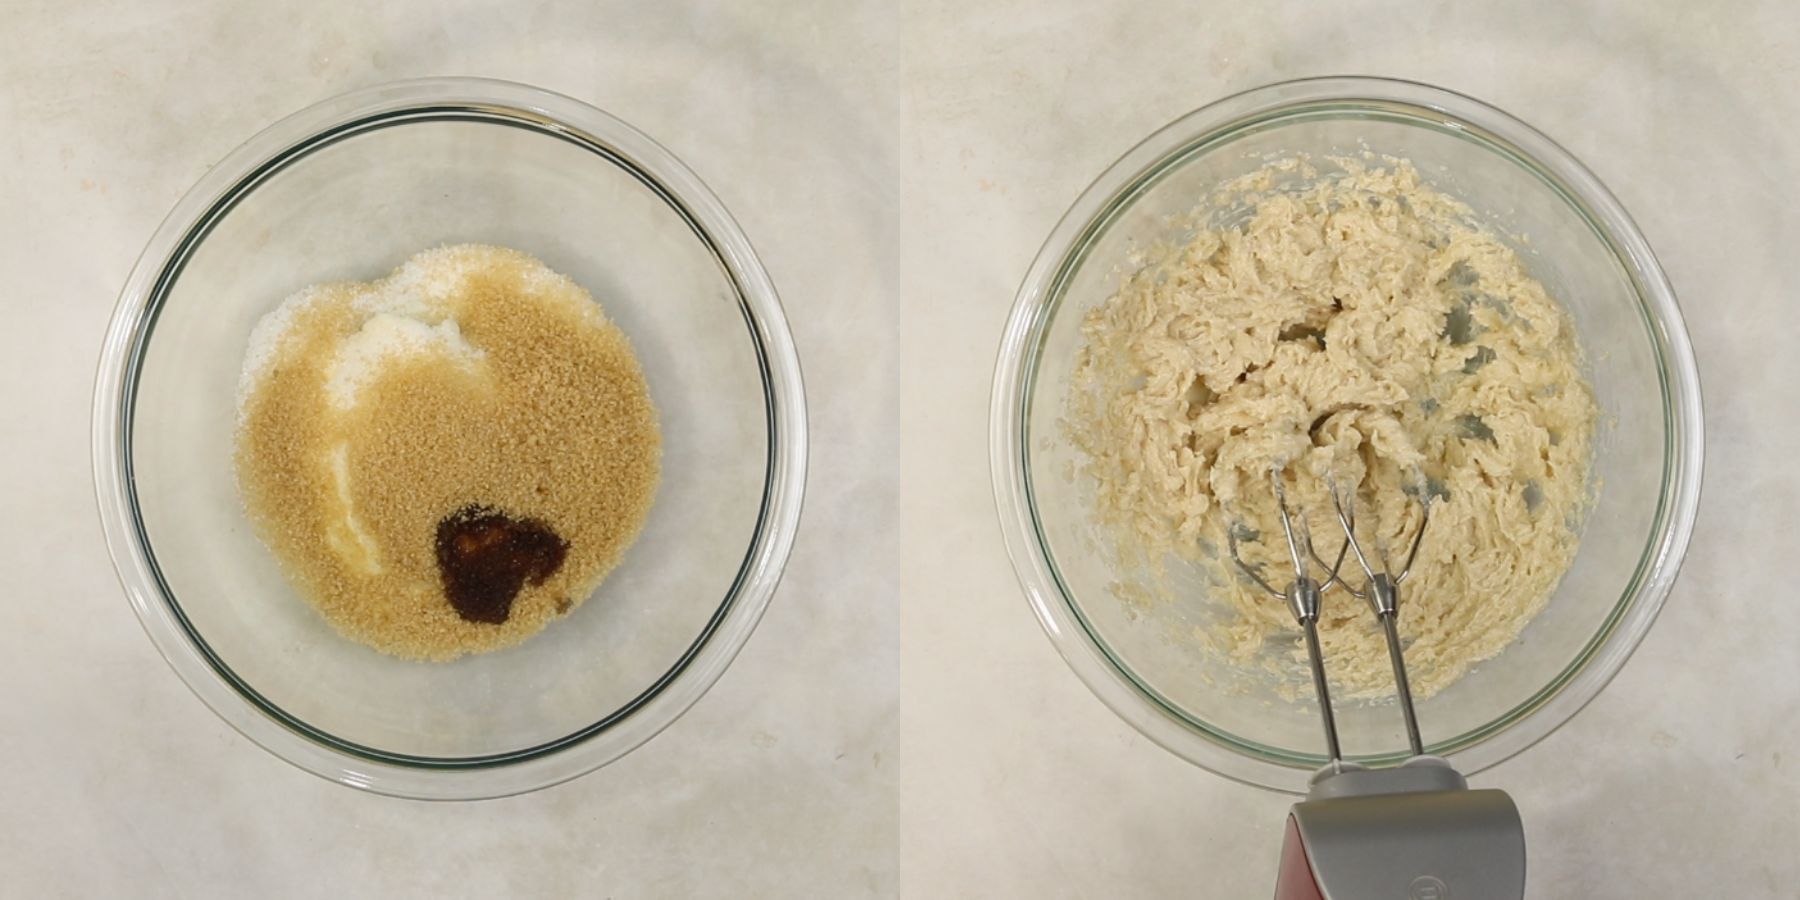
Using an electric mixer, cream the room-temperature butter and sugar until the texture is light and aerated.
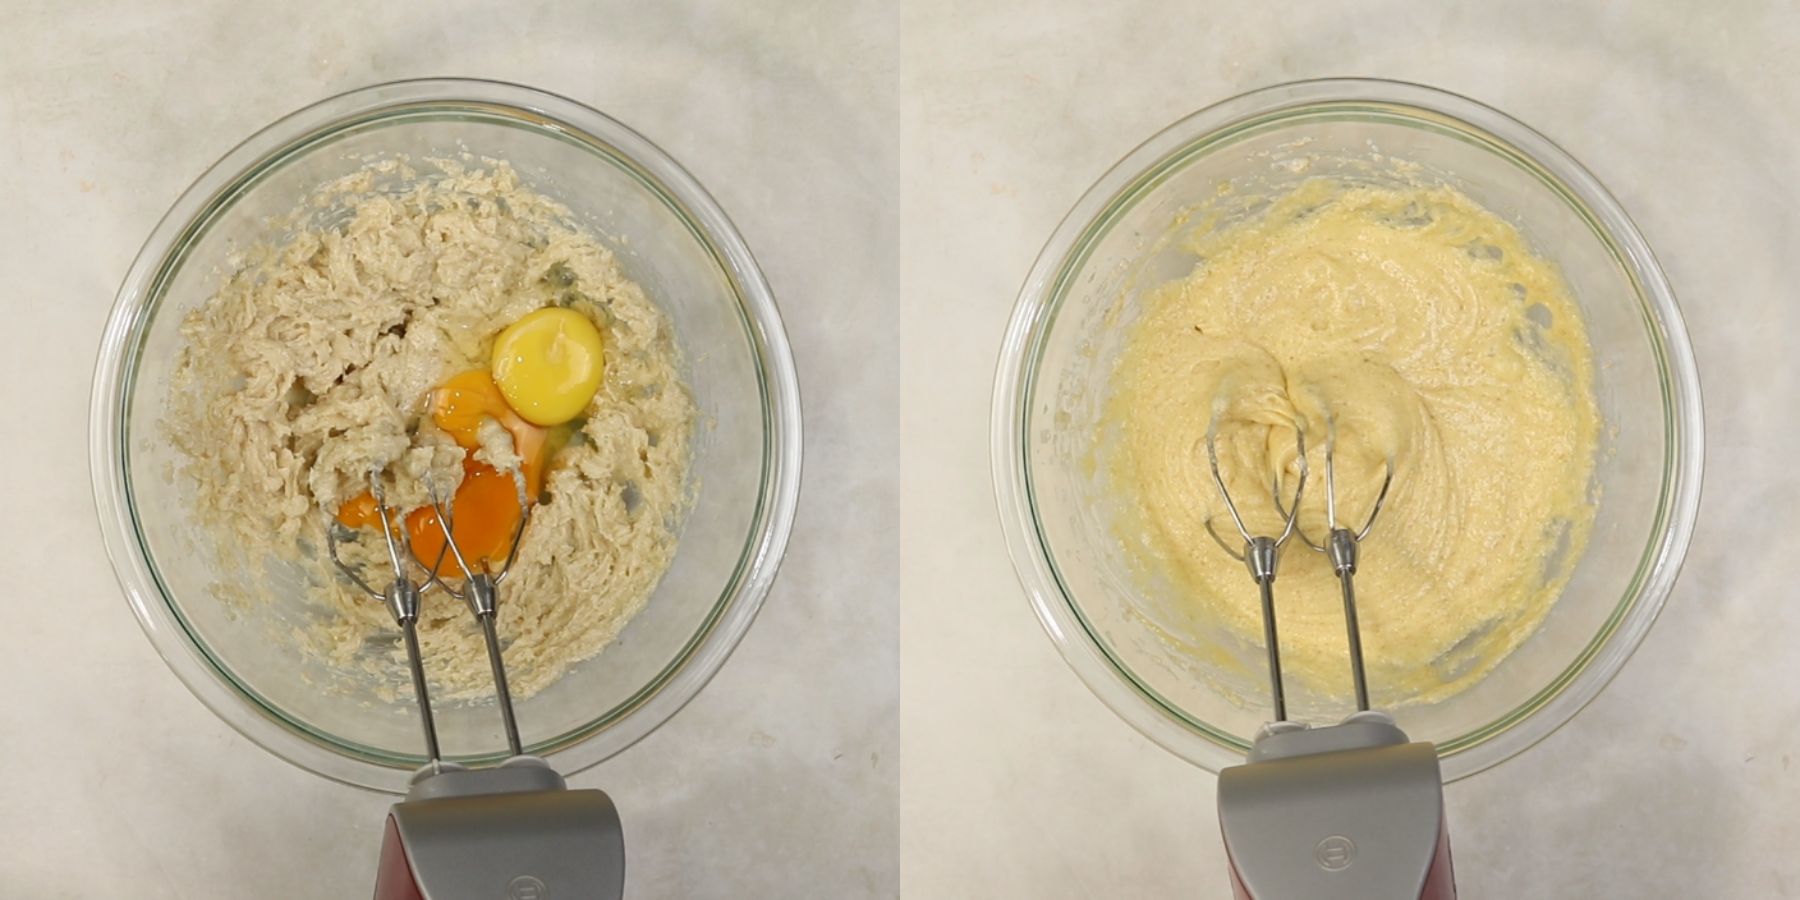
Incorporate the egg and yolk on a low speed until the mixture is fully emulsified and smooth.
Sift the flour and baking powder into the wet ingredients, mixing only until the last streaks of white disappear.
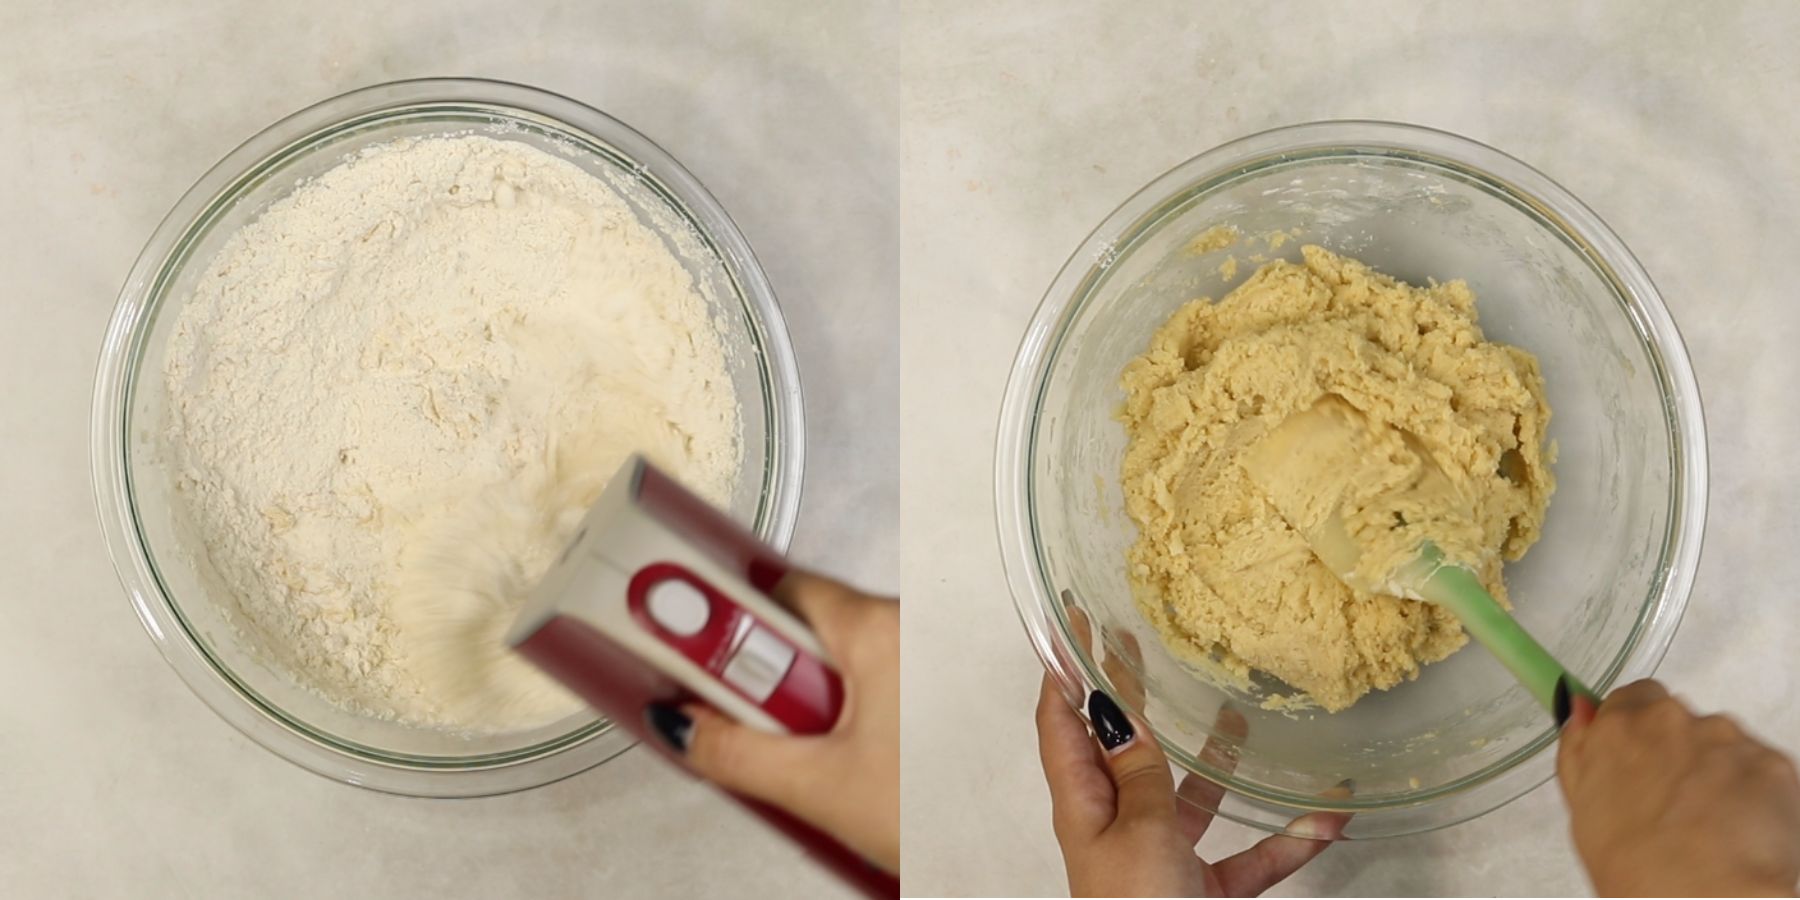
Avoid over-developing the gluten, as this will cause the cookies to become tough rather than chewy.
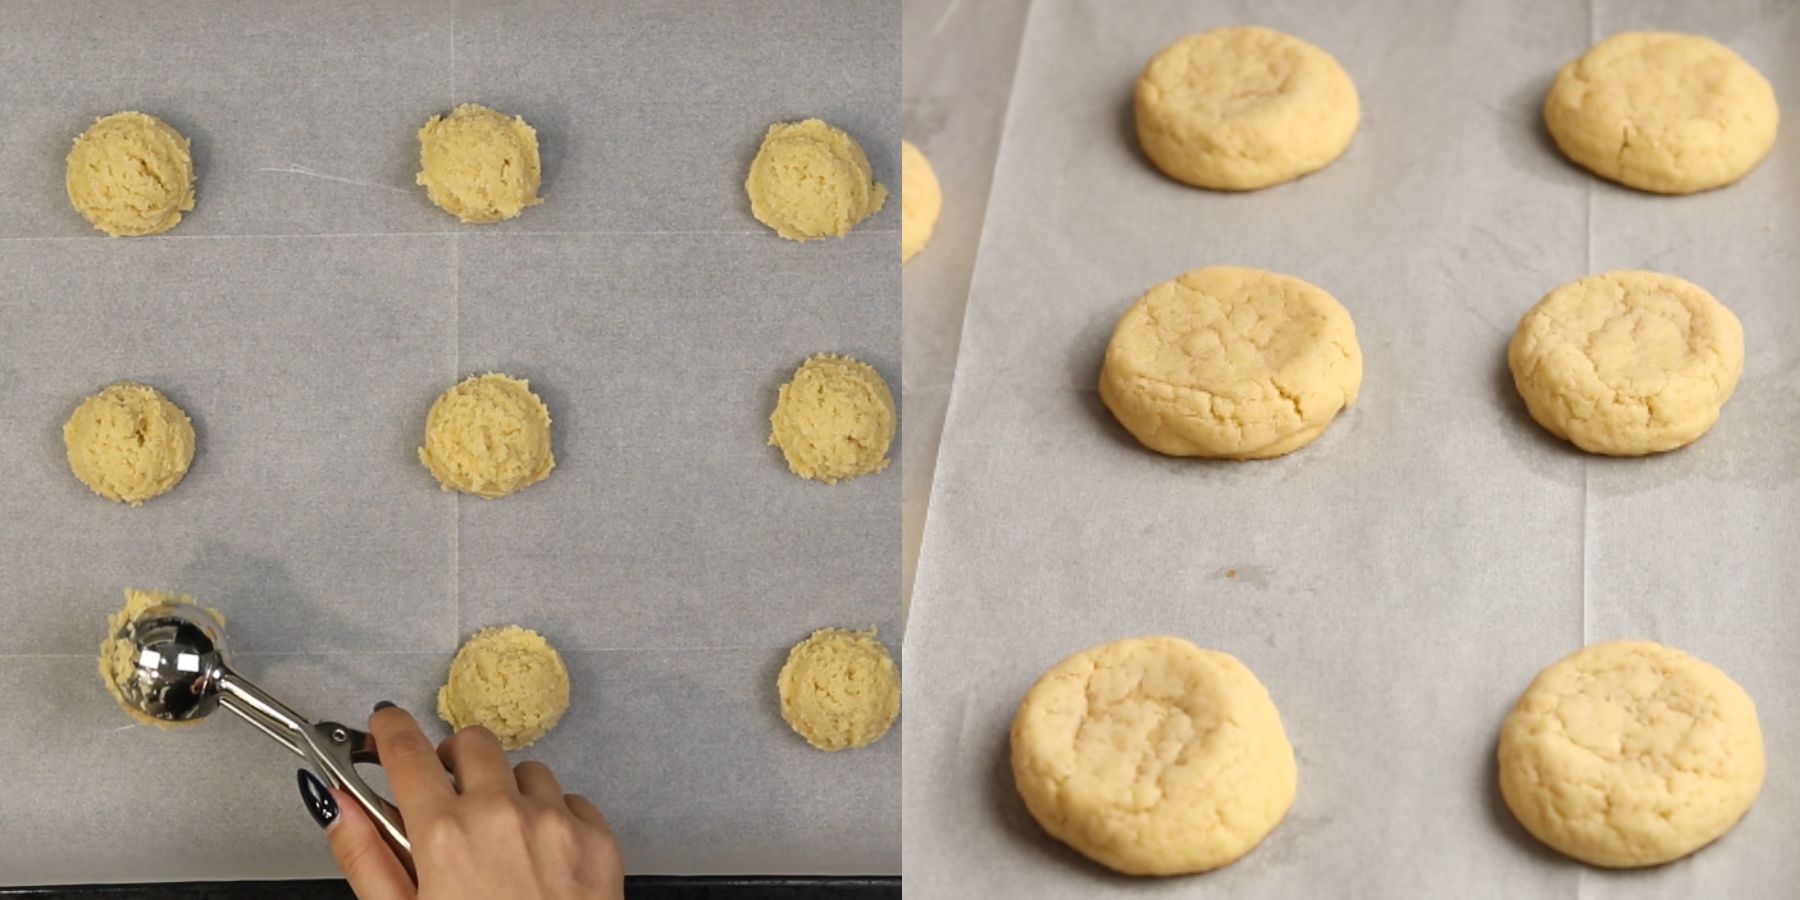
Roll 1.5-tablespoon portions into smooth, uniform spheres and space them evenly on the tray.
Bake for 9 to 11 minutes; the goal is a cookie with set, golden edges and a center that remains pale and soft.
Allow the cookies to stabilize on the hot tray for five minutes before moving them to a wire rack to reach room temperature.
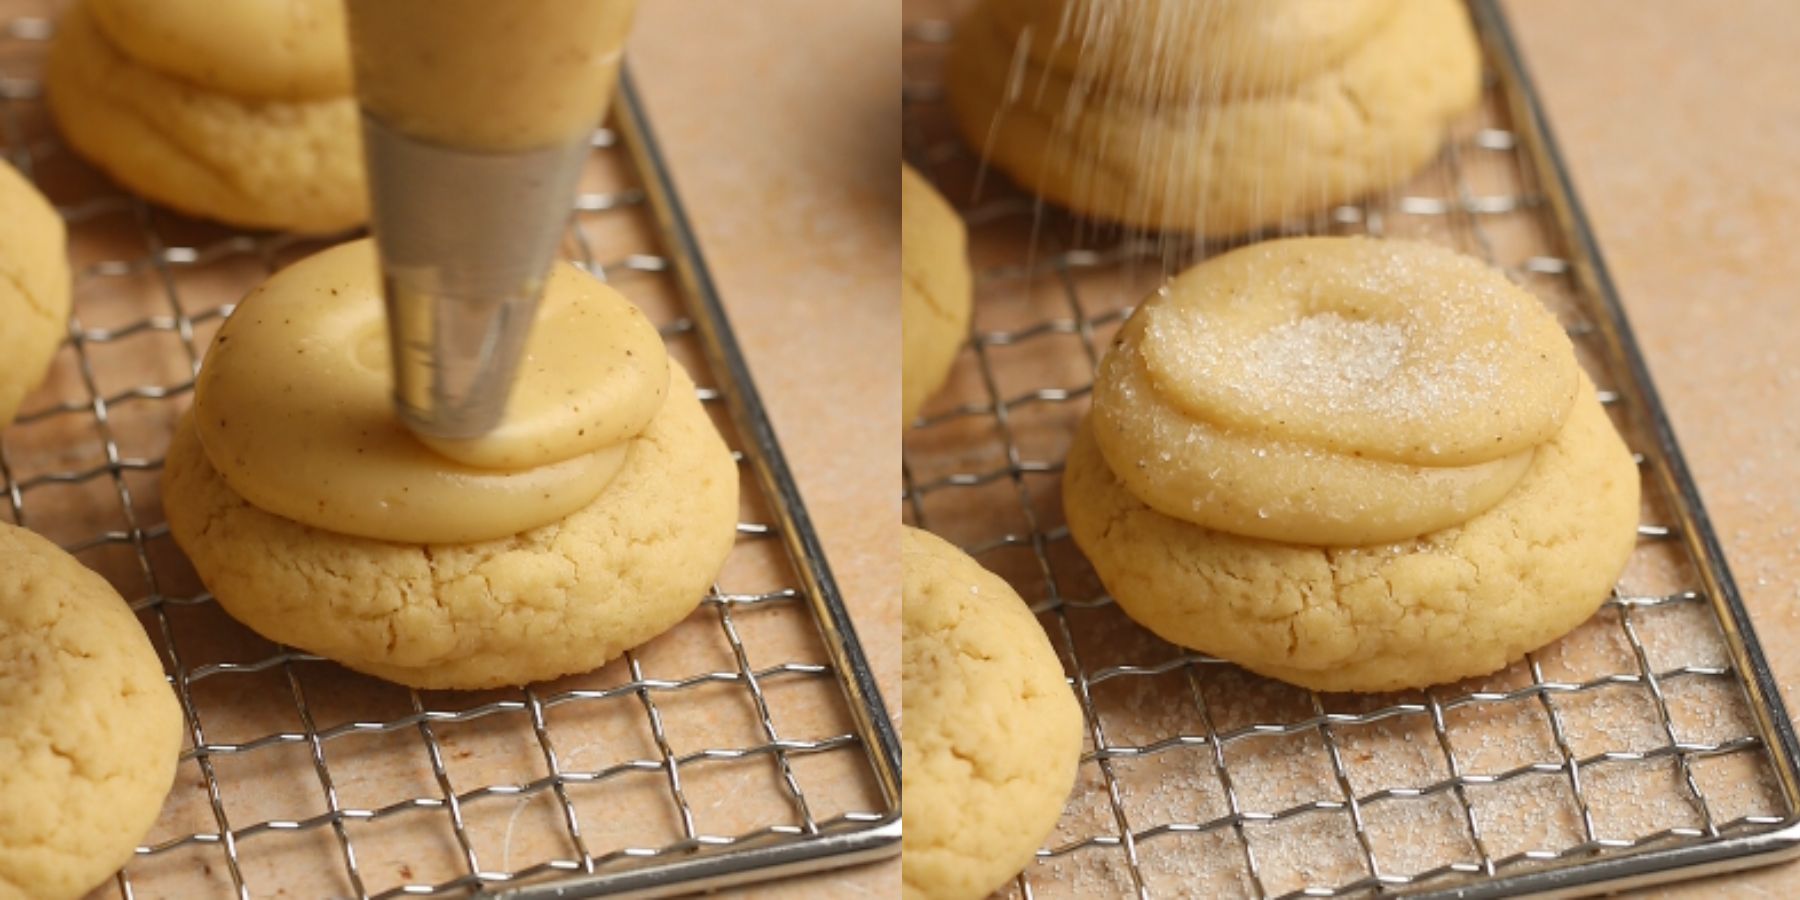
Once the cookies and cream are both completely cold, transfer the custard to a piping bag fitted with a large round tip.
Pipe a thick, centered mound onto each cookie, leaving a small border to showcase the buttery base.
Dust the top of the cream with an even layer of granulated sugar, ensuring full coverage to protect the custard from the flame.
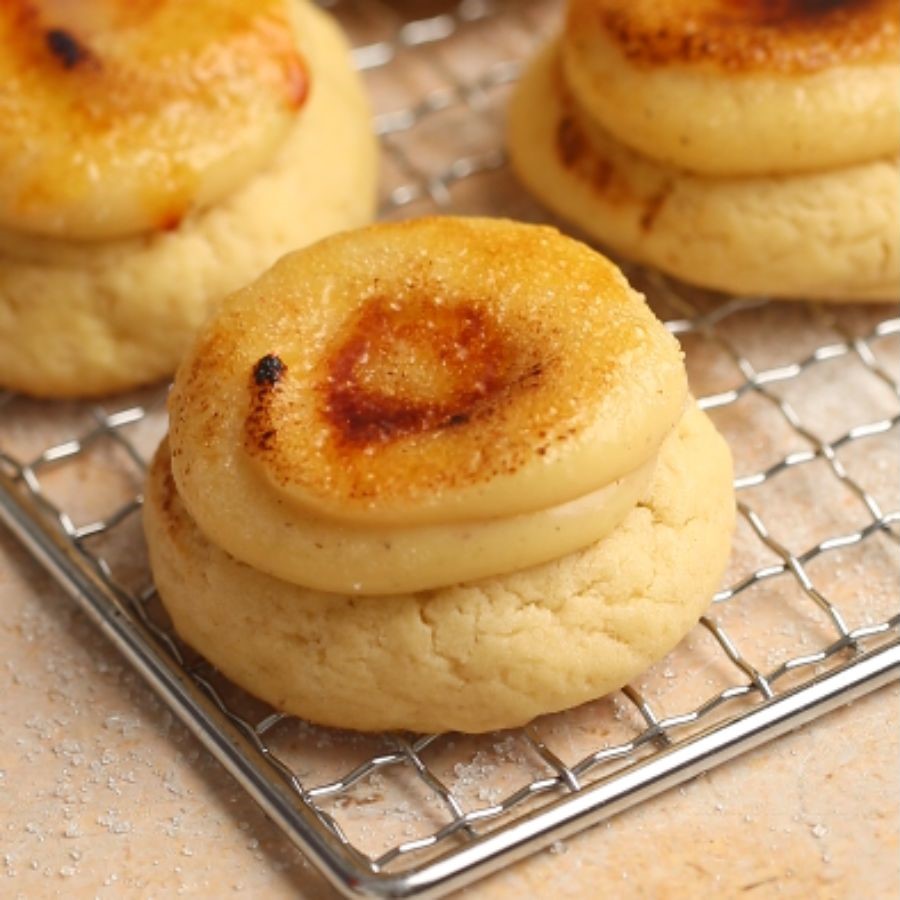
Hold the kitchen torch approximately two inches away and move it in rapid, circular motions until the sugar liquefies into a rich amber caramel.
For a professional "shatter," apply a second light dusting of sugar once the first layer hardens and torch a second time.
Serve within 30 minutes to maintain the perfect contrast between the brittle sugar shell and the silky cream.
Expert Tips
- The 60-Second Rule: When cooking your pastry cream, the mixture must reach a gentle boil for exactly one minute while whisking. This is the "activation point" for the cornstarch. Without this step, your custard will stay runny and won't hold its shape on the cookie.
- The "Glass-Like" Shatter. For the most satisfying crunch, use the double-torch method. Apply a thin layer of sugar, torch it until amber, and let it harden for 30 seconds. Add a second thin layer of sugar and torch again to build a thicker, professional-grade crust.
- Prevent a Rubbery Texture: Always press plastic wrap directly onto the surface of the hot pastry cream. If air gets between the wrap and the cream, a thick skin will form. This creates lumps that will clog your piping tip later.
- Torch Movement: Keep your kitchen torch in constant, rapid motion about 2 inches away from the sugar. If you hold it still, you will scorch the custard. Treat the flame like a paintbrush to achieve an even, golden-brown finish.
Troubleshooting
My pastry cream is lumpy.
- The Cause: You likely added the hot milk to the eggs too fast or didn't whisk enough during the thickening stage.
- The Fix: Pass the hot cream through a fine-mesh sieve immediately after cooking. This will catch any cooked egg bits or starch lumps, leaving you with a silky finish.
The sugar isn't hardening into a shell.
- The Cause: Either the sugar layer was too thin, or the pastry cream was too warm when you started.
- The Fix: Ensure the cookies are fully chilled before torching. The cold cream helps the sugar "snap" into a solid state faster.
The cookies spread too much during baking.
- The Cause: The butter was likely too soft (bordering on melted) before creaming.
- The Fix: Chill the dough balls in the fridge for 15–20 minutes before putting them in the oven to stabilize the fats.
Faq's
While you can use a broiler, it isn't recommended. The broiler heats the entire cookie, which will melt your pastry cream and make the cookie soggy. A torch provides the "localized" heat needed to caramelize only the sugar.
The "crack" is at its best for about 30 to 45 minutes. After that, the sugar begins to absorb moisture from the cream and will eventually turn into a syrup. Assemble and torch just before serving for the best experience.
No. Brown sugar contains too much moisture and will burn or turn into a sticky mess before it creates a hard shell. Stick to granulated white sugar or superfine (caster) sugar for the best results.
Make-Ahead & Storage
The Pastry Cream: This can be made up to 3 days in advance. Keep it in an airtight container with plastic wrap pressed against the surface. Give it a vigorous whisk before piping to restore its silky texture.
The Cookie Base: Unassembled cookies stay fresh in an airtight container at room temperature for up to 4 days.
Assembled Cookies: Once torched, the sugar crust lasts about 30–45 minutes. Do not refrigerate assembled cookies, as the moisture will melt the caramel shell.
Freezing
Freezing Dough: Roll the dough into balls and flash-freeze on a tray for 1 hour. Transfer to a freezer bag for up to 3 months. Bake directly from frozen, adding 2 minutes to the bake time.
Freezing Baked Cookies: You can freeze the plain baked bases for up to 2 months. Thaw at room temperature before topping.
Note: Do not freeze the pastry cream; the cornstarch bond will break upon thawing, leaving it watery and separated.

Substitutions
Gluten-Free: Use a 1:1 GF Flour Blend with xanthan gum. Let the dough rest for 15 minutes before baking to ensure a smooth texture.
Dairy-Free: Swap milk for full-fat oat milk and use plant-based butter sticks. Avoid thin milks like almond, which won't thicken the custard properly.
Variations
Espresso: Dissolve 1 teaspoon instant espresso into the simmering milk to ensure total integration and a robust coffee profile.
Lemon: Whisk 1 teaspoon zest and 1 tablespoon fresh juice into the cooled pastry cream; adding acid too early can cause the custard to break while cooking.
Salted Caramel: Press a well into the cookie with a spoon; fill with 1 teaspoon caramel sauce and sea salt before piping to create a "molten" center.
Equipment
- Digital Scale: Gram-level precision prevents dry cookies and runny custard.
- Kitchen Torch: Mandatory for the hard sugar shell without melting the cream.
- Fine-Mesh Sieve: Essential for removing egg fragments or lumps from the pastry cream.
- Heavy-Bottomed Saucepan: Prevents scorching during the high-heat custard thickening.
- Piping Bag & Large Round Tip: Creates the uniform, high-domed shape needed for even torching.
- Electric Mixer: Necessary for aerating the butter to ensure a soft, chewy cookie base.
- Silicone Mat or Parchment: Ensures an easy release and prevents burnt cookie bottoms.
- Wire Cooling Rack: Stops the cookies from steaming themselves and getting soggy.
More Crème Brûlée Inspiration
- Crème Brûlée Cheesecake: A thick, custardy cheesecake with a graham cracker crust and a signature "shatter" caramel shell.
- Crème Brûlée Cake: The ultimate layer cake featuring moist vanilla bean sponge, silky custard filling, and torched sugar.
- Classic Crème Brûlée: Our foolproof 4-ingredient recipe for the smoothest, most authentic French custard.
Join the Community
Review: Leave a rating and comment below if you enjoyed this recipe. Socials: Follow on Facebook, Instagram, and Pinterest. Save: Pin this recipe to Pinterest for later.
📖 Recipe

Easy Creme Brûlée Cookies
Ingredients
For the cookies
- ¾ cup Butter soft, unsalted
- ½ cup Granulated sugar
- ⅓ cup Brown sugar light brown sugar
- 2 teaspoon Vanilla extract
- ½ teaspoon Kosher salt
- 1 Egg
- 1 Egg yolk
- 2 ¼ cups Flour AP
- 1 teaspoon Baking soda
For the pastry cream
- 1 ½ cups Milk
- 2 teaspoon Vanilla extract
- ⅔ cup Granulated sugar
- 3 tablespoon Cornstarch
- 5 Egg yolks
- 2 tablespoon Butter unsalted
Instructions
Make the pastry cream
- Start by bringing the milk and vanilla bean paste to a gentle simmer in a saucepan over medium heat, removing it the moment small bubbles appear.
- In a separate heat-proof bowl, whisk the egg yolks, sugar, and cornstarch until the mixture turns a pale, creamy yellow.
- Gradually stream about a quarter-cup of the hot milk into the yolk mixture while whisking vigorously; this tempering process ensures the eggs don't scramble.
- Return the entire mixture to the saucepan over low heat, whisking constantly as it thickens into a dense custard.
- To ensure the cornstarch is fully activated for a stable, pipeable set, allow the cream to bubble gently for exactly one minute before removing it from the heat.
- Whisk in the cold butter until the surface is glossy and silk-like, then transfer to a bowl and press plastic wrap directly onto the surface of the cream.
- Chill for at least three hours to allow the molecular structure to firm up.
Make the cookie dough
- Preheat your oven to 180°C (350°F) and prepare a parchment-lined baking sheet.
- Using an electric mixer, cream the room-temperature butter and sugar until the texture is light and aerated.
- Incorporate the egg and yolk on a low speed until the mixture is fully emulsified and smooth.
- Sift the flour and baking powder into the wet ingredients, mixing only until the last streaks of white disappear.
- Avoid over-developing the gluten, as this will cause the cookies to become tough rather than chewy.
- Roll 1.5-tablespoon portions into smooth, uniform spheres and space them evenly on the tray.
- Bake for 9 to 11 minutes; the goal is a cookie with set, golden edges and a center that remains pale and soft.
- Allow the cookies to stabilize on the hot tray for five minutes before moving them to a wire rack to reach room temperature.
- Once the cookies and cream are both completely cold, transfer the custard to a piping bag fitted with a large round tip.
- Pipe a thick, centered mound onto each cookie, leaving a small border to showcase the buttery base.
- Dust the top of the cream with an even layer of granulated sugar, ensuring full coverage to protect the custard from the flame.
- Hold the kitchen torch approximately two inches away and move it in rapid, circular motions until the sugar liquefies into a rich amber caramel.
- For a professional "shatter," apply a second light dusting of sugar once the first layer hardens and torch a second time.
- Serve within 30 minutes to maintain the perfect contrast between the brittle sugar shell and the silky cream.
Notes
- The 60-Second Rule: When cooking your pastry cream, the mixture must reach a gentle boil for exactly one minute while whisking. This is the "activation point" for the cornstarch. Without this step, your custard will stay runny and won't hold its shape on the cookie.
- The "Glass-Like" Shatter. For the most satisfying crunch, use the double-torch method. Apply a thin layer of sugar, torch it until amber, and let it harden for 30 seconds. Add a second thin layer of sugar and torch again to build a thicker, professional-grade crust.
- Prevent a Rubbery Texture: Always press plastic wrap directly onto the surface of the hot pastry cream. If air gets between the wrap and the cream, a thick skin will form. This creates lumps that will clog your piping tip later.
- Torch Movement: Keep your kitchen torch in constant, rapid motion about 2 inches away from the sugar. If you hold it still, you will scorch the custard. Treat the flame like a paintbrush to achieve an even, golden-brown finish.
Amy says
Delicious! My friends and family loved them!
Ora says
They taste just like creme brulee!