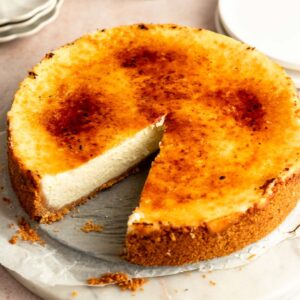
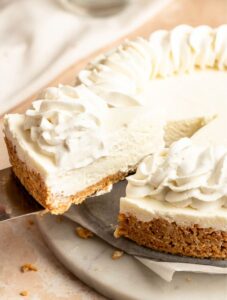
This Crème Brûlée Cheesecake features a velvety custard-like filling over a buttery Graham cracker crust, finished with a crackly burnt-sugar topping.
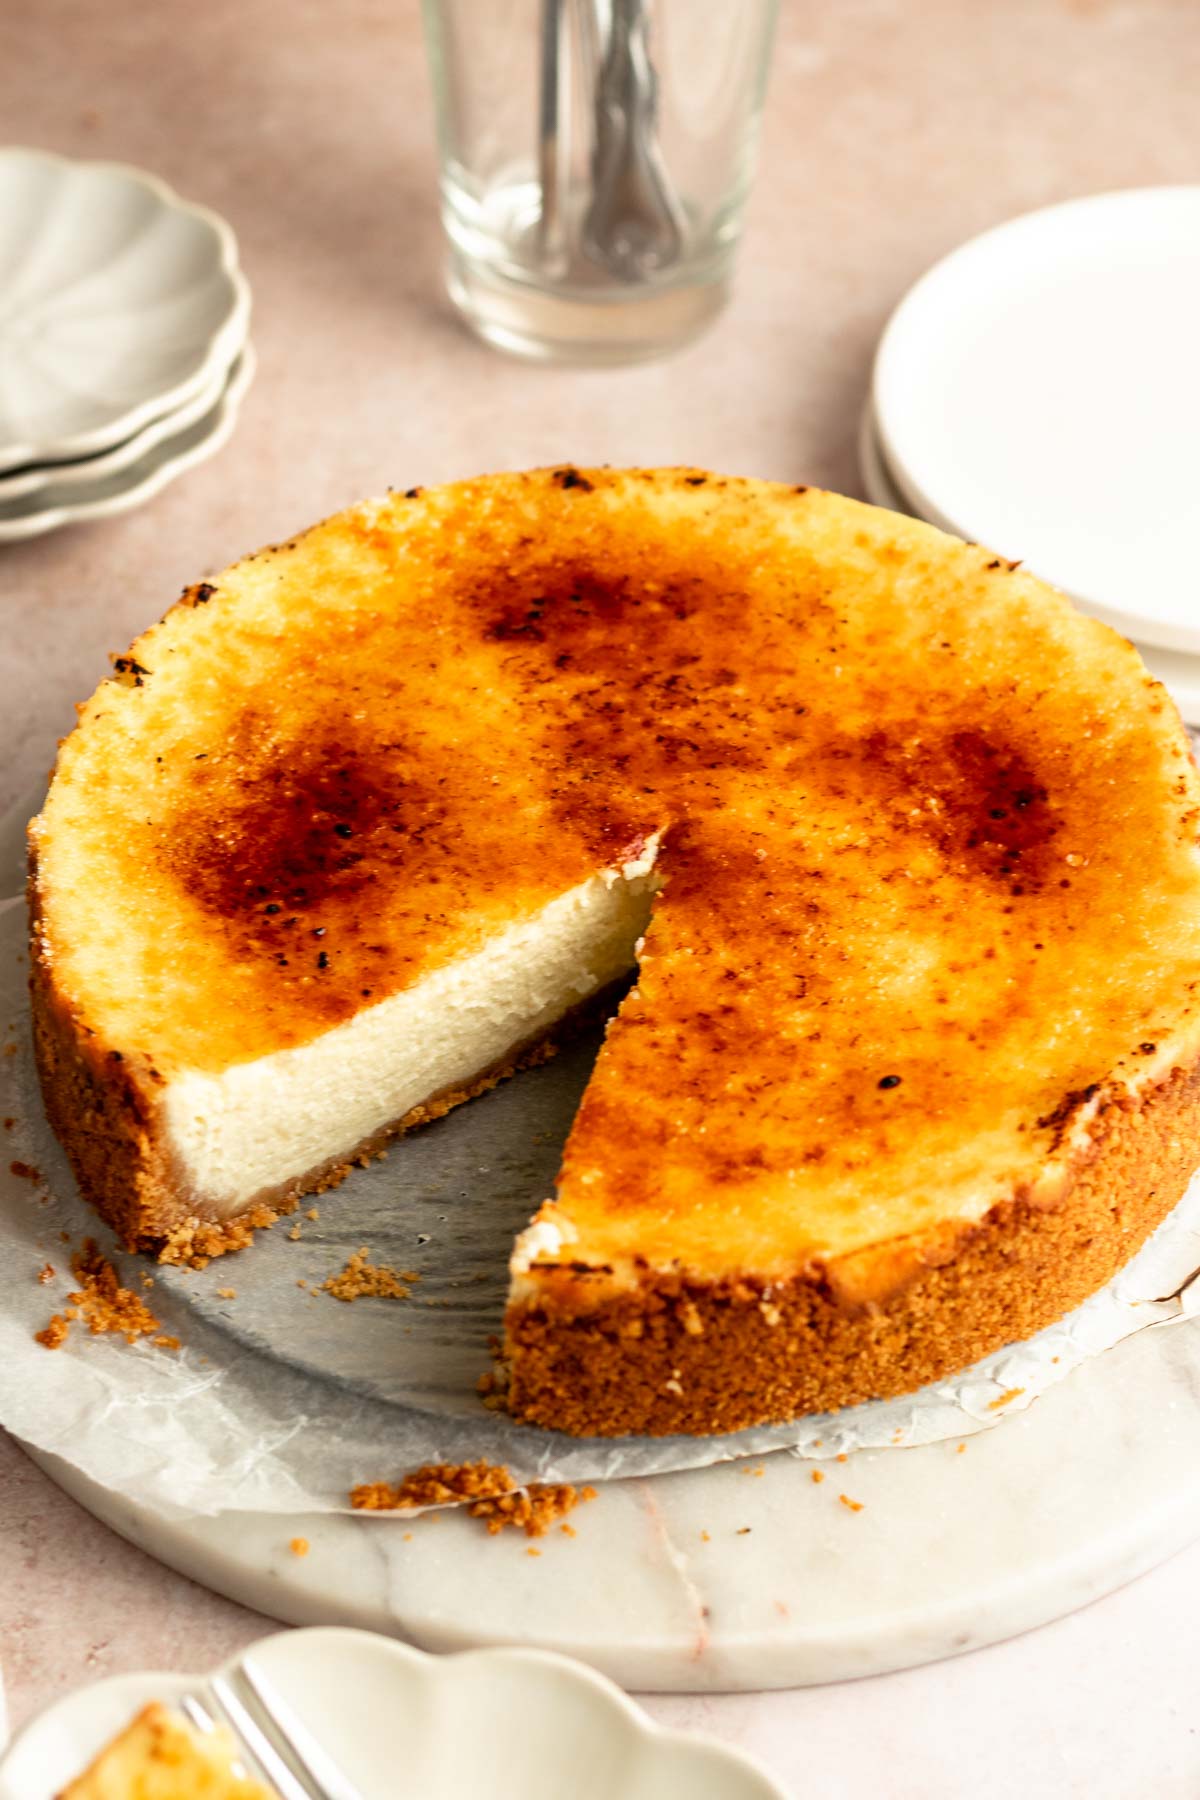
By using extra egg yolks and vanilla bean paste, this recipe achieves the authentic richness of the classic French dessert while remaining surprisingly easy to master—no water bath required.
It’s a stable, bakery-quality cake designed to crack perfectly with a spoon and slice cleanly every time.
More Cheesecake Favorites: Try my Lemon Meringue Cheesecake, Pistachio Cheesecake, or Cinnamon Roll Cheesecake.
Jump to:
Why this recipe works
- Authentic Custard Flavor: I use extra egg yolks and vanilla bean paste to replicate the deep, rich custard profile of a classic crème brûlée, setting it apart from standard vanilla cheesecake.
- No Water Bath Needed: A precise balance of sour cream and low-temperature baking ensures a creamy, crack-free result without the hassle of a traditional water bath.
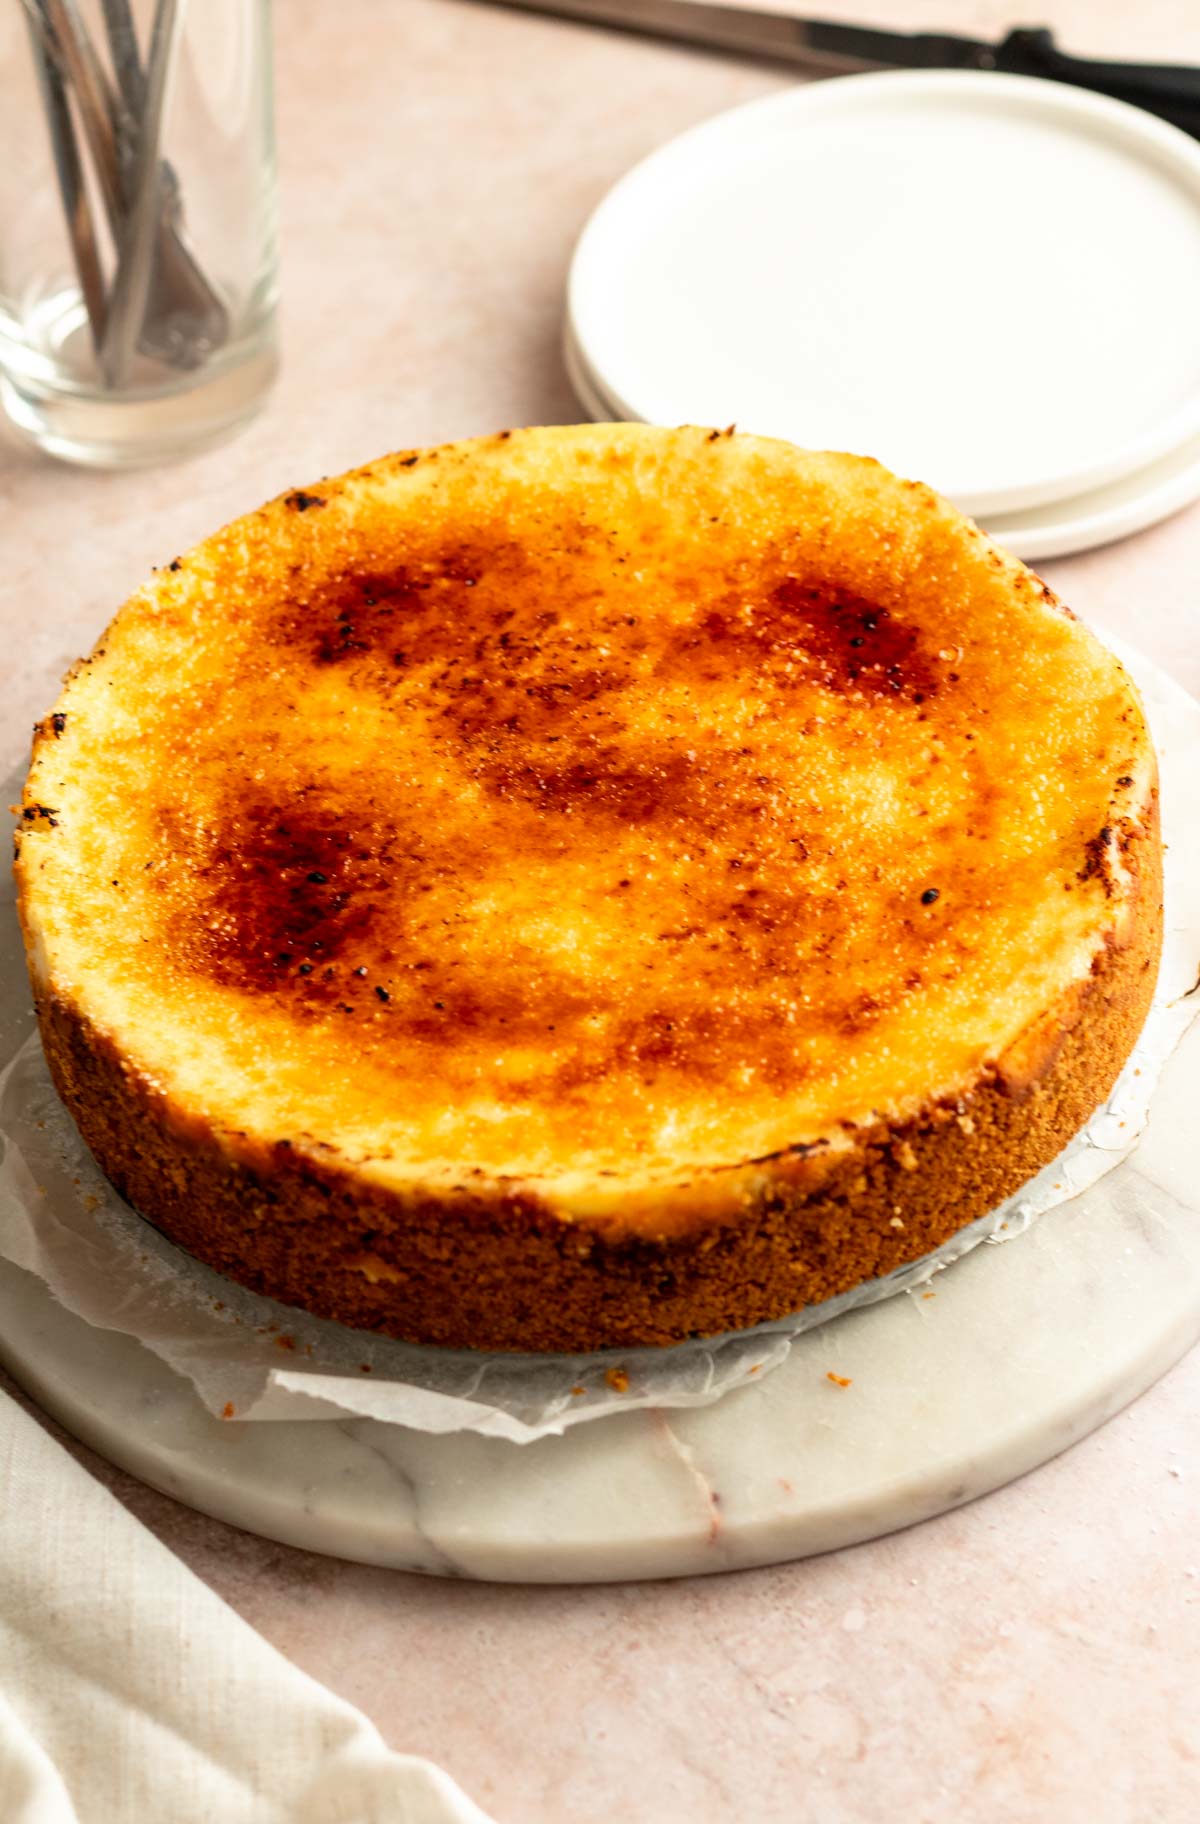
- The Perfect Crack: I utilize a specific sugar-to-heat ratio that creates a thin, glass-like caramelized layer that shatters perfectly when tapped, without melting the cheesecake filling.
- Superior Stability: The addition of a small amount of cornstarch provides enough structure for professional, clean slices while maintaining a silky, "melt-in-your-mouth" texture.
- Make-Ahead Friendly: This recipe is designed to be baked and chilled 24 hours in advance, leaving only the 2-minute "torching" step for right before serving to impress your guests.

Ingredients
Before you start to make this recipe, measure and prepare your ingredients so the cooking process will go smoothly and easily.
Full measurements are in the recipe card below.
Graham Cracker Crumbs: Provides a sturdy, slightly salty base to contrast the sweet custard. Ensure they are pulsed into a fine sand so the crust doesn't crumble when sliced.
Unsalted Butter (Melted): Acts as the glue for the crust. Using unsalted allows you to control the salt level of the base.
Full-Fat Cream Cheese (Room Temperature): The foundation of the filling. It must be block-style and fully softened to ensure a silky, lump-free texture.
Sour Cream (Room Temperature): Breaks down the density of the cream cheese, adding a slight tang and a "melt-in-your-mouth" custard consistency.
Egg Yolks + Whole Eggs (Room Temperature): Whole eggs provide structure, while the extra yolks are responsible for the rich, yellow color and the heavy custard mouthfeel essential for a "Brûlée" finish.
Granulated Sugar: Used in the filling for sweetness and on top for the crust. Note: Only granulated sugar will melt into a clear, glass-like shell; other sugars will burn or stay grainy.
Vanilla Bean Paste: Adds concentrated flavor and the signature black speckles seen in traditional French crèmes brûlées.
Cornstarch: A stabilizing agent that prevents the cheesecake from weeping or becoming too soft when subjected to the high heat of the kitchen torch.
Instructions
Heat oven to 180°C (350°F). Line a 9-inch springform pan with parchment paper and lightly grease the sides.
Pulse graham crackers in a food processor until they reach a fine, sandy texture. Stir crumbs, granulated sugar, and melted butter until the mixture is evenly moistened.

Press the mixture firmly into the bottom of the pan using the flat base of a measuring cup to ensure a sturdy base.
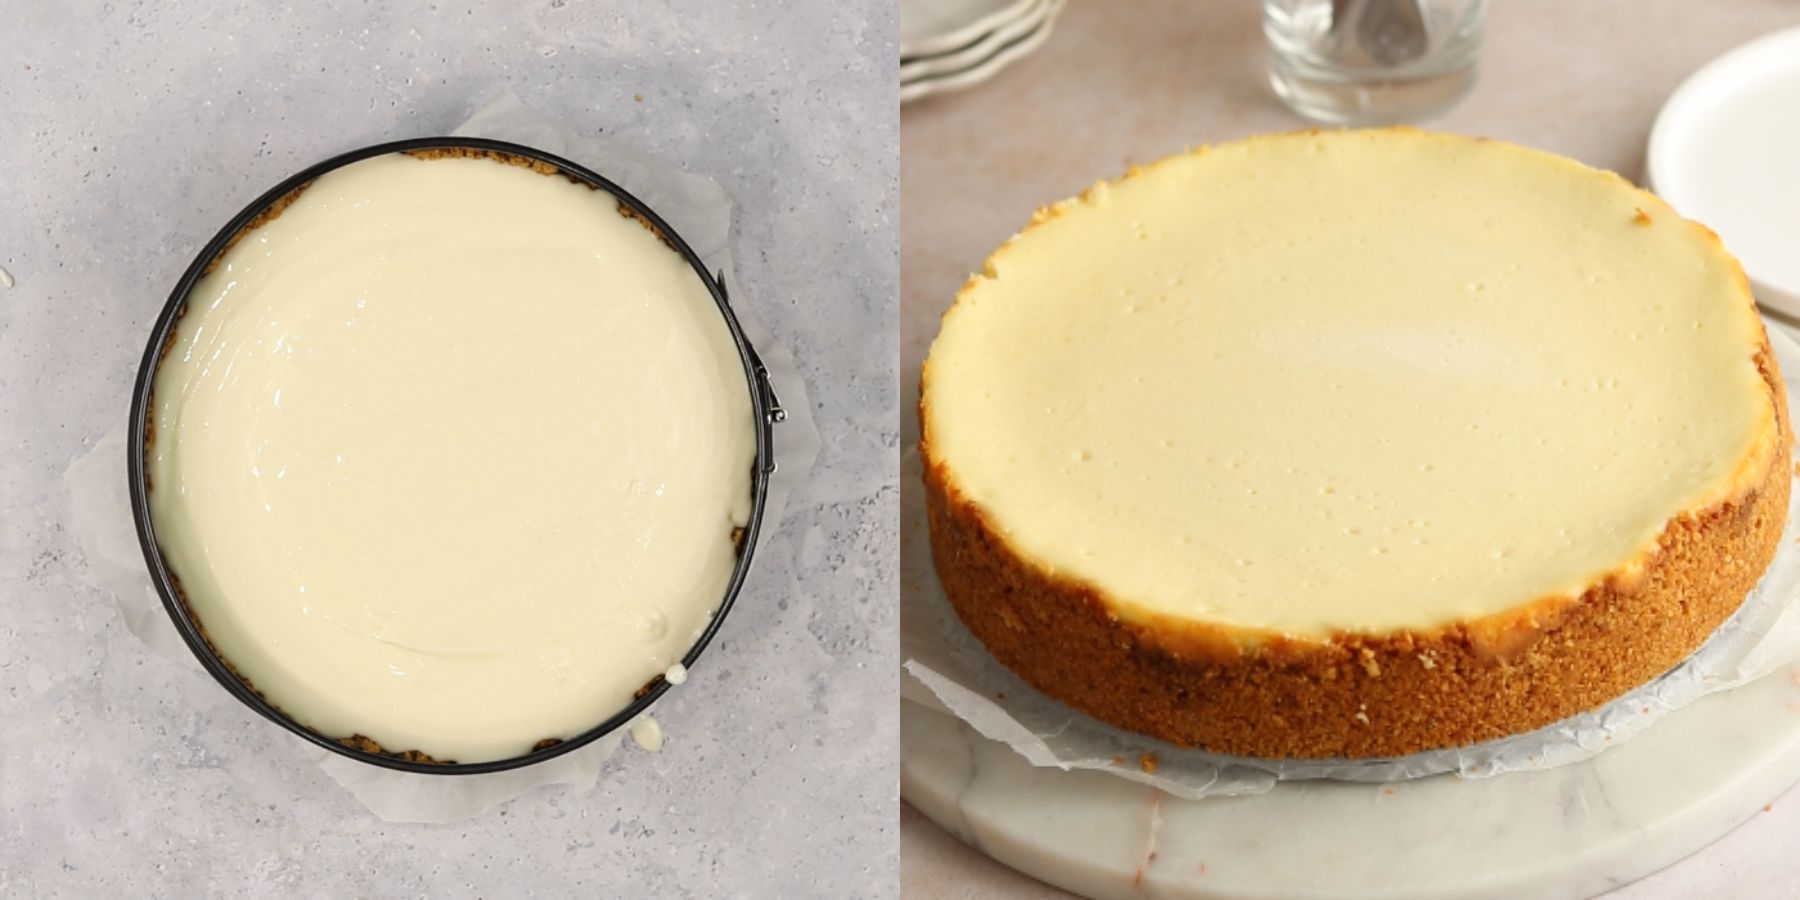
Bake for 7–8 minutes until fragrant. Remove and let the crust cool completely before adding the filling.

Lower oven temperature to 140°C (280°F). Beat the room-temperature cream cheese, sugar, and vanilla bean paste until completely smooth.
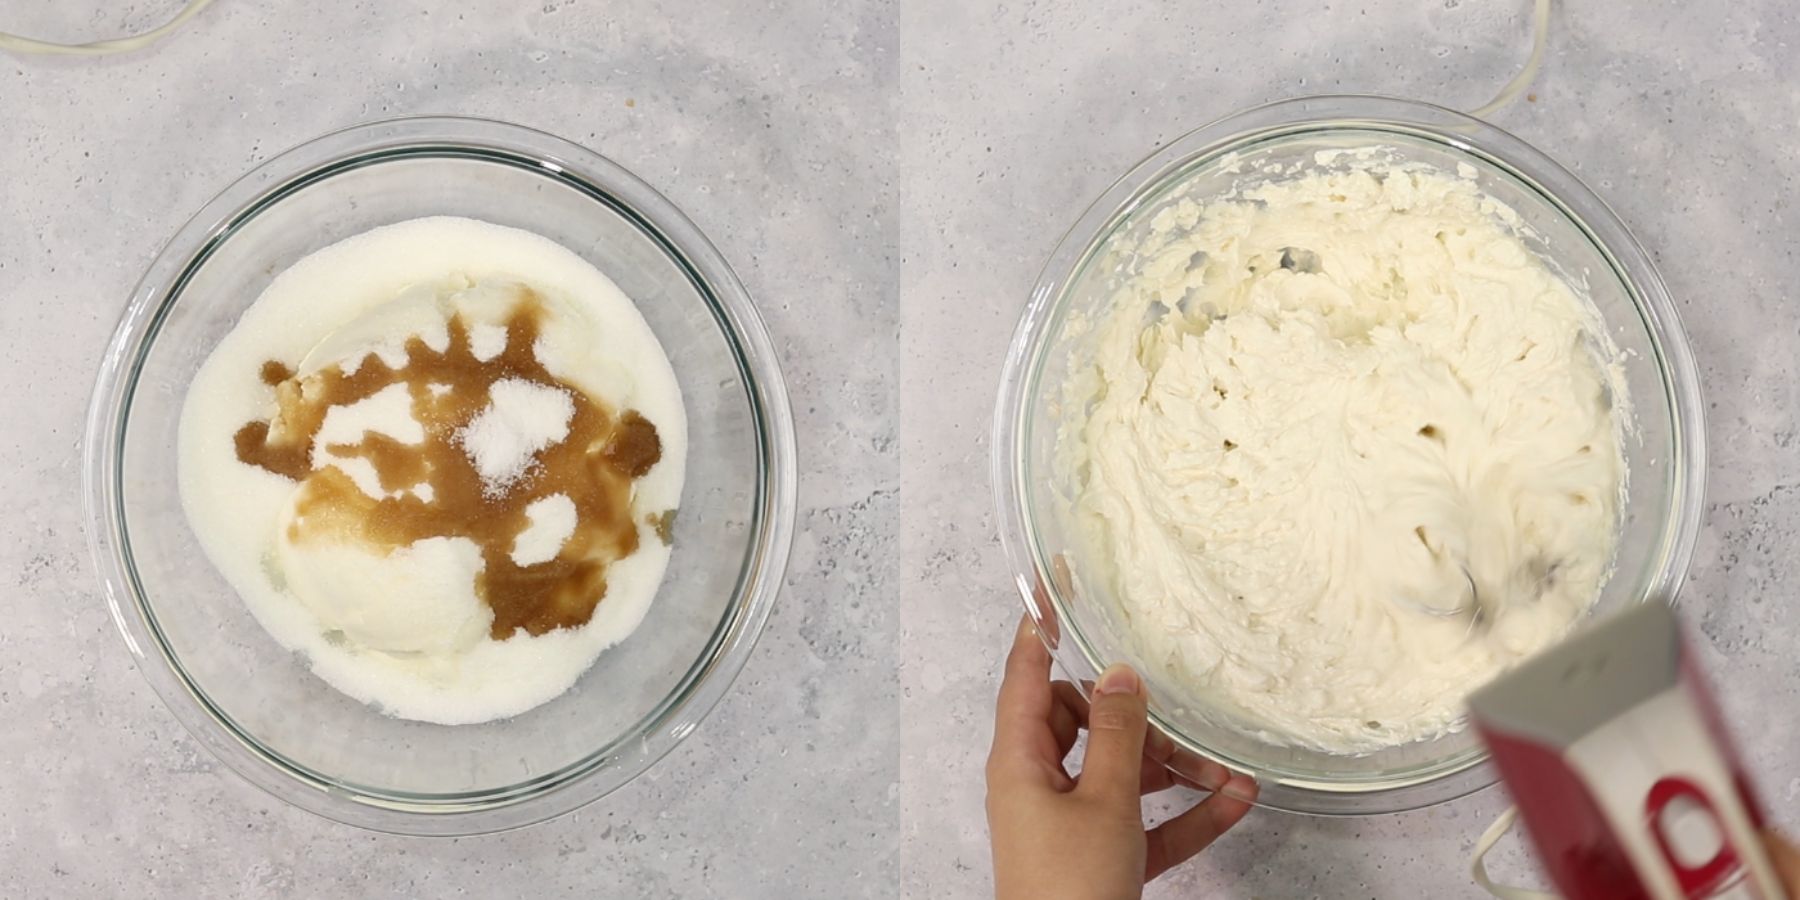
Mix in the sour cream, eggs, and egg yolks on low speed. Tip: Avoid over-mixing here to prevent air bubbles that cause cracking.

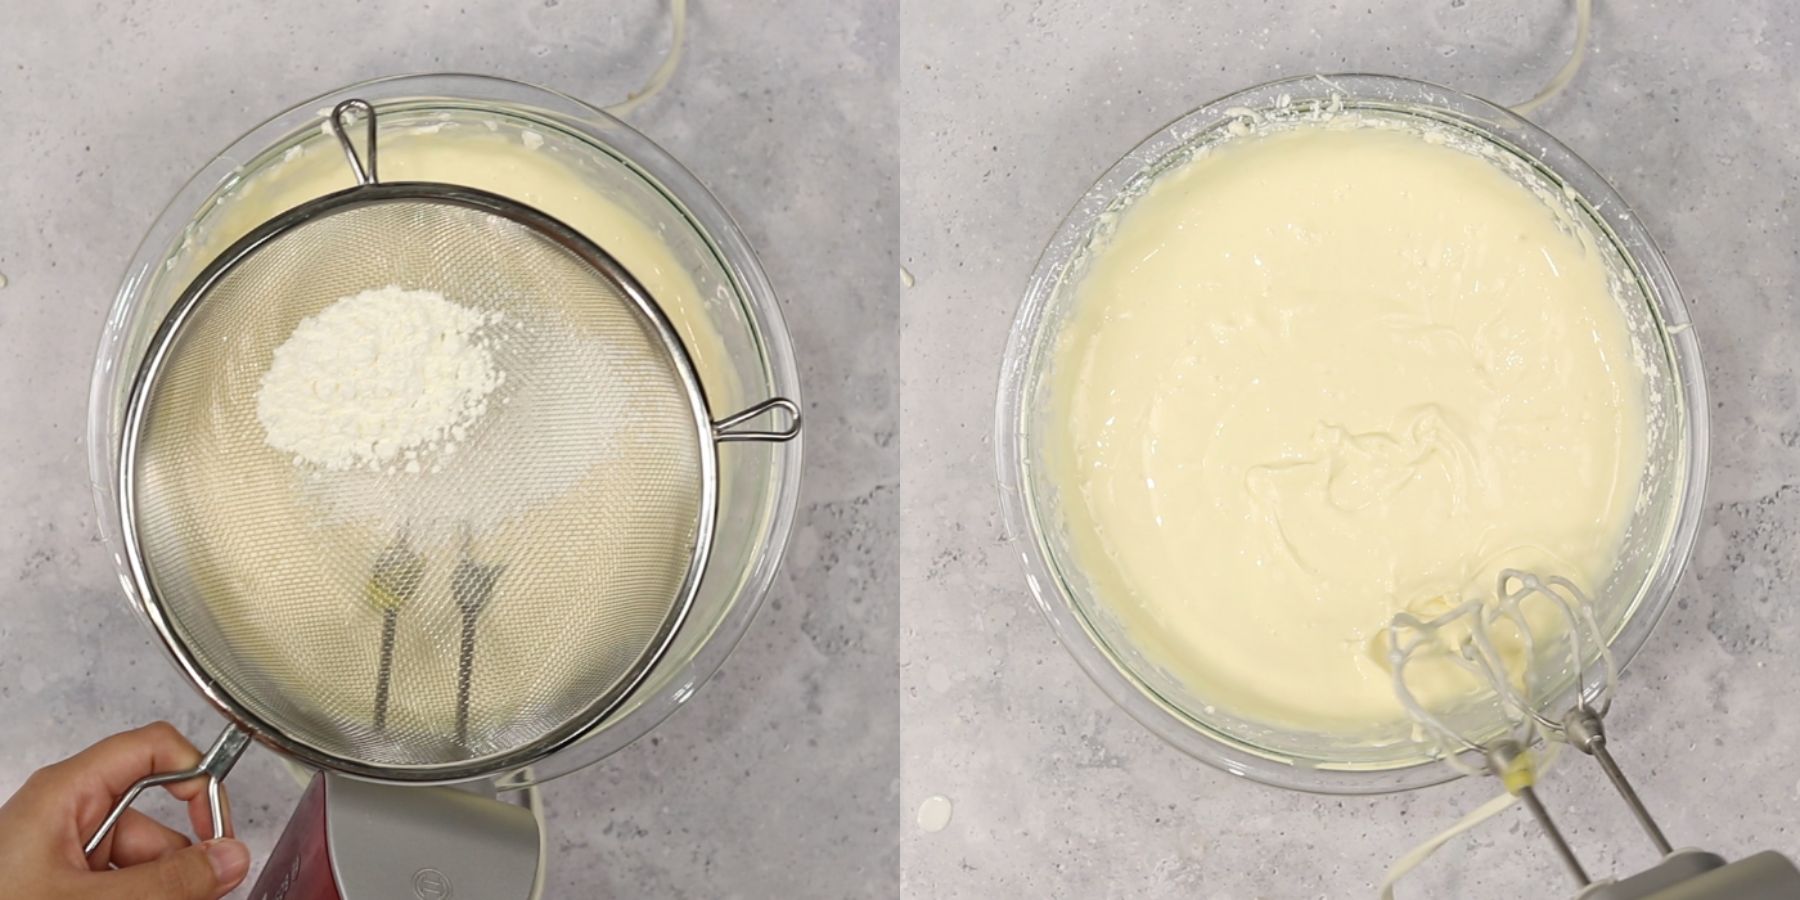
Sift in the cornstarch and mix just until no white streaks remain.
De-Air: Pour the batter over the cooled crust. Tap the pan firmly on the counter 5–10 times to force air bubbles to the surface.
Bake for 60 minutes. The edges should be set, but the center should still have a slight "jello-like" jiggle.
Turn the oven off and prop the door open slightly. Let the cheesecake sit inside for 1–2 hours. This gradual temperature drop is the secret to a crack-free top.
Wrap tightly in plastic and refrigerate for at least 5 hours (preferably overnight) to fully set the custard texture.
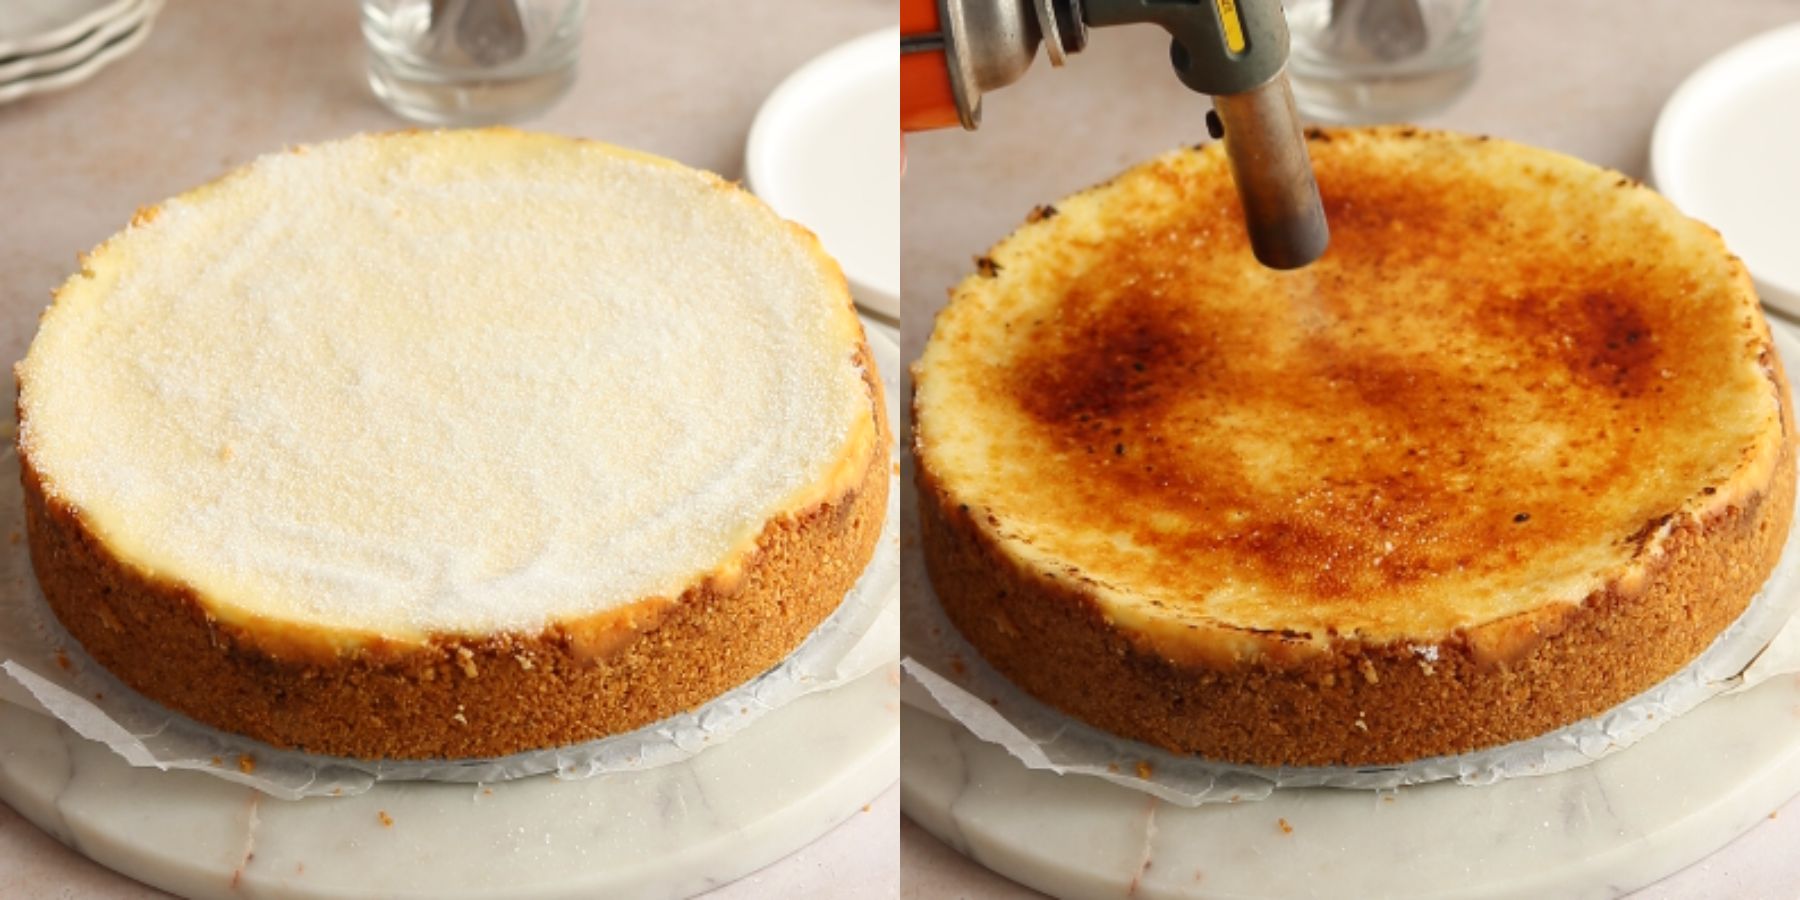
Just before serving, sprinkle an even, thin layer of granulated sugar over the top.
Use a kitchen torch in constant circular motions until the sugar bubbles and turns deep amber. Let it harden for 2 minutes into a glass-like shell before slicing.
Expert Tips
- The Double-Torch: Sprinkle a thin sugar layer, torch until golden, wait 30 seconds, and repeat. This builds a thicker, glass-like "shatter" without overheating the cheesecake.
- Low-Speed Mixing: Switch to the lowest setting once eggs are added. High speeds incorporate air, causing the cake to rise and collapse into a sunken, watery center.
- The Humidity Fix: Sugar liquefies in moisture. If transporting, place a silica packet in the carrier, but for best results, torch on-site immediately before serving.
- Suspended Vanilla Speckles: Ensure your batter is fully emulsified and thick before pouring. This prevents vanilla bean paste from sinking to the bottom of the crust.
- The Perimeter Release: Run an offset spatula around the edges 10 minutes after baking. This allows the cake to shrink inward as it cools, preventing surface cracks.
- Clean Rim Torching: Wipe stray sugar off the pan rim before torching. Burnt sugar on metal creates a bitter, carbonized aroma that taints the flavor of the cake edges.
Troubleshooting
Cracks on the Surface: Usually caused by over-mixing or rapid temperature changes. Solution: Keep the mixer on low speed to avoid air bubbles, and never skip the "oven-door-propped" cooling stage.
Lumpy Filling: Occurs when cold eggs or sour cream hit the cream cheese. Solution: Use only room-temperature ingredients. If lumps appear, pass the batter through a fine-mesh sieve before baking.
Soft or Weeping Sugar: Humidity or torching too early dissolves the caramel. Solution: Torch the sugar within 30 minutes of serving. If it liquefies instantly, the cheesecake was not chilled long enough.
The "Sloshy" Center: If the cheesecake moves like liquid rather than a firm jiggle, it is underbaked. Solution: Bake in 5-minute increments until the edges are set but the center has a controlled, Jell-O-like wobble.
Soggy Crust: Often caused by a loose springform seal or under-baking the base. Solution: Ensure the crust is firmly packed and fully cooled before adding the filling to create a moisture barrier.
Burnt Sugar Smell: Caused by torching stray sugar on the pan's rim. Solution: Wipe the edges of the pan clean of all granules before you begin the caramelization process.

Faq's
No. Broilers apply heat to the entire cake, melting the filling before the sugar caramelizes. A torch provides the precision needed for a crisp top.
The extra egg yolks create the signature "Crème Brûlée" custard color. This is intentional and provides a richer flavor.
No. This recipe uses a low-temperature bake (140°C) and a gradual cooling method to prevent cracks without the hassle of a water bath.
Storing
Store the un-torched cheesecake in an airtight container for up to 5 days. Do not store once torched, as the sugar will liquefy.
Freezing
Freezing: Wrap the plain cheesecake (without sugar topping) tightly in a double layer of plastic wrap and a layer of foil. Freeze for up to 3 months.
Thawing: Thaw in the refrigerator for 24 hours before adding the sugar and torching.
Make-Ahead & Slicing
The Base: The cheesecake is best made 1–2 days in advance to allow the custard to fully set and flavors to develop.
The Topping: Never make the brûlée topping ahead of time. Torch it within 30–60 minutes of serving to ensure the sugar stays crisp and "shatters."
Serving And Slicing
The Shatter: For the best experience, crack the sugar top with a spoon in front of your guests.
Clean Slices: Dip a long, sharp knife in hot water and wipe it completely dry between every single cut. This prevents the filling from dragging and ensures professional, sharp edges.
Substitutions
Gluten-Free: Swap graham crackers for an equal weight of GF graham crumbs. Ensure cornstarch is certified GF.
Vanilla Bean Paste: Sub 1:1 with Pure Vanilla Extract or the scraped seeds of one whole vanilla bean.
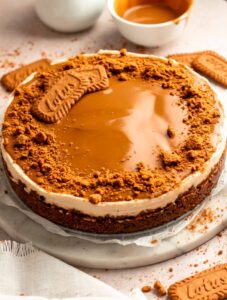
The Crust: Sub graham crackers with Biscoff cookies or Digestive biscuits.
Variations
Biscoff: Use Biscoff crumbs for the base; swirl 2 tablespoon melted cookie butter into the batter.
Espresso: Dissolve 1 tablespoon espresso powder into the vanilla before mixing.
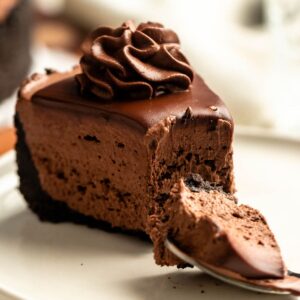
Chocolate Chip: Fold ½ cup mini chocolate chips into the finished batter.
Fruit Bottom: Spread a thin layer of raspberry preserves over the cooled crust before filling.
Salted Caramel: Drizzle caramel sauce over the chilled cake before the sugar layer.
Citrus: Add 1 tablespoon lemon zest and 1 teaspoon juice to the cream cheese mixture.
Equipment
- 9-inch Springform Pan: For a clean, non-stick release.
- Kitchen Torch: Required for localized sugar caramelization.
- Mixing Bowls: Use glass or metal bowls. Avoid plastic, which can retain oily residues that interfere with the custard's emulsification.
- Electric Hand Mixer: For low-speed aeration control.
- Fine-Mesh Sieve: For sifting cornstarch to ensure a lump-free batter.
- Offset Spatula: For smoothing the surface and releasing edges.
More Cheesecake Recipes
- Apple Crumble Cheesecake: A creamy base layered with cinnamon apple pie filling, finished with a buttery crumble and salted caramel.
- No-Bake Biscoff Cheesecake: Features a cookie crust, silky Biscoff-infused filling, and a melted cookie butter drip.
- Tiramisu Cheesecake: An Oreo base topped with mascarpone cream, espresso-soaked ladyfingers, and a cocoa dust finish.
Connect With Us
Review: Leave a rating and comment below if you enjoyed this recipe. Socials: Follow on Facebook, Instagram, and Pinterest. Save: Pin this recipe to Pinterest for later.
📖 Recipe
Creamy Creme Brulee Cheesecake
Ingredients
Crust
- 2 cups Graham crackers
- ½ cup Butter melted, unsalted
- 1 tablespoon Granulated sugar
Filling
- 24 oz Cream cheese softened
- ½ cup Sour cream full fat
- 1 cup Granulated sugar
- 3 teaspoon Vanilla extract or 1 vanilla bean, or vanilla bean extract
- 3 Eggs
- 2 Egg yolks
- 2 tablespoon Cornstarch
Topping
- 1 tablespoon Granulated sugar
Instructions
- Heat oven to 180°C (350°F). Line a 9-inch springform pan with parchment paper and lightly grease the sides.
- Pulse graham crackers in a food processor until they reach a fine, sandy texture. Stir crumbs, granulated sugar, and melted butter until the mixture is evenly moistened.
- Press the mixture firmly into the bottom of the pan using the flat base of a measuring cup to ensure a sturdy base.
- Bake for 7–8 minutes until fragrant. Remove and let the crust cool completely before adding the filling.
- Lower oven temperature to 140°C (280°F). Beat the room-temperature cream cheese, sugar, and vanilla bean paste until completely smooth.
- Mix in the sour cream, eggs, and egg yolks on low speed. Tip: Avoid over-mixing here to prevent air bubbles that cause cracking.
- Sift in the cornstarch and mix just until no white streaks remain.
- De-Air: Pour the batter over the cooled crust. Tap the pan firmly on the counter 5–10 times to force air bubbles to the surface.
- Bake for 60 minutes. The edges should be set, but the center should still have a slight "jello-like" jiggle.
- Turn the oven off and prop the door open slightly. Let the cheesecake sit inside for 1–2 hours. This gradual temperature drop is the secret to a crack-free top.
- Wrap tightly in plastic and refrigerate for at least 5 hours (preferably overnight) to fully set the custard texture.
- Just before serving, sprinkle an even, thin layer of granulated sugar over the top.
- Use a kitchen torch in constant circular motions until the sugar bubbles and turns deep amber. Let it harden for 2 minutes into a glass-like shell before slicing.
Notes
- The Double-Torch: Sprinkle a thin sugar layer, torch until golden, wait 30 seconds, and repeat. This builds a thicker, glass-like "shatter" without overheating the cheesecake.
- Low-Speed Mixing: Switch to the lowest setting once eggs are added. High speeds incorporate air, causing the cake to rise and collapse into a sunken, watery center.
- The Humidity Fix: Sugar liquefies in moisture. If transporting, place a silica packet in the carrier, but for best results, torch on-site immediately before serving.
- Suspended Vanilla Speckles: Ensure your batter is fully emulsified and thick before pouring. This prevents vanilla bean paste from sinking to the bottom of the crust.
- The Perimeter Release: Run an offset spatula around the edges 10 minutes after baking. This allows the cake to shrink inward as it cools, preventing surface cracks.
- Clean Rim Torching: Wipe stray sugar off the pan rim before torching. Burnt sugar on metal creates a bitter, carbonized aroma that taints the flavor of the cake edges.
Ilana says
made it for a birthday and was a huge hit, my family loved it. So many compliments. They compare it to the creme brulee cheesecake at Fogo de chao! Only problem was the baking time but that was probably due to my pan being a 6inch instead of a 9inch lol. Such a good recipe 🙂
Mary Ayala says
I’ve made this a few times now and it’s a huge hit everytime! I don’t however add the cornstarch, don’t know why, just keep forgetting to… comes out amazing without though. I haven’t been able to do the carmelized sugar topping either… no torch dang it! However, as much as I’d love to try it that way, it’s not needed. This cheesecake has many fans in this house just the way it is!!!
Ann McCarthy says
Made this for Christmas - it was excellent. I served it with a caramel sauce on the side. It would be excellent with fresh whipped cream and raspberries, as well.