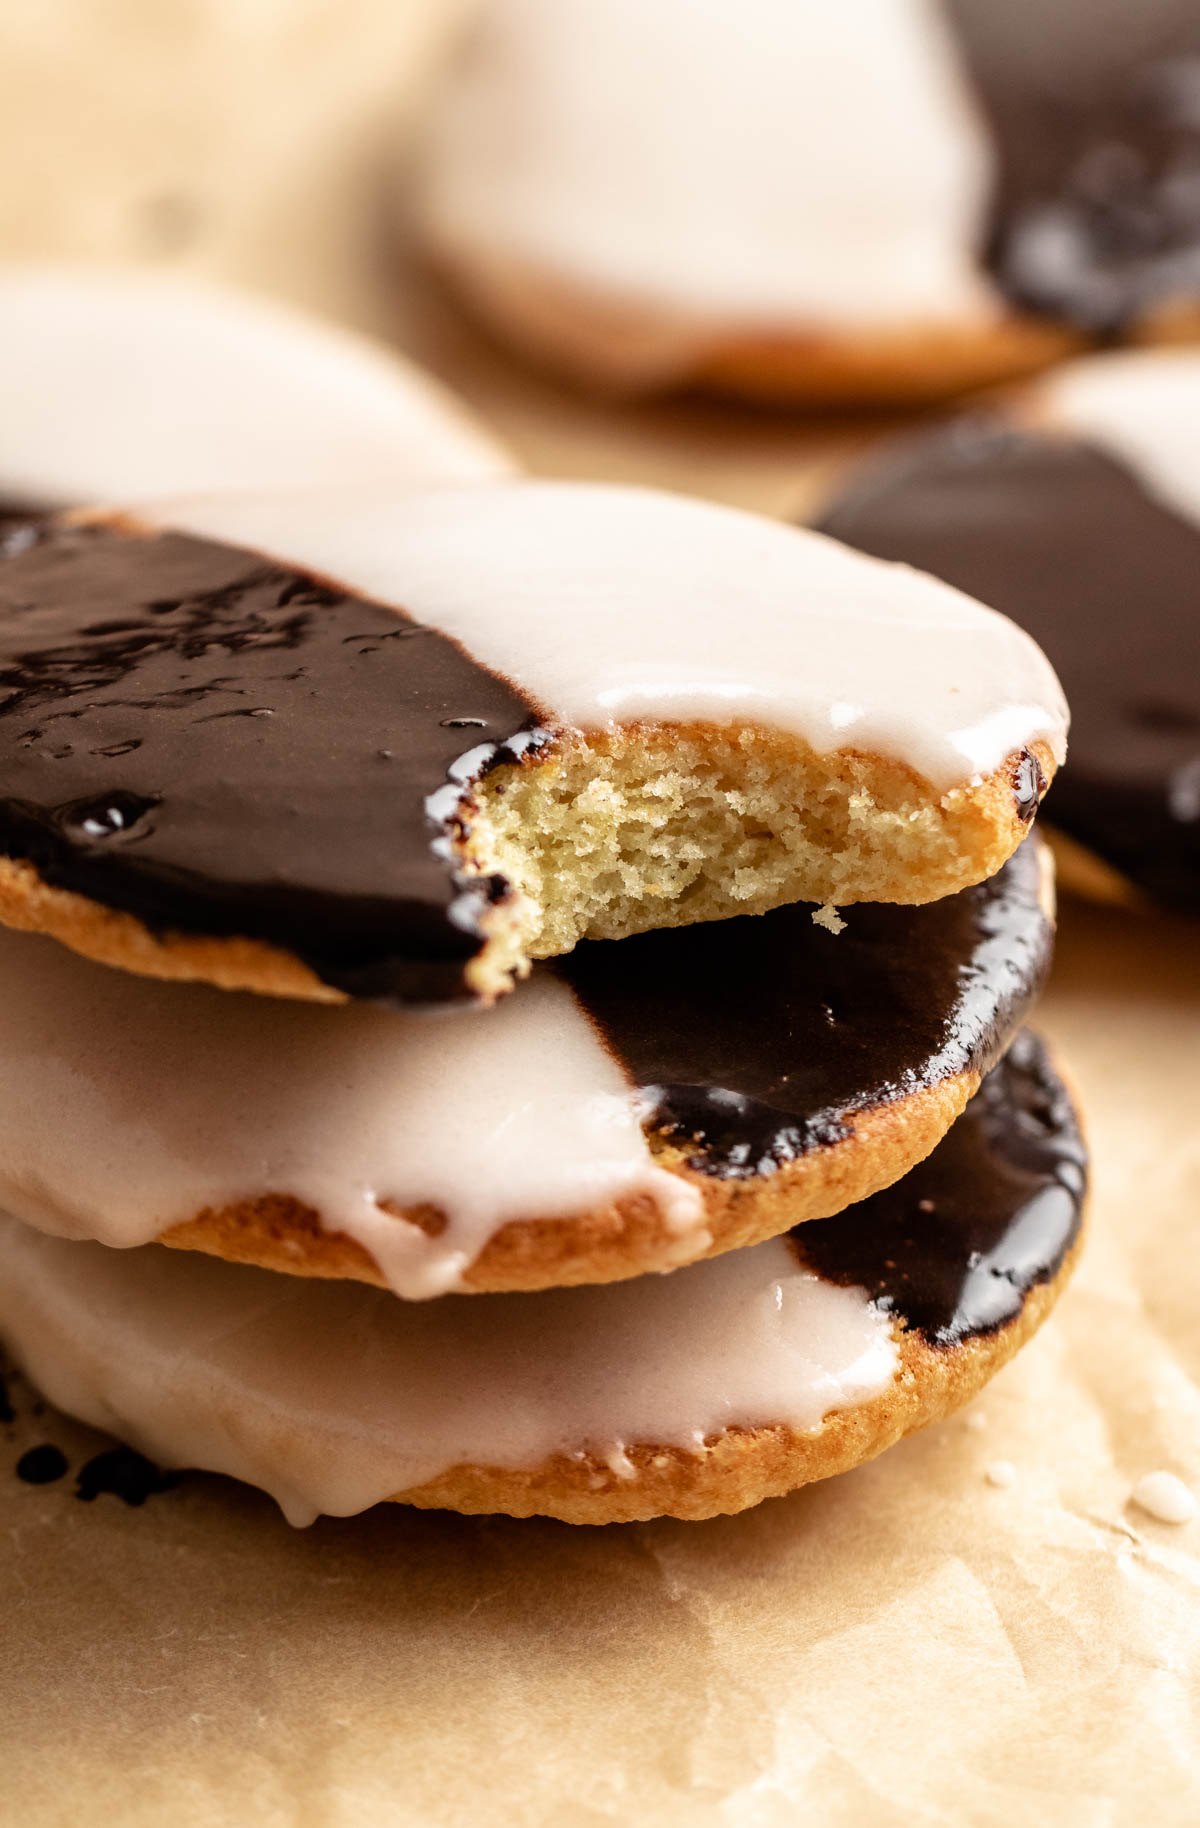
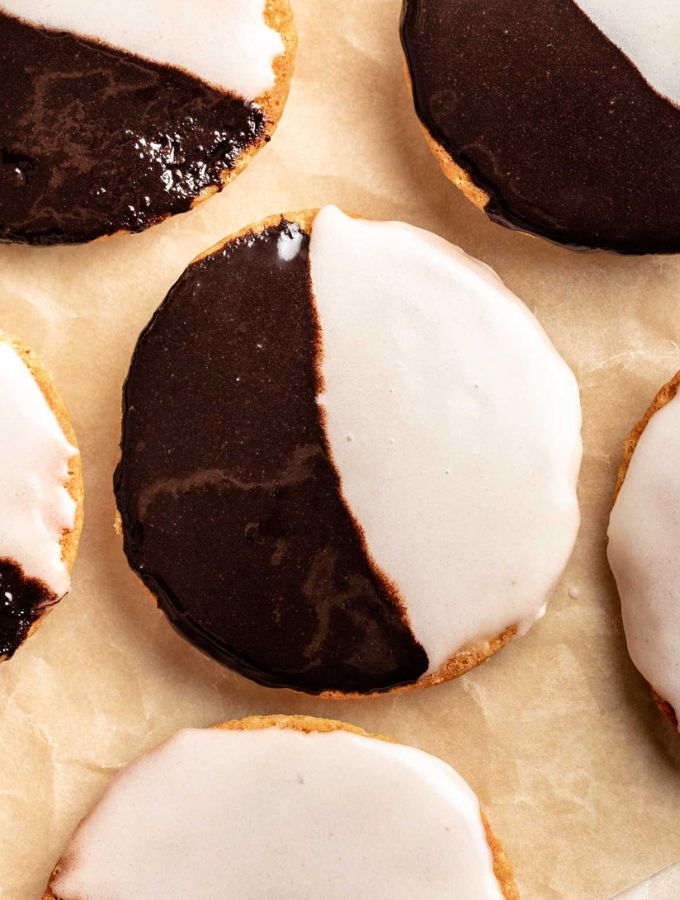
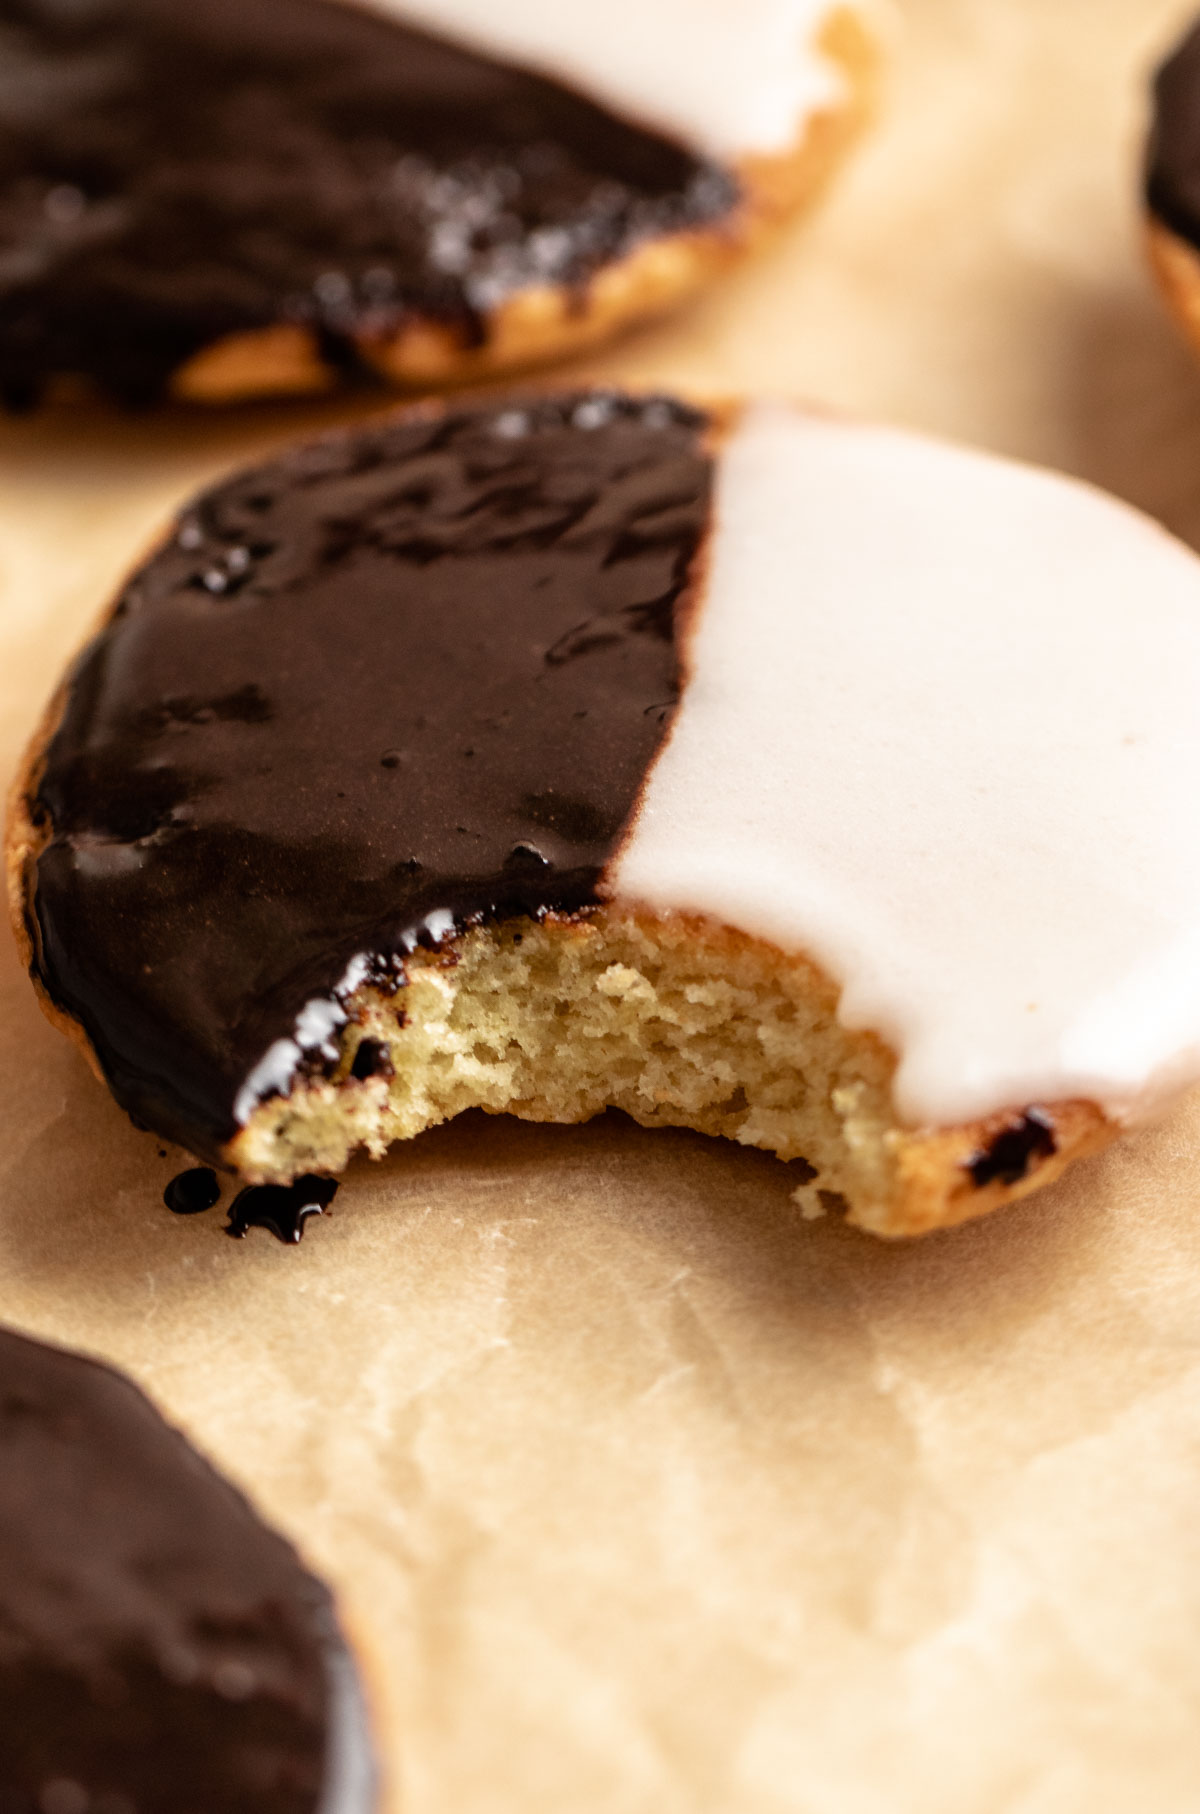
These half moon cookies are pillowy soft cookies with half chocolate half vanilla icing which creates this iconic New York cookie!
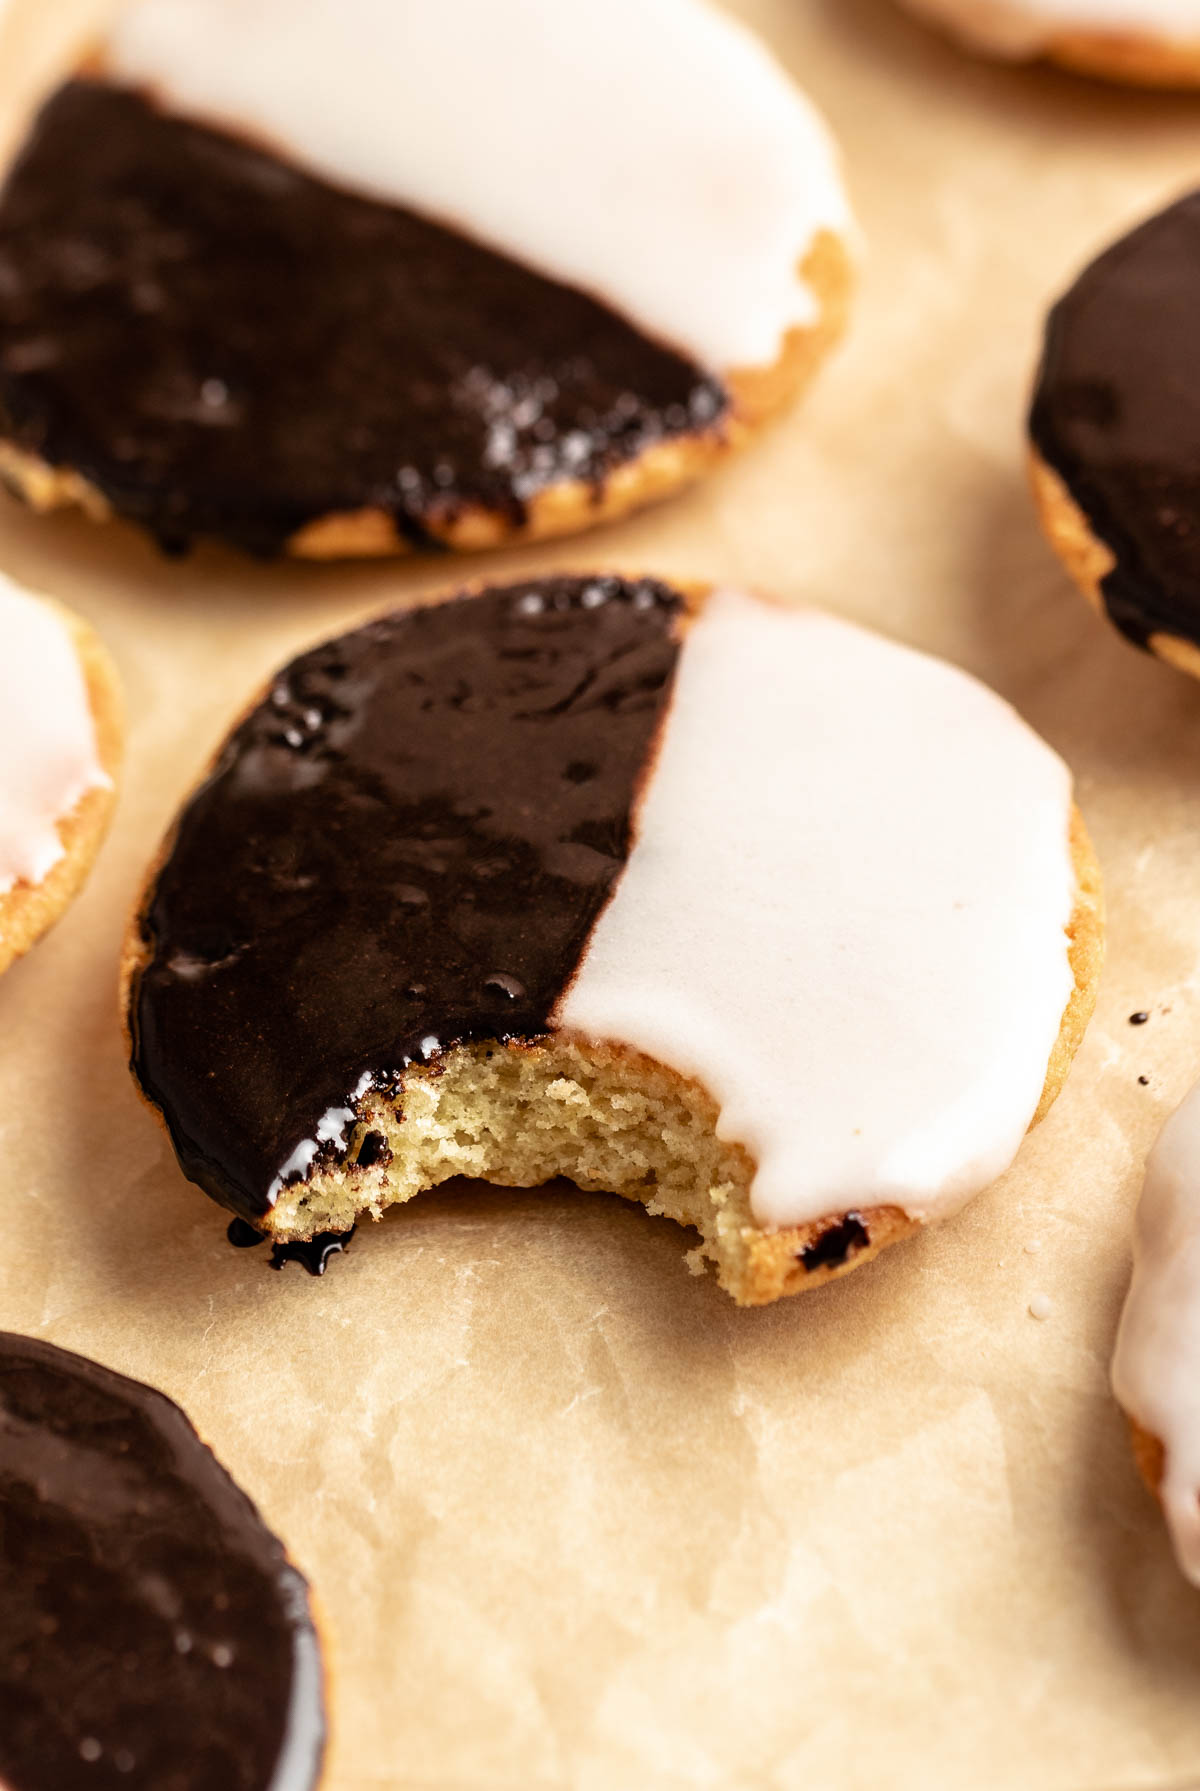
You will never need to pick a favorite flavor when you are enjoying these cookies! You get the best of both worlds: chocolate and vanilla.
These cookies have been around upstate new york for over 50 years.
They are the most famous from the Seinfeld episode where Jerry says that the key to eating these halfmoon cookies is eating a bit of the vanilla and a bit of the chocolate in each bite.
You can find these iconic cookies in Jewish bakeries in new york, but when you are not nearby, you can make them easily at home!
For more delicious cookie recipes, check out my cheesecake cookies, coffee cookies, triple chocolate cookies, biscoff butter cookies, and brookies cookies.
Jump to:
Why this recipe works
- Flavor- the flavor of these cookies is a vanilla base with chocolate and vanilla icing in every bite, so you get the best of both worlds in every bite!
- Texture- the texture of these cookies is very similar to cake or cupcake texture. It's soft and fluffy and goes perfectly with the delicious icing on top.
- Ease- these cookies are very easy to make and come together in one bowl and do not need chill time!
- Simple- you will need super simple ingredients to make these cookies like butter, flour, sour cream, and sugar.
- A classic cookie- these cookies are a true classic, and are around for over 50 years! Now you can make them at home and eat them without needing to travel to new york.
What are half moon cookies?
Half-moon cookies are fluffy cake-like cookies frosted with half vanilla icing and half chocolate icing and are very well-known cookies from Upstate Utica, New York.
You can find these iconic cookies in bakeries and shops in new york, but you can also make them at home!

Ingredients
Before you start to make this recipe, measure and prepare your ingredients so the cooking process will go smoothly and easily.
Full measurements are in the recipe card below.
Butter- use unsalted butter for this recipe. Only butter will work; no margarine or coconut oil. Margarine has an odd taste and can ruin the flavor of these delicious cookies.
Sour cream- use full-fat sour cream for this and ensure that it's at room temperature. If you don't have sour cream, you can swap it with Greek yogurt.
Flour– we used all-purpose flour for this recipe. cake flour will work great as well.
Baking soda and baking powder – baking soda and baking powder help the cookies rise and spread. Make sure that your levelers aren't expired.
Sugar- we used granulated sugar for this recipe. You can use caster sugar as well.
Eggs- you will need 1 large egg and 1 egg yolk for this recipe. Make sure that your eggs are at room temperature.
Vanilla extract- adds extra flavor.
Kosher salt- you will need about ⅓ teaspoon of kosher salt for this recipe.
For the icing
Powder sugar- is known as confectioners sugar. For a smoother icing, sift it before adding it to the butter.
Light corn syrup- is also known as glucose syrup. This ingredient is super important, it gives the icing a beautiful gloss
Milk- use your favorite milk for this. Can be plant-based or whole milk.
Vanilla extract- if you want to make these even better, use a vanilla bean extract.
Cocoa powder- we used Dutch cocoa powder. You can use natural cocoa powder as well.
Instructions
Preheat oven to 180c (350f) and prepare a baking sheet with parchment paper.
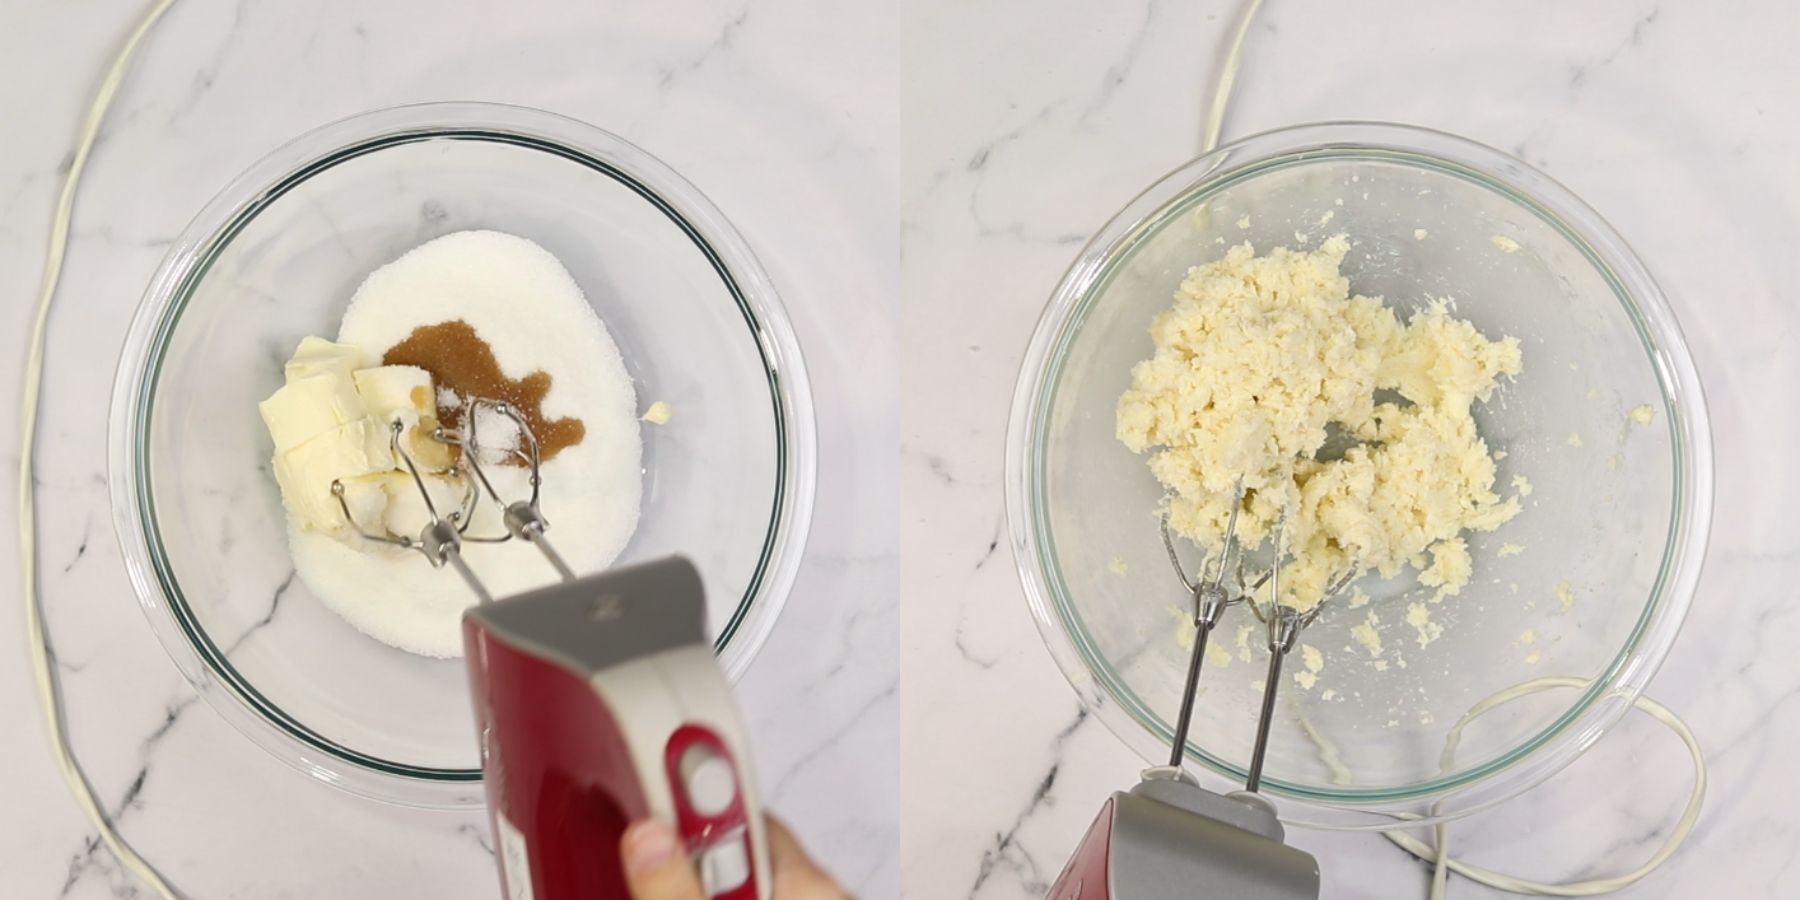
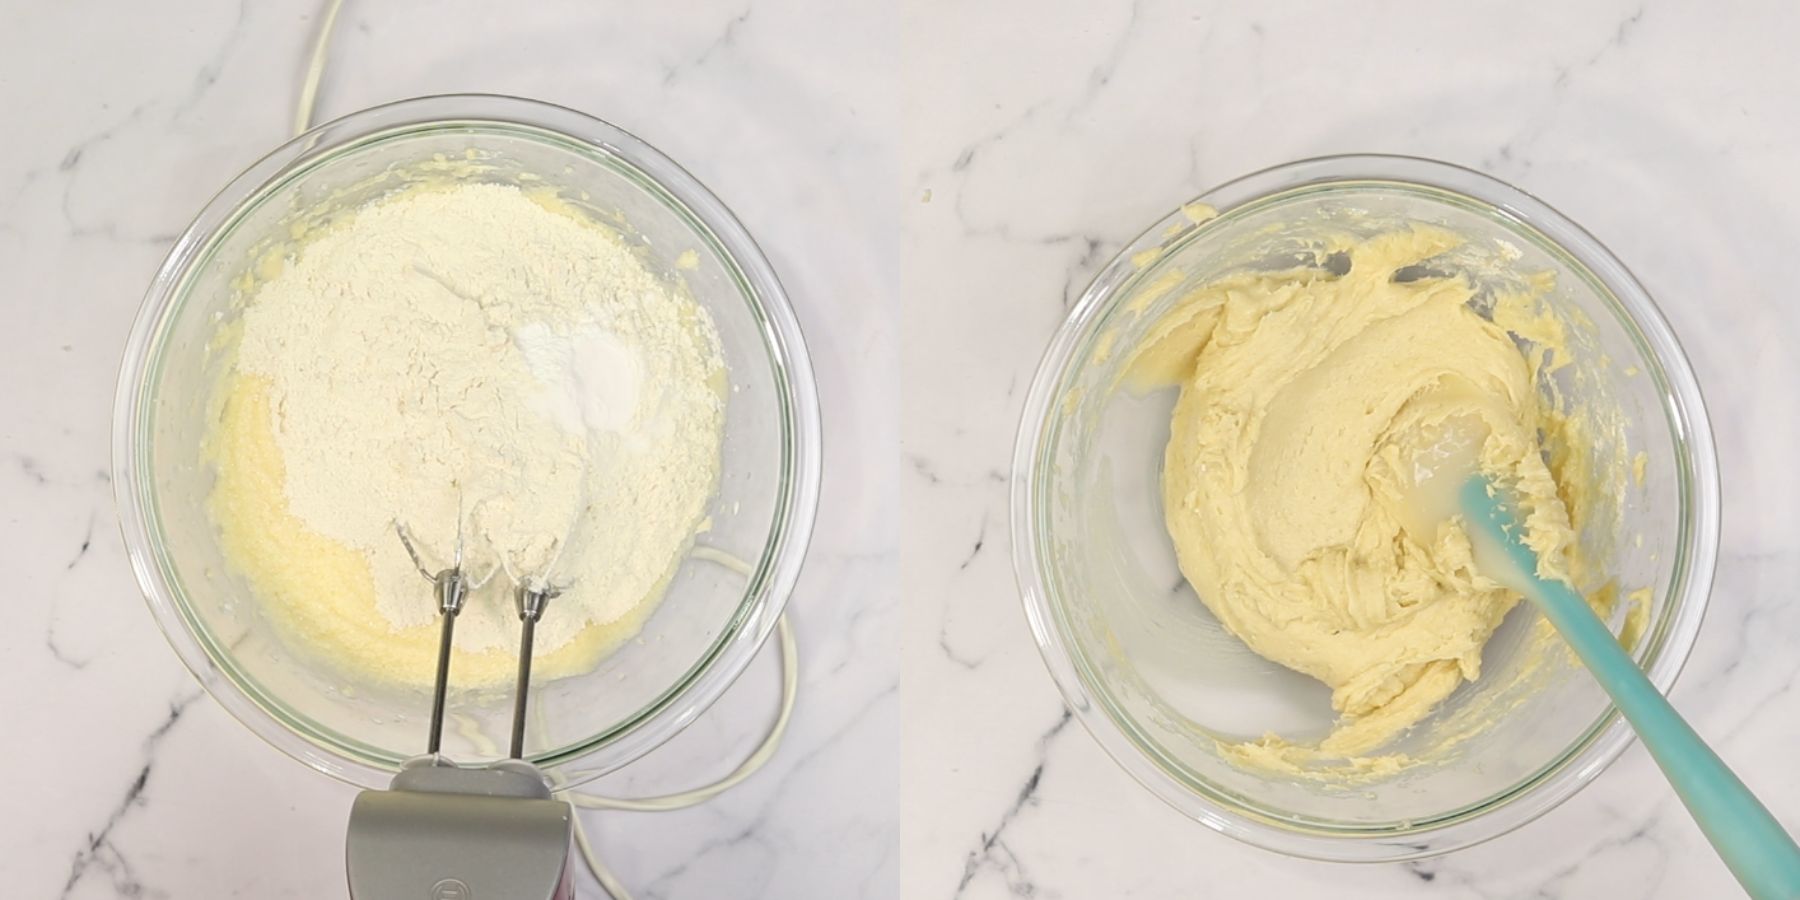
Into a big mixing bowl, add the room temperature butter, vanilla extract, kosher salt, and sugar, and cream it with an electric hand mixer for 2-3 minutes or until it's creamy and light in color.
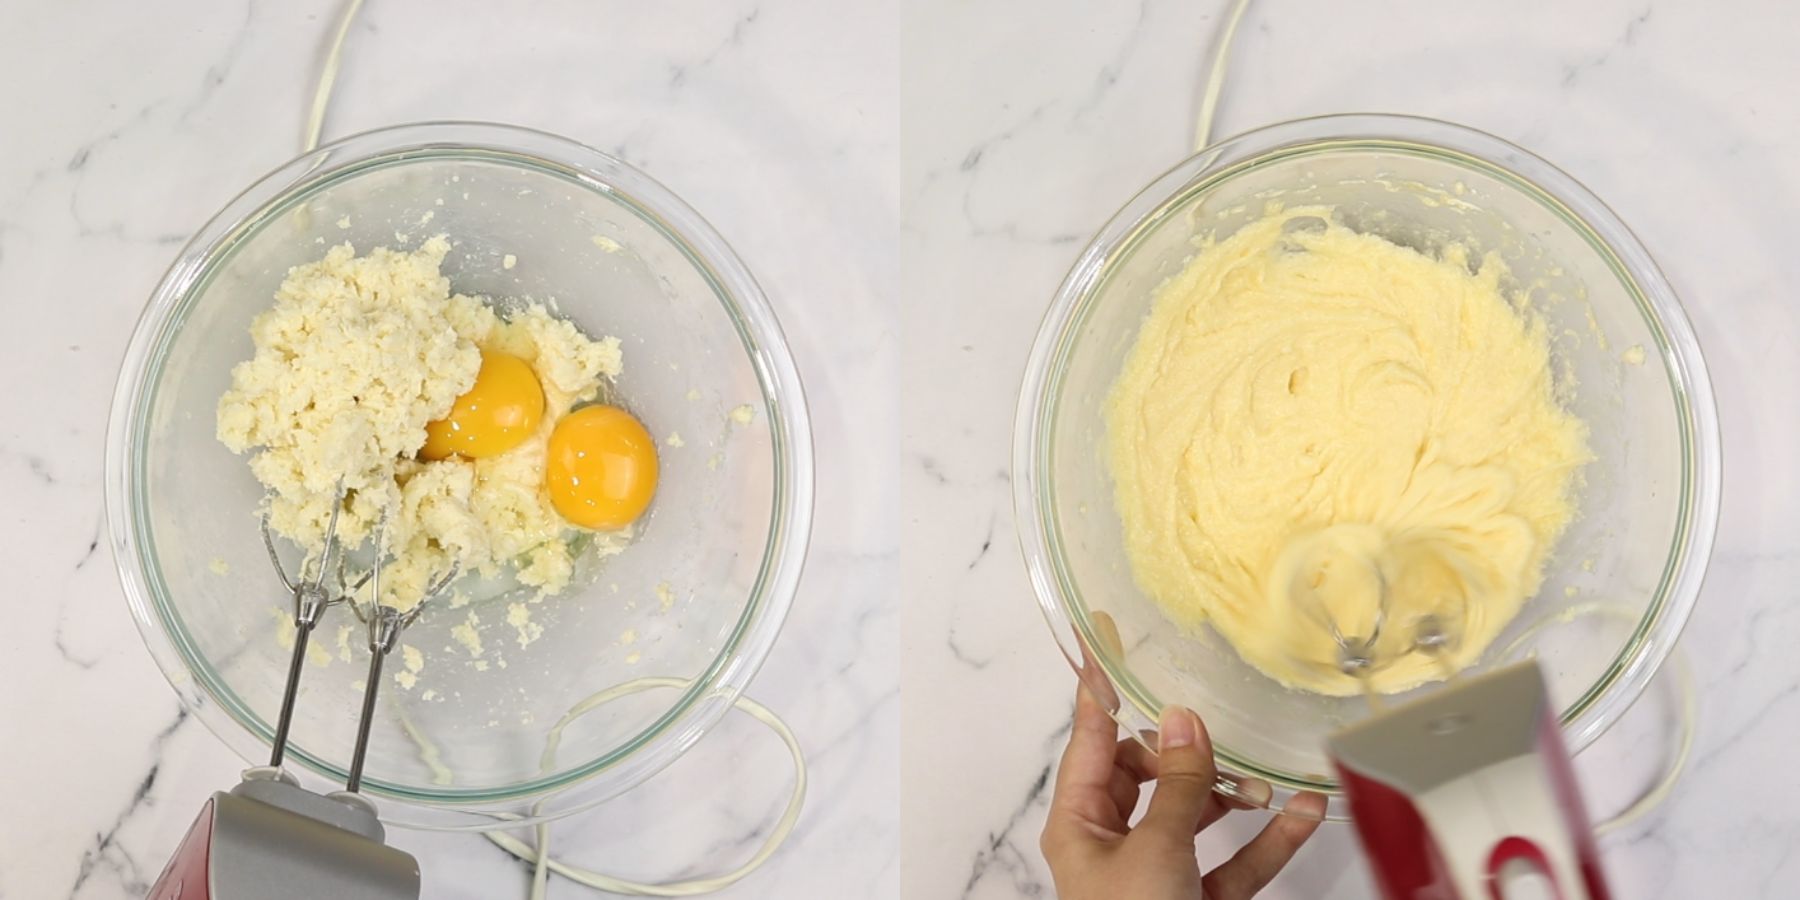
Add the eggs, and mix until combined and creamy.
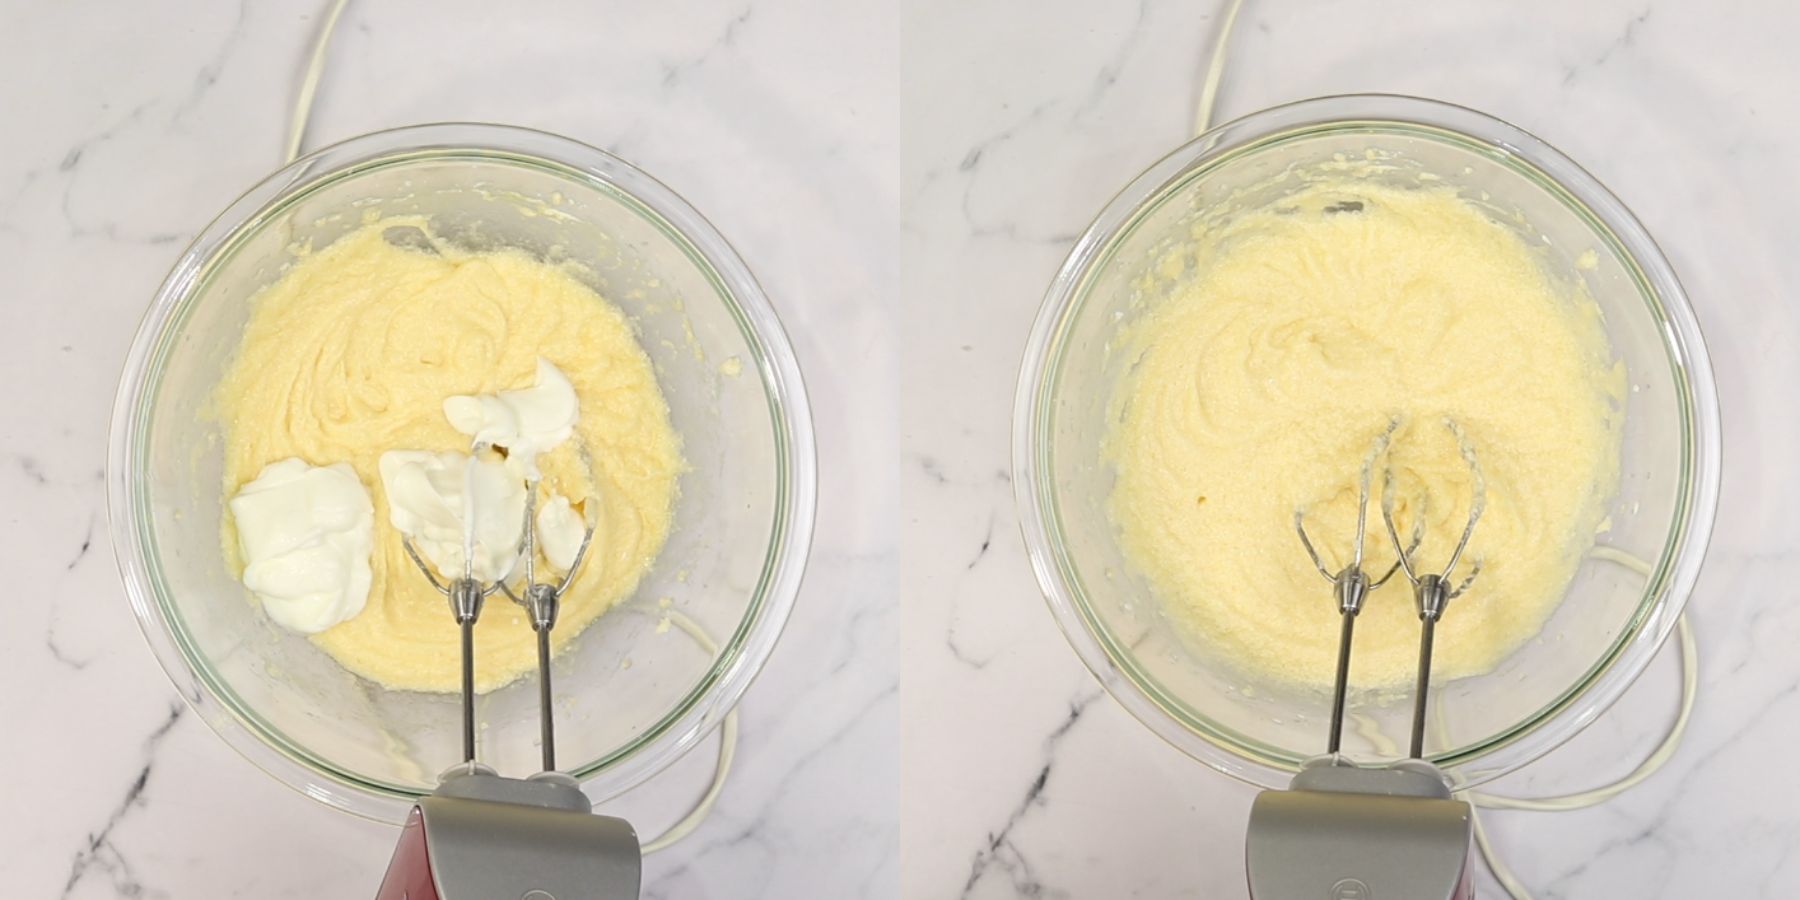
Add the sour cream and mix until well combined.
Then, add the flour, baking powder, and baking soda, and mix with the hand mixer until just combined. Do not overmix!
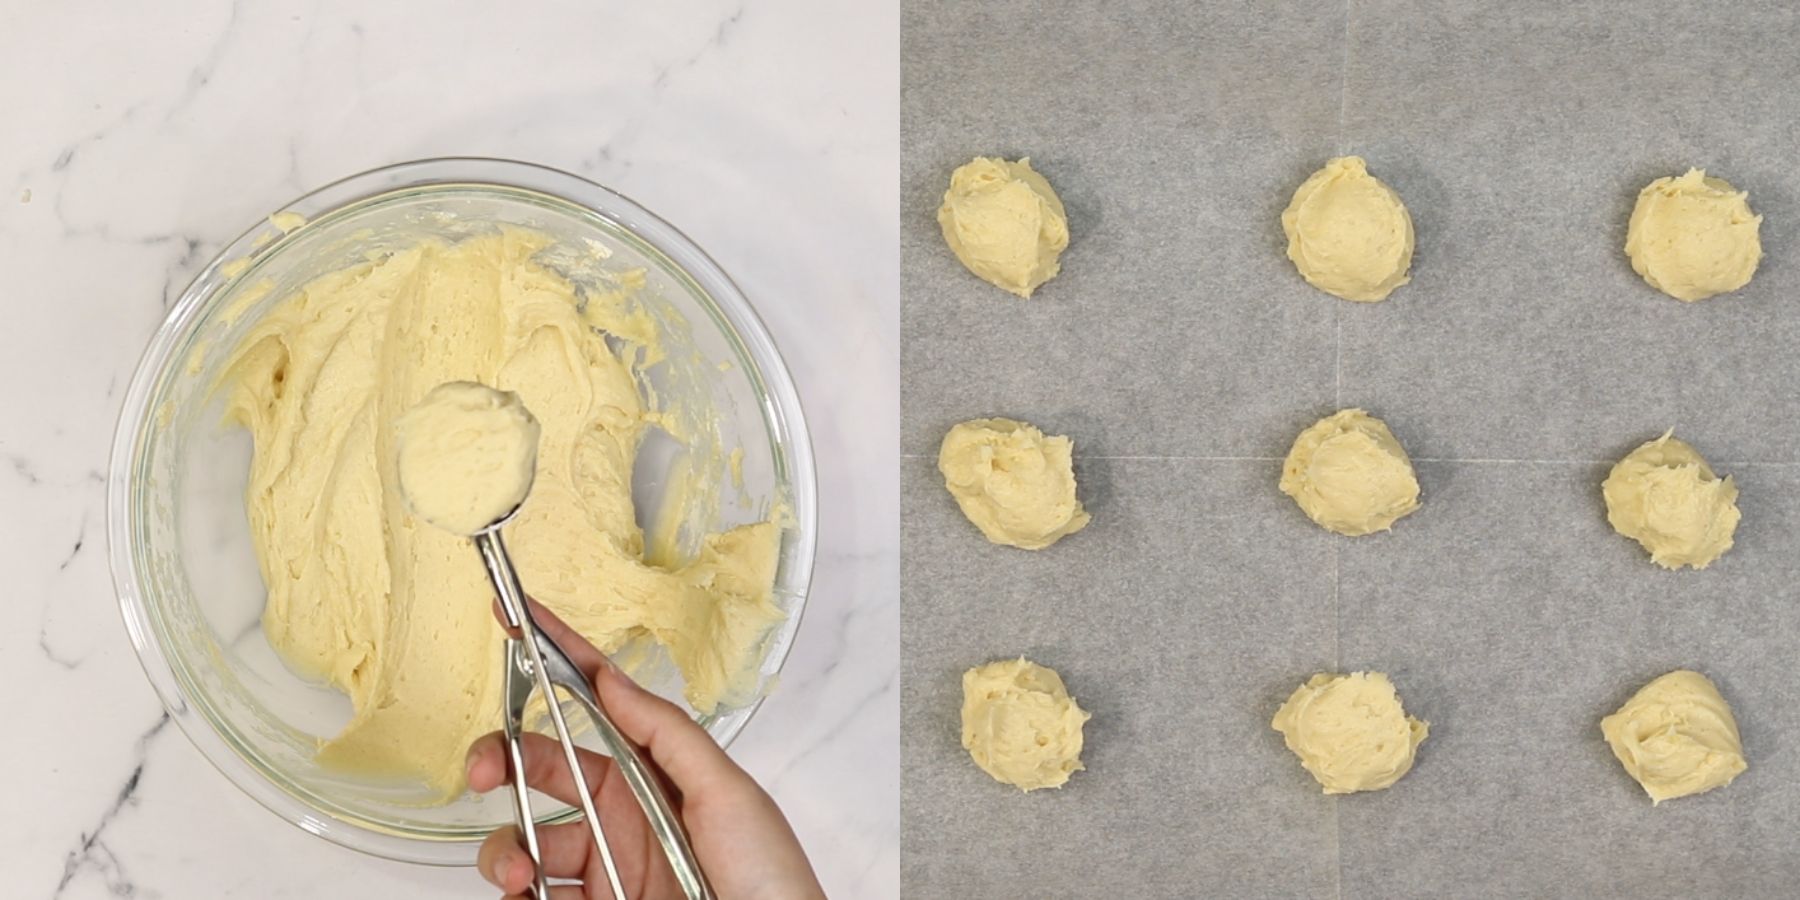
Use a 2 tbsp cookie scooper to scoop out the cookies or scoop the cookies with a regular tablespoon, 2 tablespoons at a time.
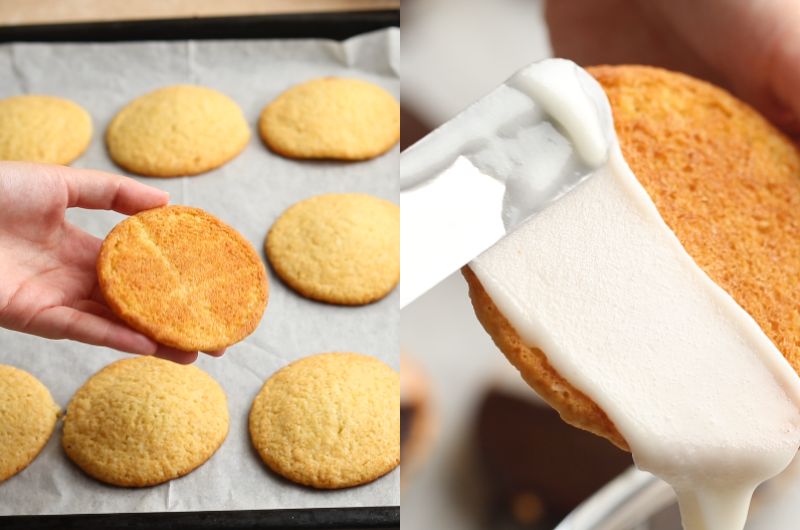
Bake in a 180c (350f) preheated oven for 10-11 minutes or until the cookies are puffed and they have a light golden brown color.
Let the cookies cool for 5 minutes, and then transfer them to a wire rack to cool completely.
Make the icing
In a medium-sized mixing bowl, add the powdered sugar, milk, corn syrup, and vanilla extract and mix with a small whisk until you get a creamy and smooth mixture.
Divide the icing into 2 separate bowls, and add the sifted cocoa powder plus 1-2 tablespoon of milk. Whisk and add more milk if the mixture is too thick.
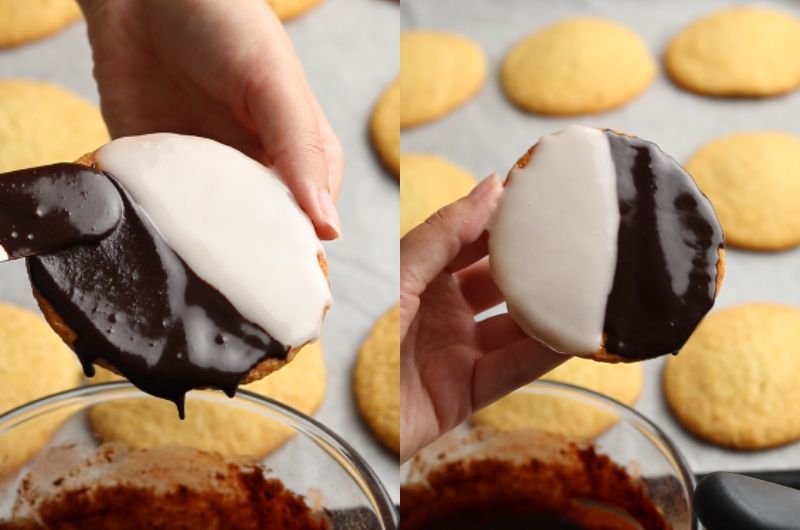
Using a small offset spatula, cover half of each cookie (flat side up) with vanilla icing and chocolate icing. I recommend drawing a line down the middle to create a perfect borderline.
Allow the icing to set on each cookie before serving. Place them in the fridge for 20 minutes to speed up to setting process.
Expert Tips
- Our top tip of these is adding icing to the bottom side of the cookie instead of the top. The flat surface is easier to frost and will give you a perfect black and white cookie, and it's also the classic way to make them.
- If the icing is too thick, add a tablespoon or more until you get the right consistency.
- Use room temperature ingredients. It is important that you use room-temperature ingredients like eggs and butter. This step ensures that your mixture mixes into a homogenous mixture and bakes perfectly.
- Don’t overmix the batter, you don’t want to develop the gluten in the flour. This step ensures you have moist cookies and not dense and dry cookies.
- Make sure that your butter is at room temperature. An hour or two before making these cookies, take the butter out of the fridge and let it come to room temperature. The butter should be soft to the touch. If your butter is too cold, it will be harder to mix and there will be lumps of butter in the dough.
- Measure your flour correctly! When measuring your flour, avoid scooping it with a measuring cup. Instead, stir the flour with a spoon to create as many air pockets as possible, and spoon it into your measuring cup. Finally, level it with a back of a knife.
- Line your sheet pan with parchment paper or a silicone mat! This step helps the cookies to bake evenly, and it makes sure that your cookies release easily from the pan.
- Use a cookies scoop to scoop out the cookies, that way you will have even-sized cookies, plus it ensures that your cookies bake evenly.
- Be patient! I know it’s extremely tempting to eat these cookies as they are pulled out of the oven, but let these cookies cool for at least 15 minutes so they will be firmer and won’t crumble up.
- We suggest letting these cookies cool for 5 minutes and then transferring them to a wire rack to cool for at least 10 more minutes. This step ensures that the bottom of your cookies will not be soggy from the steam.
Faq's
Half moon cookies are made with a soft cake-like sour cream cookie, that is topped with half chocolate icing and half vanilla icing.
Both black and white cookies and half-moon cookies are classic new york cookies that are very similar. Half-moon cookies have more of a cake-like texture and a domed top, while black and white cookies are flatter and have a more classic cookie texture.
Your cookies should puff up and turn a light golden brown when they are ready. This usually takes about 10-11 minutes. You don't want to overbake them to keep them moist.
Storing
It’s okay to store these cookies at room temperature for up to 3 days. Make sure that you store them in an airtight container so they won't dry out.
Freezing
Bake these cookies according to the instructions, letting the cookies cool completely, and freezing them in an airtight freezer-friendly container for up to 2 months.
To thaw, place them at room temperature for 1-2 hours to defrost.
Make it ahead of time
Make these ahead of time by baking the cookies and storing them in an airtight container in the fridge for up to 3 days.
When you are ready to assemble, make the icing and assemble the cookies according to the instructions.
Substitutions
Gluten-free- you can swap the flour with gluten-free flour to make these gluten-free. I never tested this recipe with gluten-free flour, but it should work.
Dairy-free- it’s easy to make this recipe dairy-free. Simply replace the butter with vegan butter and use vegan sour cream. Also, use dairy-free milk for the icing.
Variations
Frosting- half moon cookies come in two ways, either with chocolate and vanilla icing or with vanilla and chocolate buttercream.
If you prefer using buttercream, you can use the recipe for vanilla buttercream from my homemade oatmeal cream pies, and chocolate buttercream from my small batch chocolate cake.
Chocolate half moon cookies- when you are visiting new york bakeries you will find chocolate half moon cookies and vanilla ones.
This recipe makes the vanilla ones but you can easily make the chocolate ones by swapping ¼ cup of flour with cocoa powder.
Equipment
More cookie recipes
Cheesecake cookies- These cheesecake cookies are made with a graham cracker cookie, that is topped with a creamy cheesecake topping, and graham cracker crumbs.
Chewy pistachio cookies- These pistachio cookies are made with a chocolate chip cookie base filled with chopped pistachios and chocolate chunks and topped with flakey salt!
Strawberry shortcake cookies- These strawberry shortcake cookies are made with fresh strawberries, and rolled in buttery shortcrust crumble, and are chewy on the inside and crunchy on the outside.
If you tried this recipe, don’t forget to leave a rating and a comment below. We love hearing from you.
If you liked this recipe
📖 Recipe

Vanilla Half Moon Cookies (Bakery Style)
Ingredients
- 4.58 oz Butter softened
- ¾ cup Granulated sugar
- ⅓ teaspoon Kosher salt
- 1 teaspoon Vanilla extract
- 1 Egg
- 1 Egg yolk
- ⅓ cup Sour cream room temp, full fat
- 1 ⅔ cups Flour AP
- ⅓ teaspoon Baking powder
- ⅓ teaspoon Baking soda
For the icing
- 2 cups Powdered sugar
- 3-4 teaspoon Milk or more if needed
- 1 tablespoon Corn syrup
- 1 teaspoon Vanilla extract
- 3 tablespoon Cocoa powder
Instructions
- Preheat oven to 180c (350f) and prepare a baking sheet with parchment paper.
- Into a big mixing bowl, add the room temperature butter, vanilla extract, kosher salt, and sugar, and cream it with an electric hand mixer for 2-3 minutes or until it's creamy and light in color.
- Add the eggs, and mix until combined and creamy.
- Add the sour cream and mix until well combined.
- Then, add the flour, baking powder, and baking soda, and mix with the hand mixer until just combined. Do not overmix!
- Use a 2 tbsp cookie scooper to scoop out the cookies or scoop the cookies with a regular tablespoon, 2 tablespoons at a time.
- Bake in a 180c (350f) preheated oven for 10-11 minutes or until the cookies are puffed and they have a light golden brown color.
- Let the cookies cool for 5 minutes, and then transfer them to a wire rack to cool completely.
Make the icing
- In a medium-sized mixing bowl, add the powdered sugar, milk, corn syrup, and vanilla extract and mix with a small whisk until you get a creamy and smooth mixture.
- Divide the icing into 2 separate bowls, and add the sifted cocoa powder plus 1-2 tablespoon of milk. Whisk and add more milk if the mixture is too thick.
- Using a small offset spatula, cover half of each cookie (flat side up) with vanilla icing and chocolate icing. I recommend drawing a line down the middle to create a perfect borderline.
- Allow the icing to set on each cookie before serving. Place them in the fridge for 20 minutes to speed up to setting process.
Notes
- Our top tip of these is adding icing to the bottom side of the cookie instead of the top. The flat surface is easier to frost and will give you a perfect black and white cookie, and it's also the classic way to make them.
- If the icing is too thick, add a tablespoon or more until you get the right consistency.
- Use room temperature ingredients. It is important that you use room-temperature ingredients like eggs and butter. This step ensures that your mixture mixes into a homogenous mixture and bakes perfectly.
- Don’t overmix the batter, you don’t want to develop the gluten in the flour. This step ensures you have moist cookies and not dense and dry cookies.
- Make sure that your butter is at room temperature. An hour or two before making these cookies, take the butter out of the fridge and let it come to room temperature. The butter should be soft to the touch. If your butter is too cold, it will be harder to mix and there will be lumps of butter in the dough.
- Measure your flour correctly! When measuring your flour, avoid scooping it with a measuring cup. Instead, stir the flour with a spoon to create as many air pockets as possible, and spoon it into your measuring cup. Finally, level it with a back of a knife.
- Line your sheet pan with parchment paper or a silicone mat! This step helps the cookies to bake evenly, and it makes sure that your cookies release easily from the pan.
- Use a cookies scoop to scoop out the cookies, that way you will have even-sized cookies, plus it ensures that your cookies bake evenly.
- Be patient! I know it’s extremely tempting to eat these cookies as they are pulled out of the oven, but let these cookies cool for at least 15 minutes so they will be firmer and won’t crumble up.
- We suggest letting these cookies cool for 5 minutes and then transferring them to a wire rack to cool for at least 10 more minutes. This step ensures that the bottom of your cookies will not be soggy from the steam.


Comments
No Comments