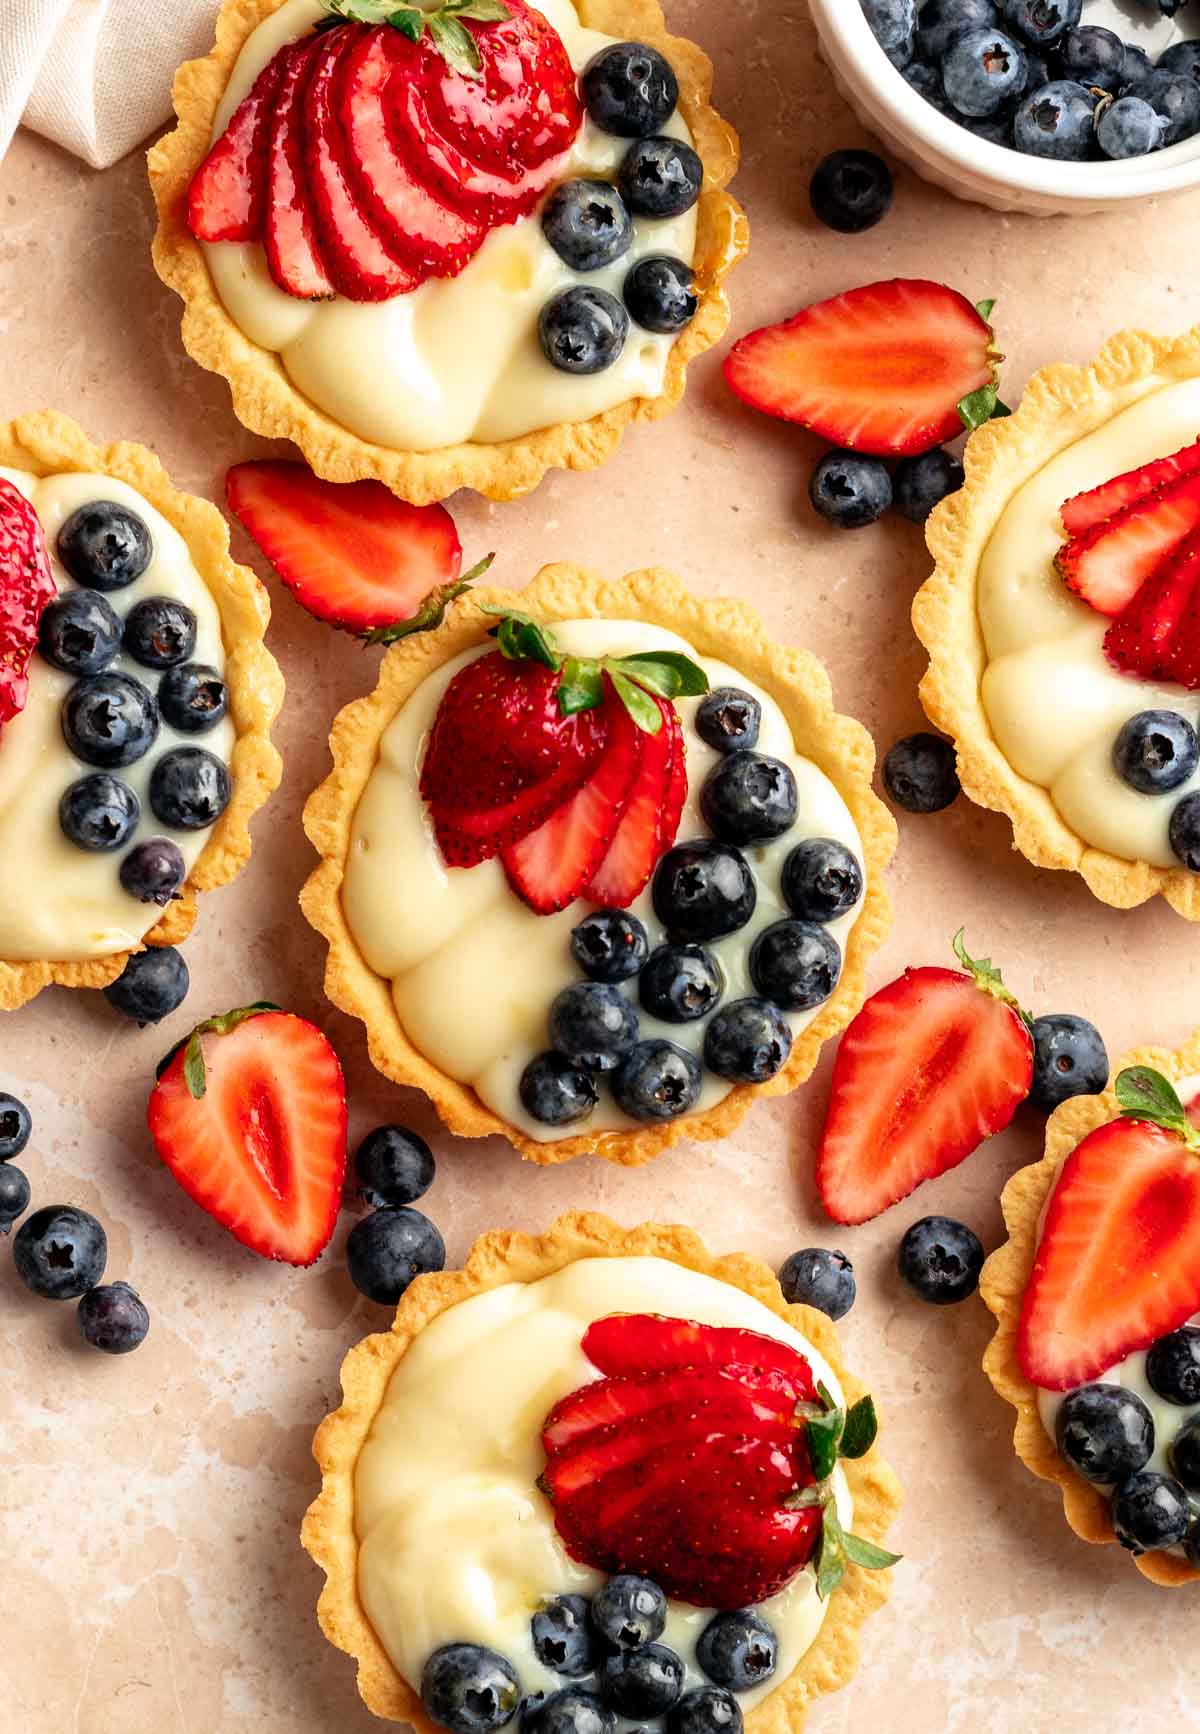
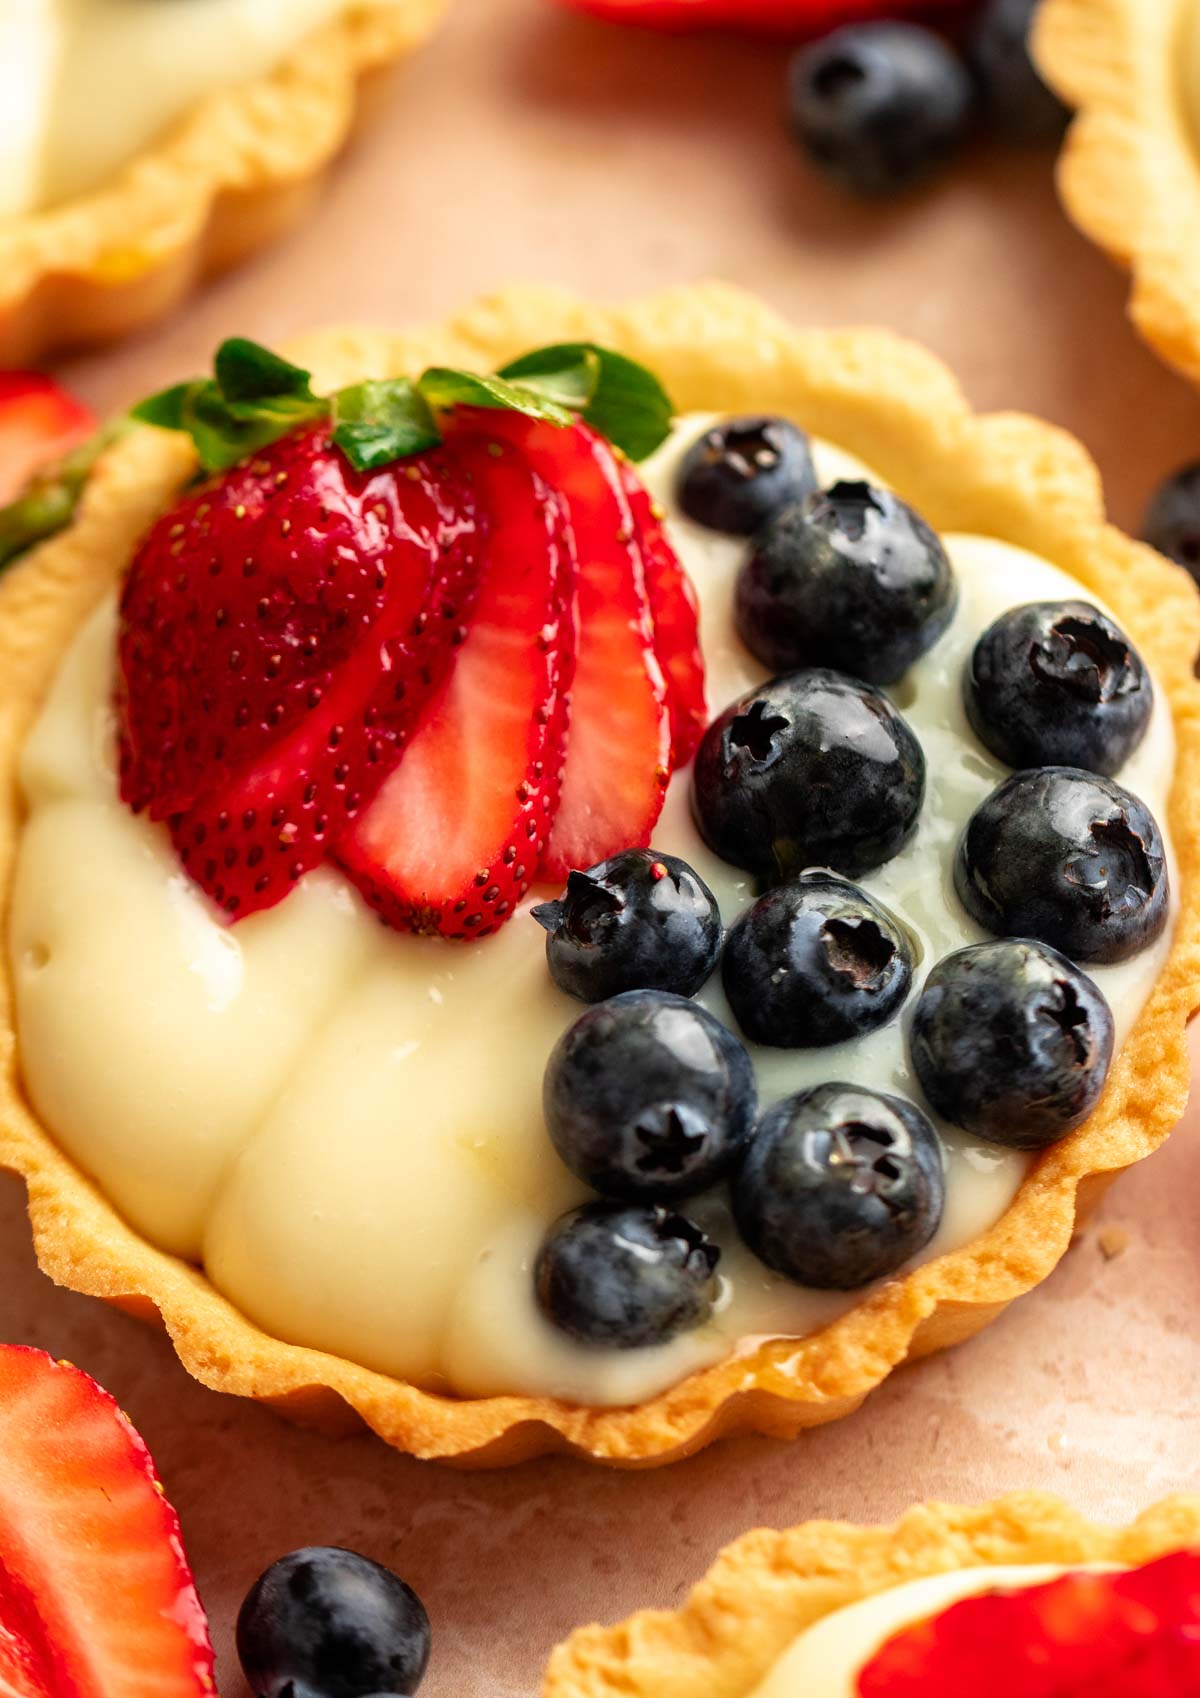
These mini fruit tarts are made with easy and buttery tart shells, filled with homemade pastry cream, and topped with fresh fruit.
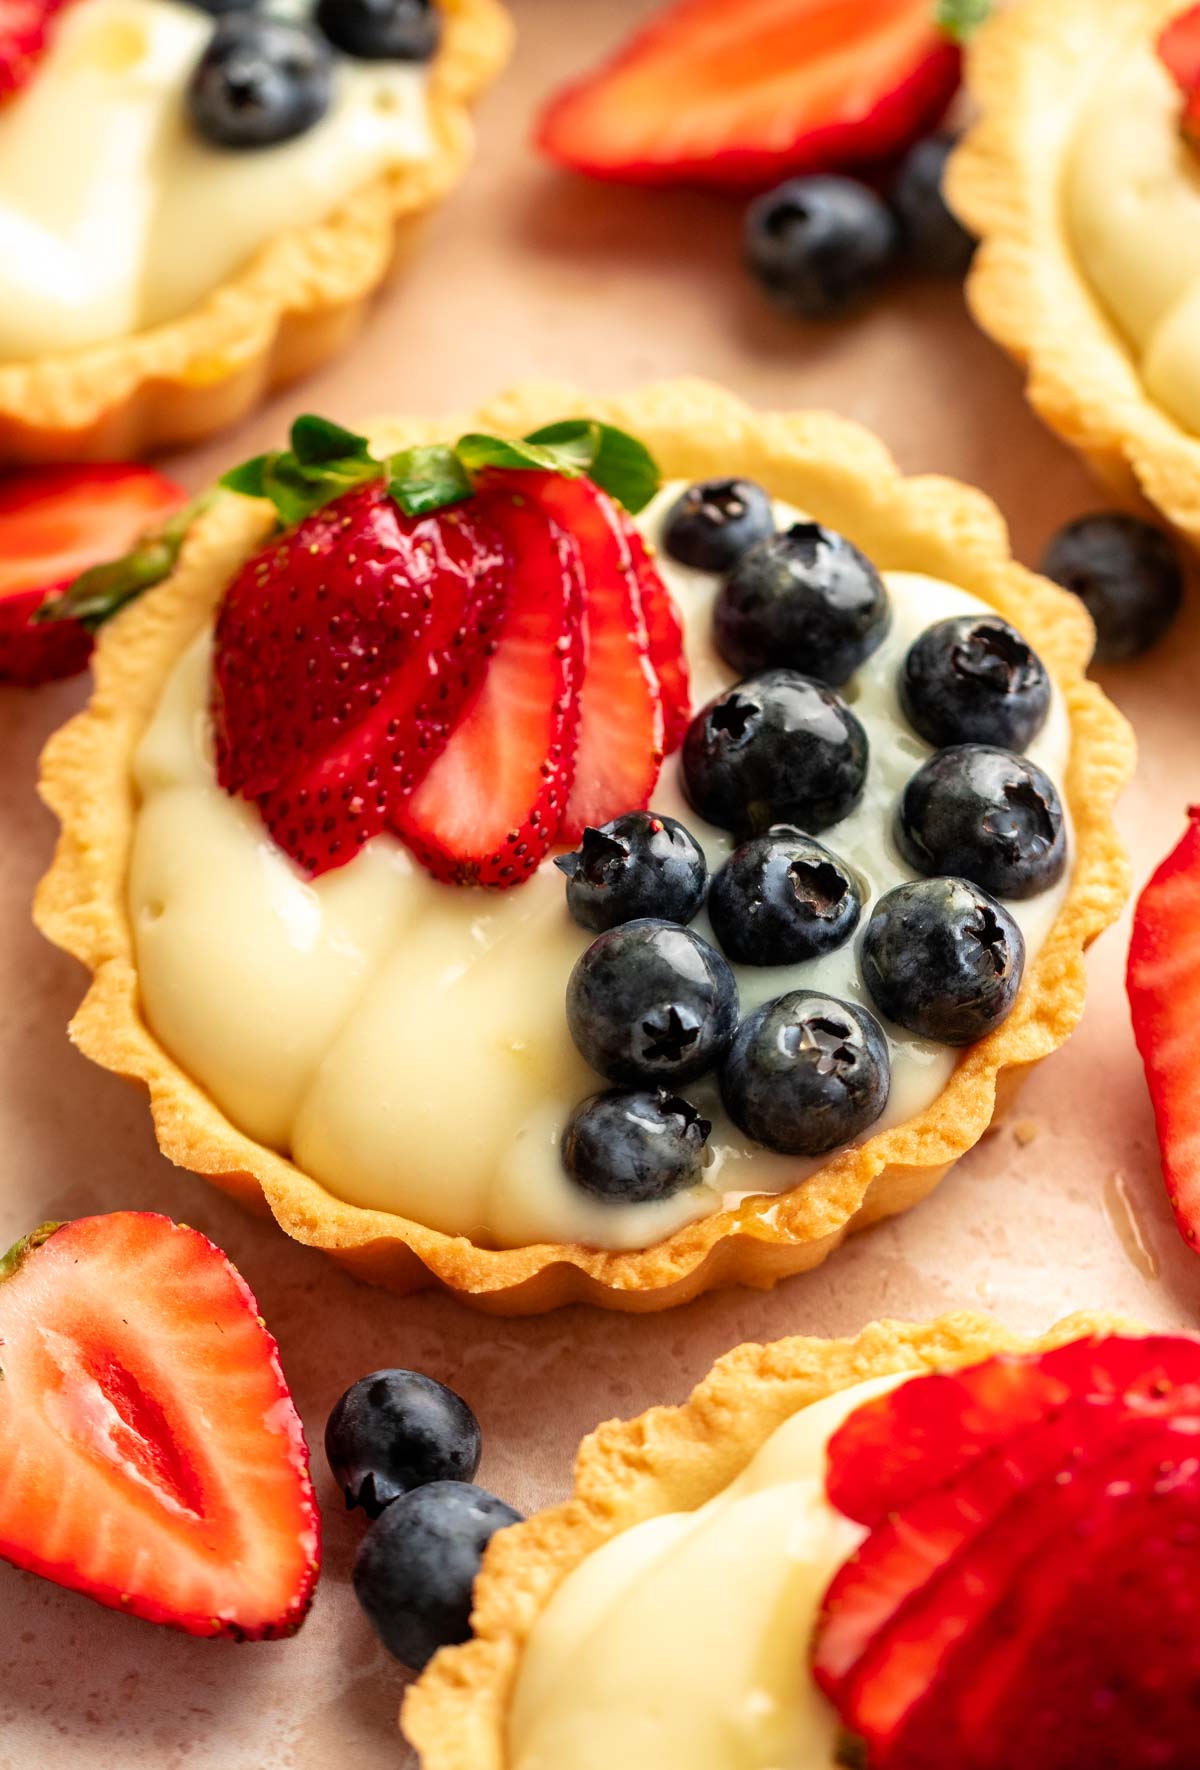
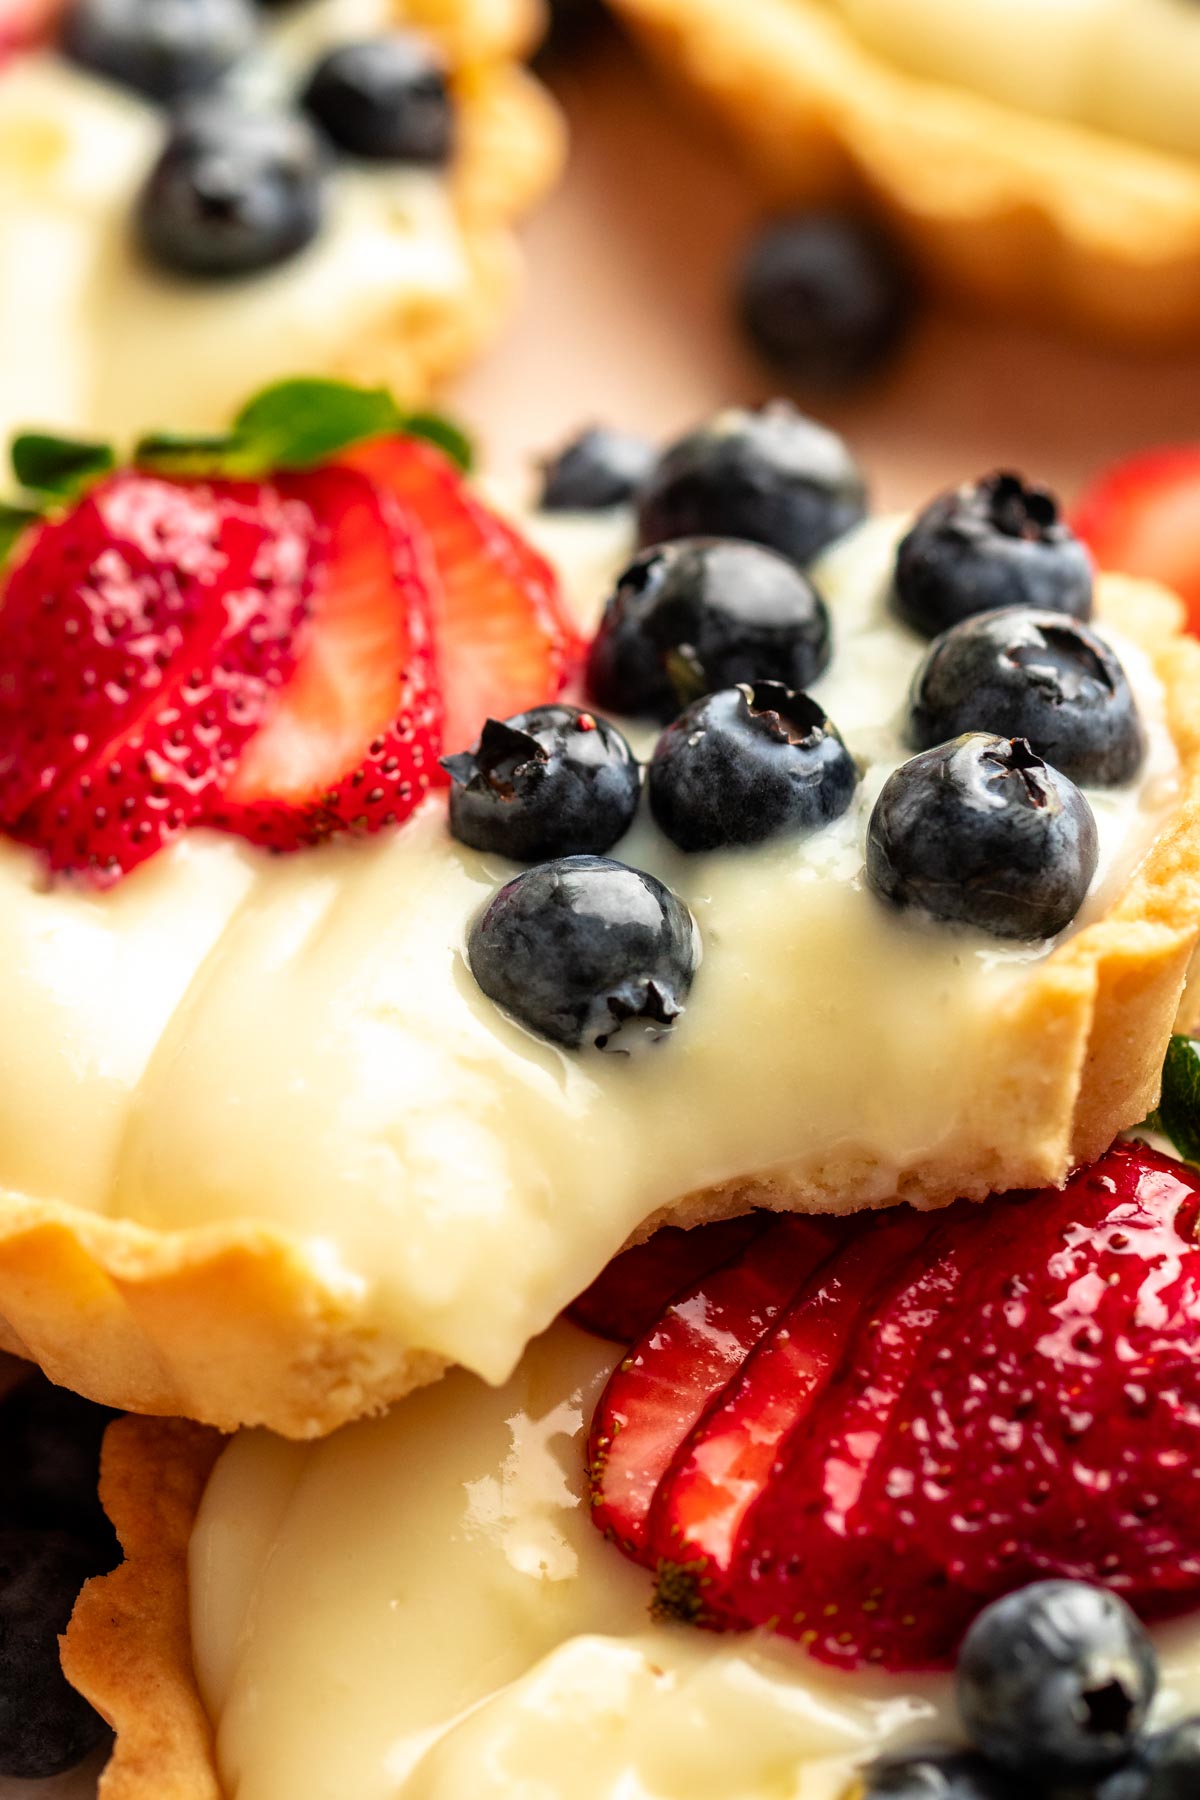
These mini fruit tartlets are made with a buttery tart shell, which is crisp and flaky. Filled with a smooth and creamy homemade pastry cream that adds a rich, velvety texture.
The pastry cream is rich but not heavy, pairing beautifully with the bright, fresh fruit on top.
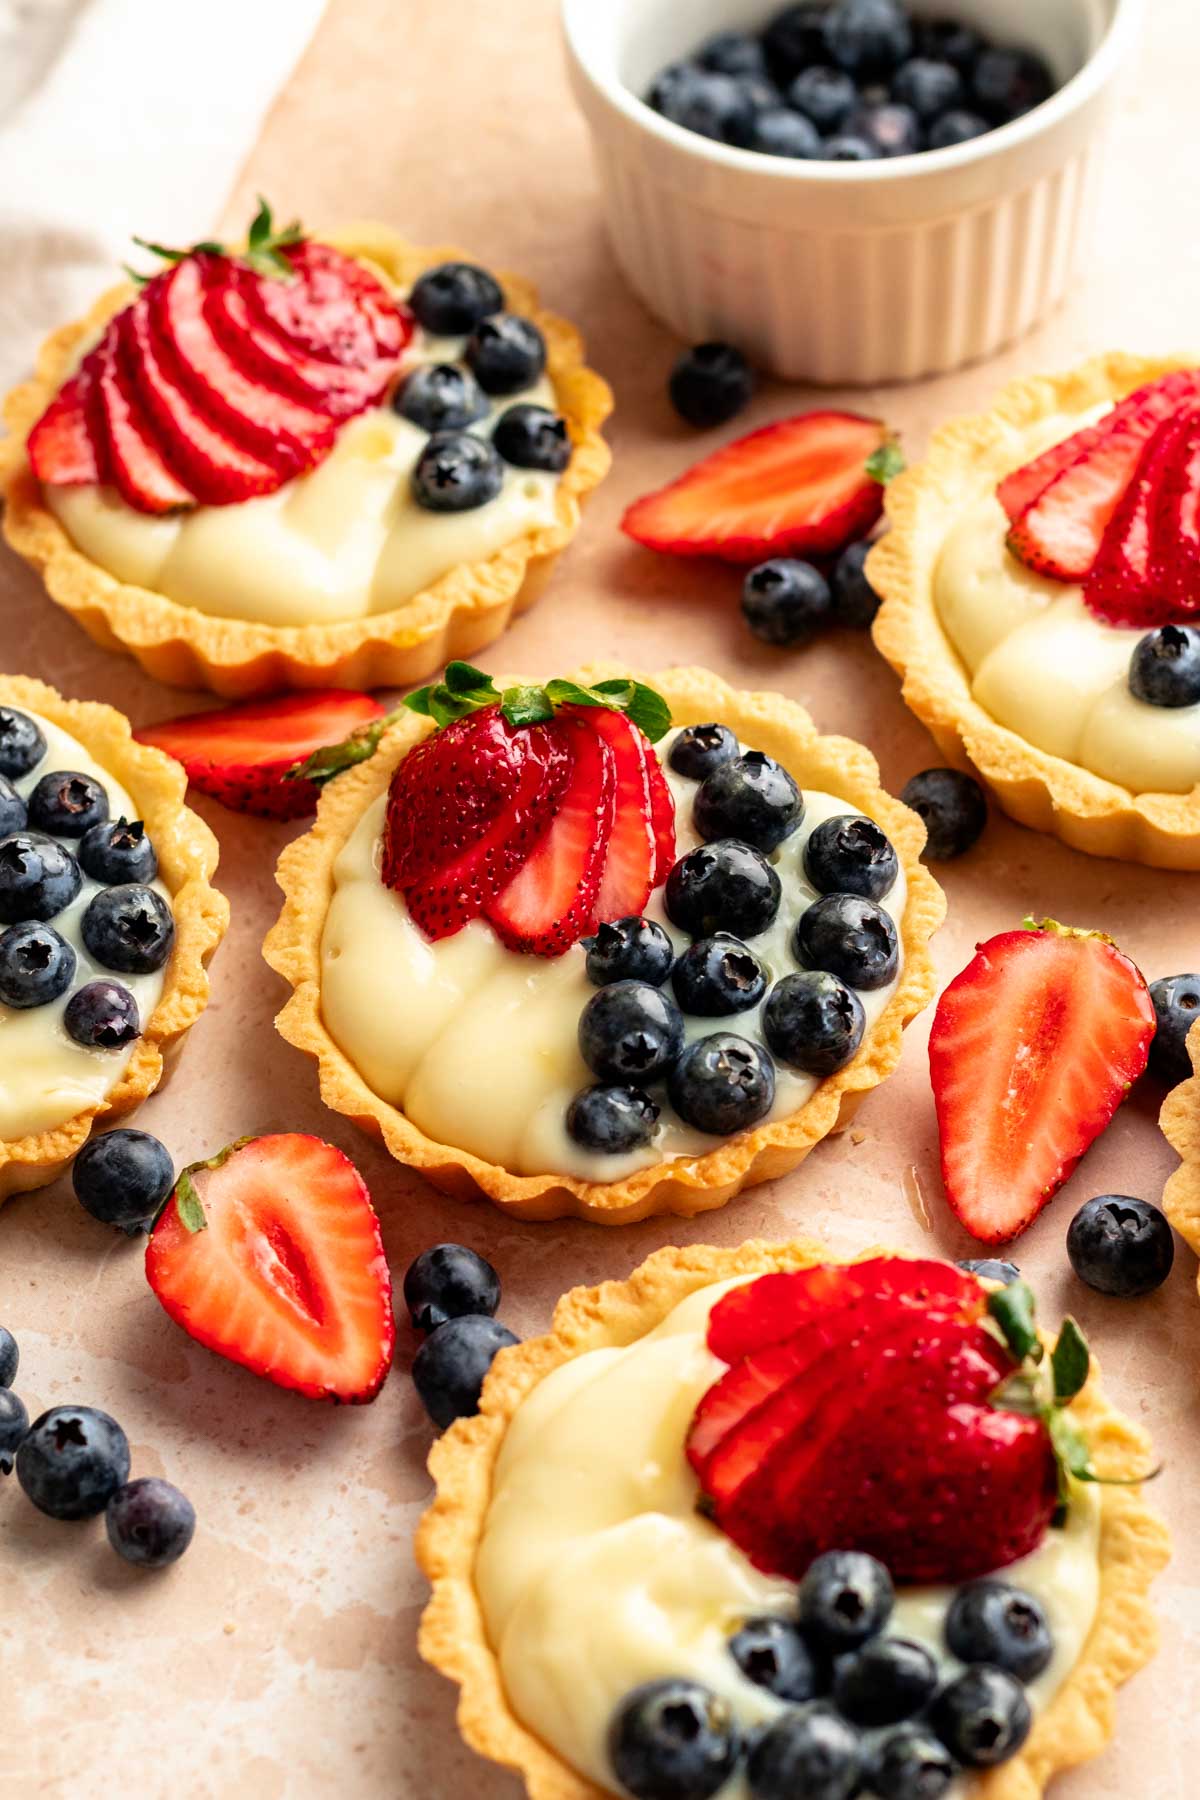
You can customize them with whatever fruits are in season or your personal favorites, making them as simple or fancy as you'd like.
They also make a beautiful dessert for gatherings or special occasions. Serve them as part of a dessert platter, at a brunch, or even as a light summer treat.
For more mini desserts, check out my mini chocolate tarts, mini strawberry cheesecakes, mini no bake cheesecakes, mini Oreo cheesecakes, mini pumpkin pies, brownie bites, and cheesecake balls.
Jump to:
Why this recipe works
- Tart crust- The buttery pâte sucrée crust is crisp and tender. It holds up well and pairs perfectly with the pastry cream and fresh fruit.
- Creamy pastry cream filling- The homemade pastry cream is smooth, rich, and velvety. It adds a luscious contrast to the crisp shell and fresh fruit.
- Fresh fruit topping- You can use a variety of fruits like berries, kiwi, or peaches. It adds freshness, color, and a juicy bite to every tart.
- Perfect texture combo- Each tart has a balance of crunchy, creamy, and juicy textures. That mix makes every bite interesting and satisfying.
- Individual portion size- These are perfectly portioned so there is no need to slice the tart with a tough dough and runny filling that can spill from the sides.
Ingredients
Before you start to make this recipe, measure and prepare your ingredients so the cooking process will go smoothly and easily.
Full measurements are in the recipe card below.
For the crust
Flour– I used all-purpose flour for the tart crust. You can also use pastry flour for a more delicate texture.
Eggs- you will need 1 large egg for the crust. Whisk the egg with a fork before adding it to the dough. The egg helps bind the dough together.
Kosher salt- you will need about ¼ teaspoon of kosher salt for this recipe.
Butter- cold, unsalted butter is best for making a tender, flaky crust. Make sure it's cut into small cubes.
Powdered sugar- you will need powdered sugar for this recipe. You don’t have to buy powdered sugar; you can simply make it at home by blending granulated sugar in a blender or food processor.
For the pastry cream
Whole milk- gives the pastry cream a rich and creamy base. You can also use half-and-half for extra richness.
Egg yolks- help thicken the cream and add a smooth, custardy texture. Use large eggs for best results.
Granulated sugar- adds sweetness and balances the richness of the cream.
Unsalted butter- stirred in at the end to add richness and make the cream silky. Use high-quality butter for the best flavor.
Vanilla extract- for extra flavor. You can also use vanilla bean paste or pure vanilla extract.
Cornstarch- you will need cornstarch for the pastry cream. This can't be substituted.
Instructions
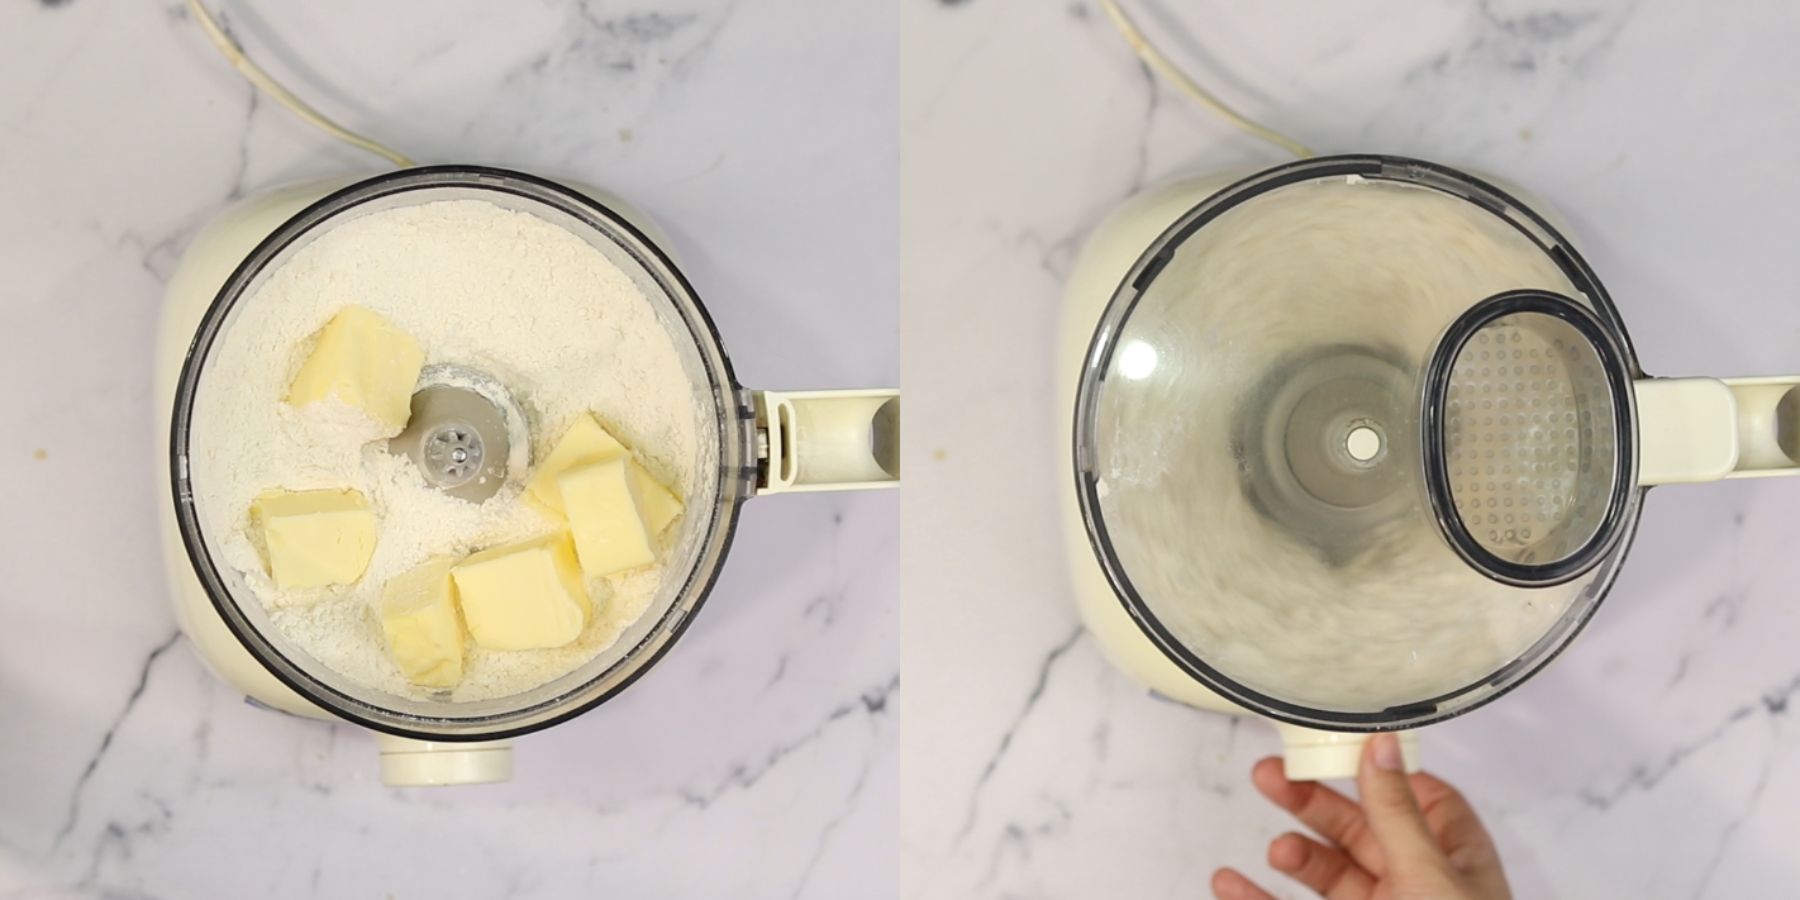
Start by making the tart dough. In a food processor, add the flour, powdered sugar, and salt, and mix until combined.

Add the cold cubed butter, and blend until there are pea-sized pieces of butter. If you don't have a food processor, you can do it by hand, mixing the cold butter into the flour mixture. Make sure that your hands are cold.
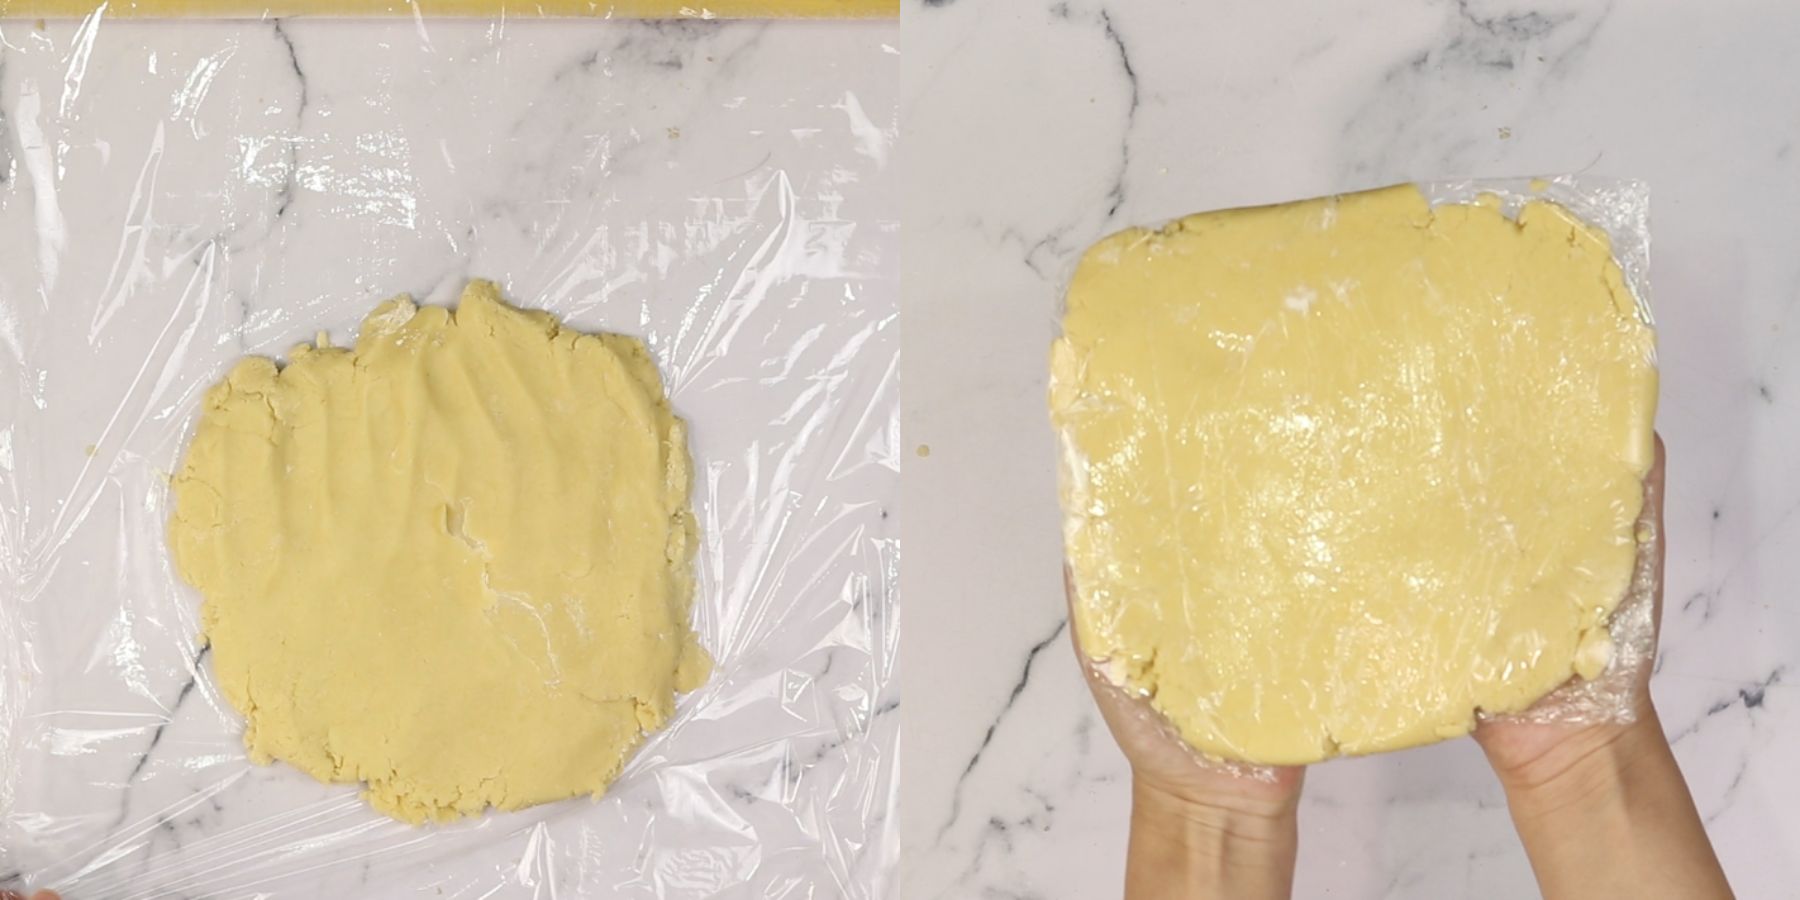
Then, add the egg, and the vanilla extract and mix until a dough forms. Try not to overmix the dough.
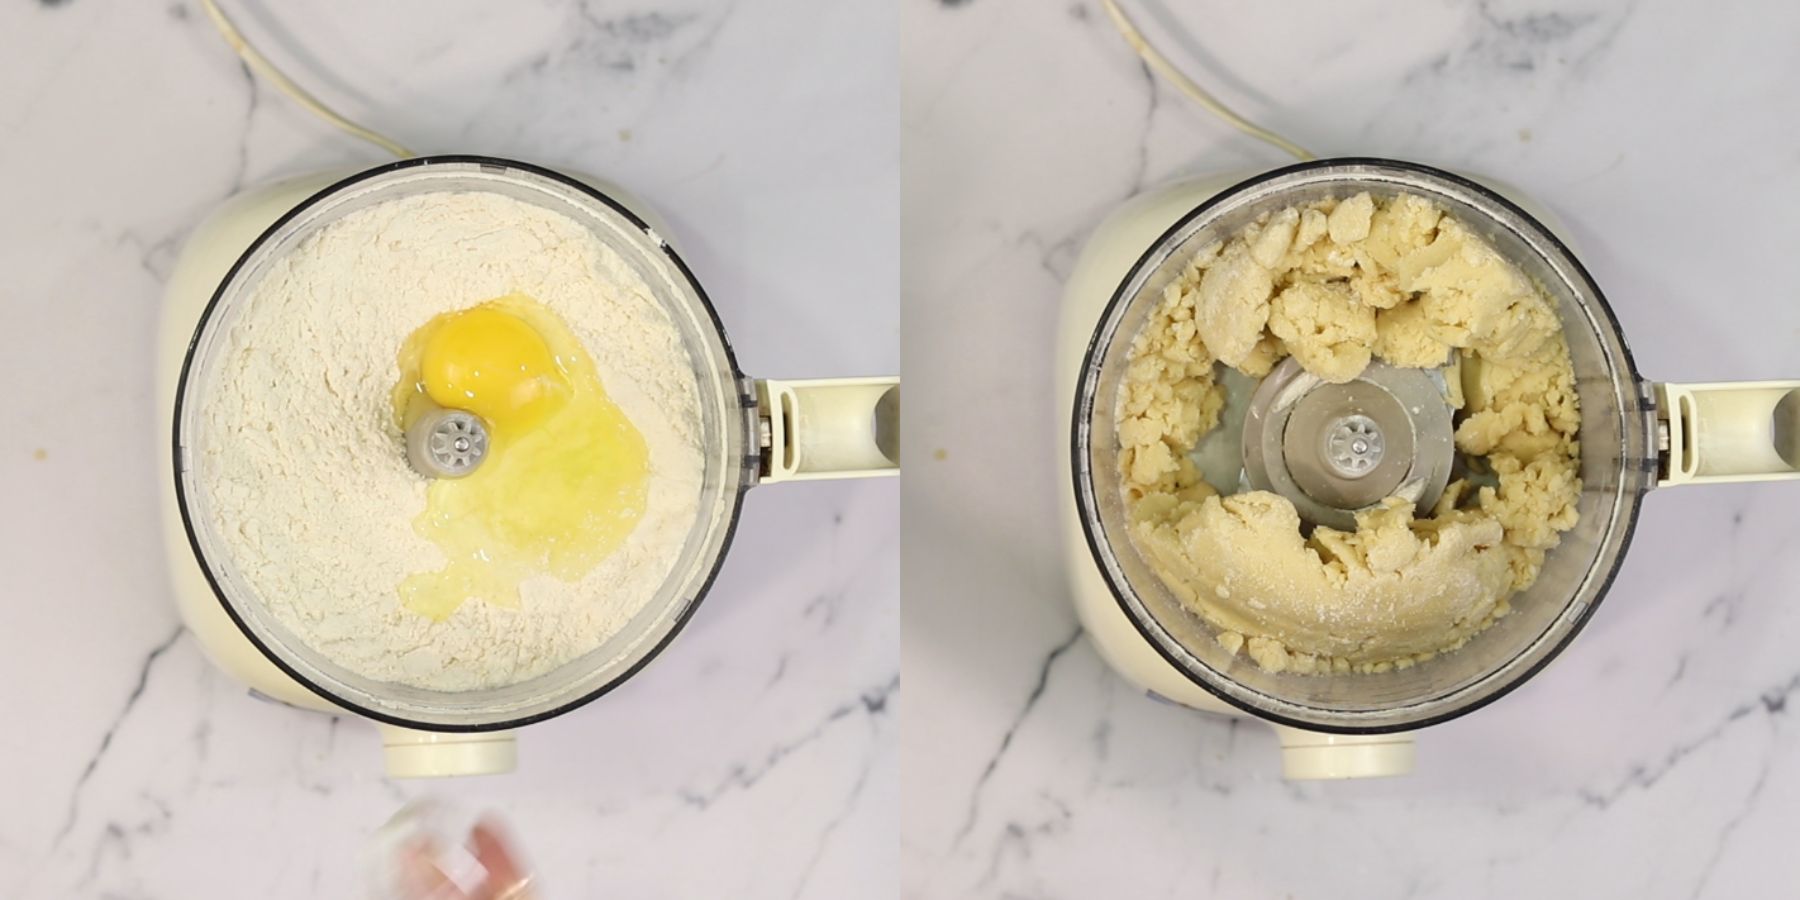
Cover the dough with plastic wrap and let it chill in the fridge for at least an hour.
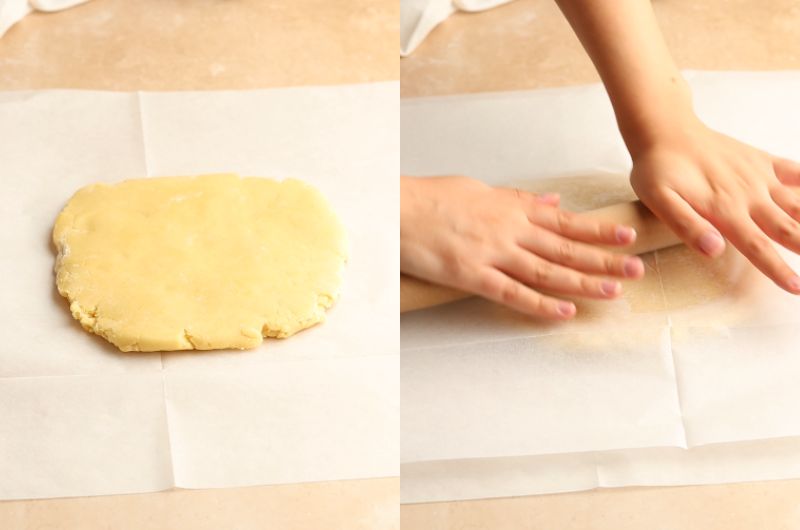
Transfer the dough onto a clean floured surface and roll it with a rolling pin into a rectangle.
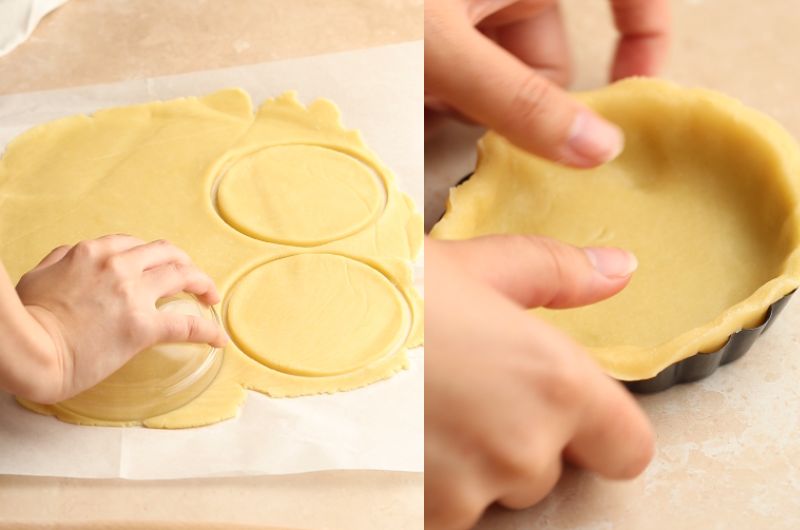
Use a cookie cutter or a round bowl (1 inch larger than the mini tart pans) and cut small rounds of the pastry.
Place the pastry inside the mini tart pans and press it down using your clean hands.
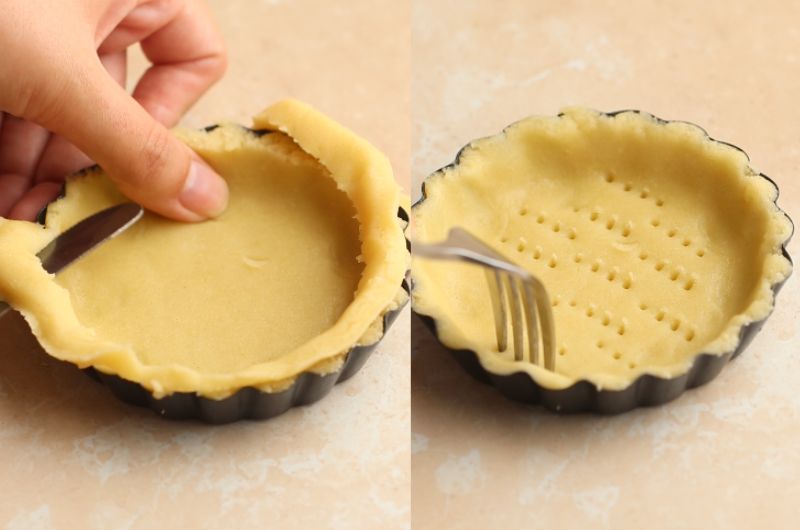
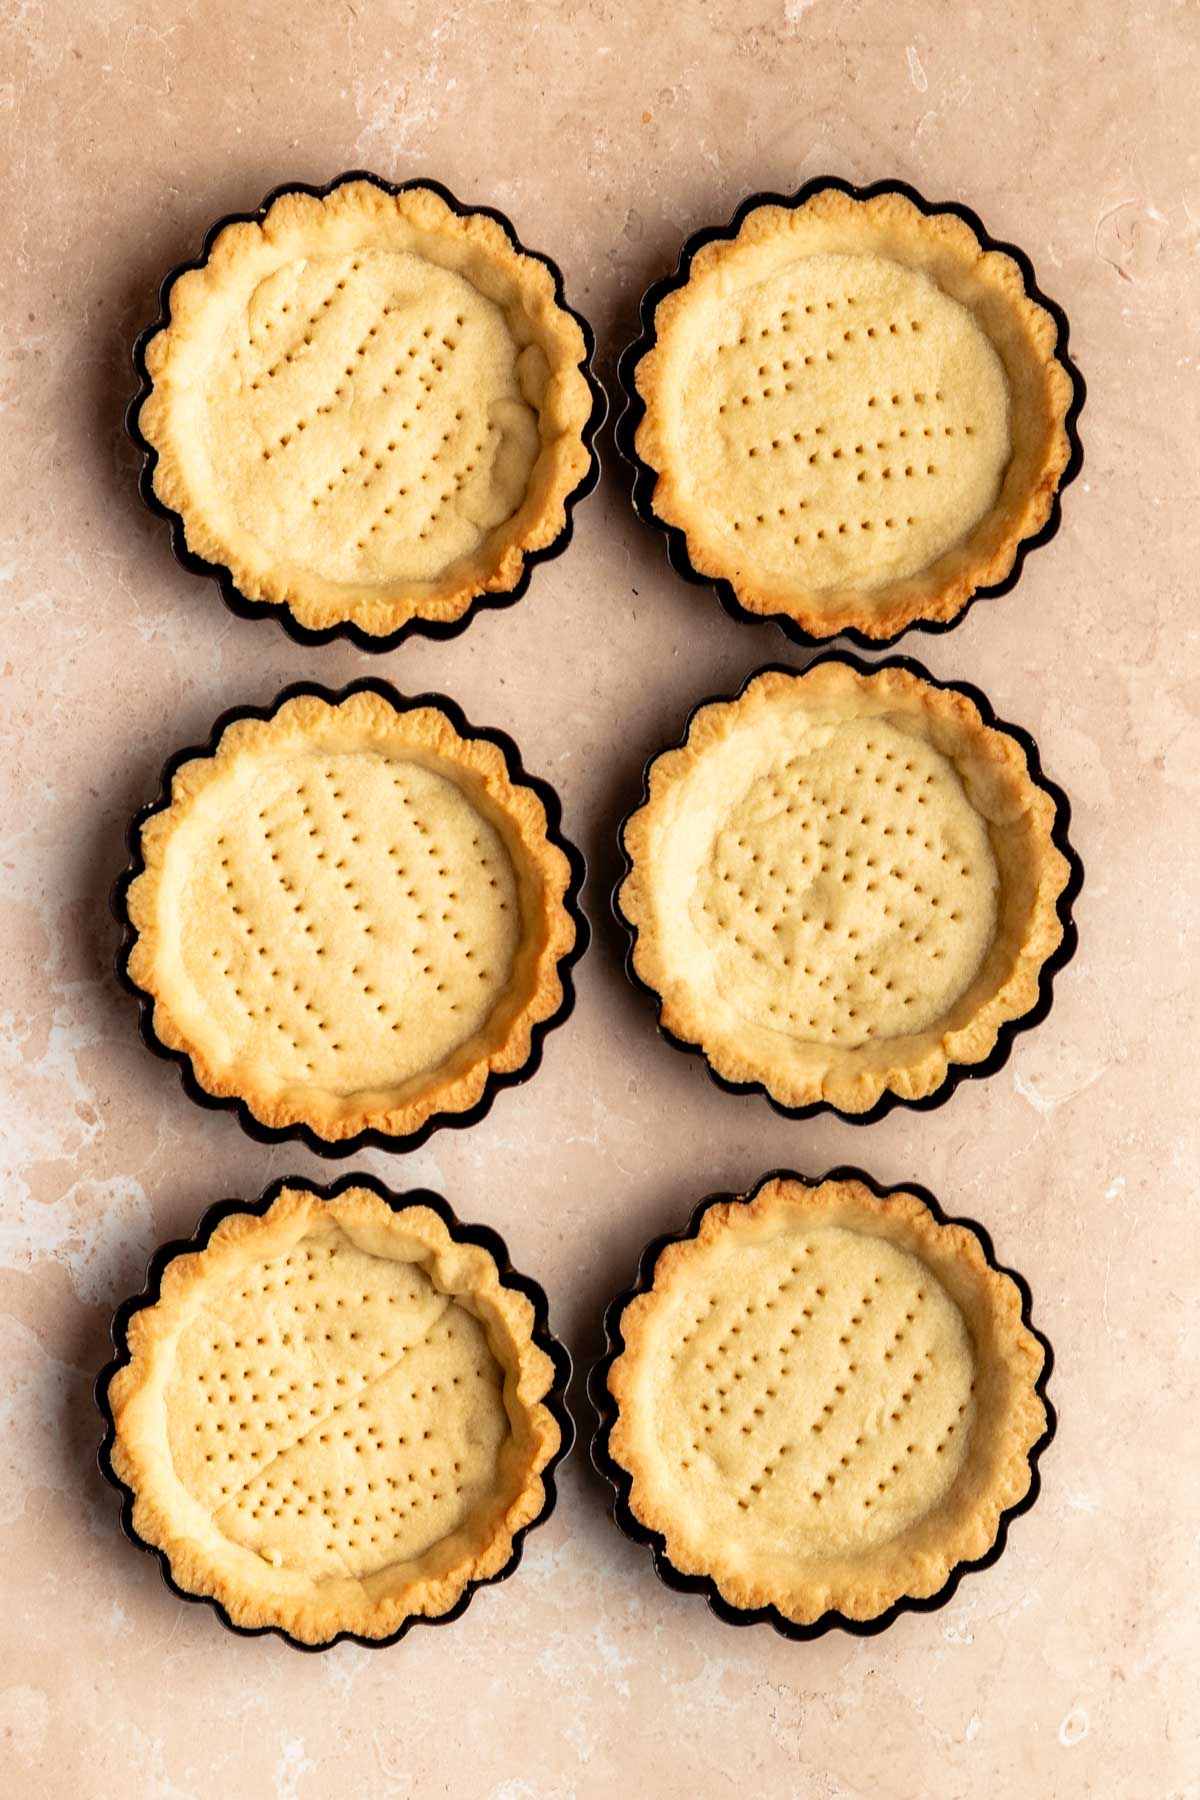
Cut off the extra edges. Make holes in the bottom of the pan with a fork and place them in the freezer for at least 20 minutes.
Bake in a 180c (350f) preheated oven for about 15-20 minutes or until the crust is a light golden brown color. Remove from the oven and let it cool while making the filling.
Make the pastry cream
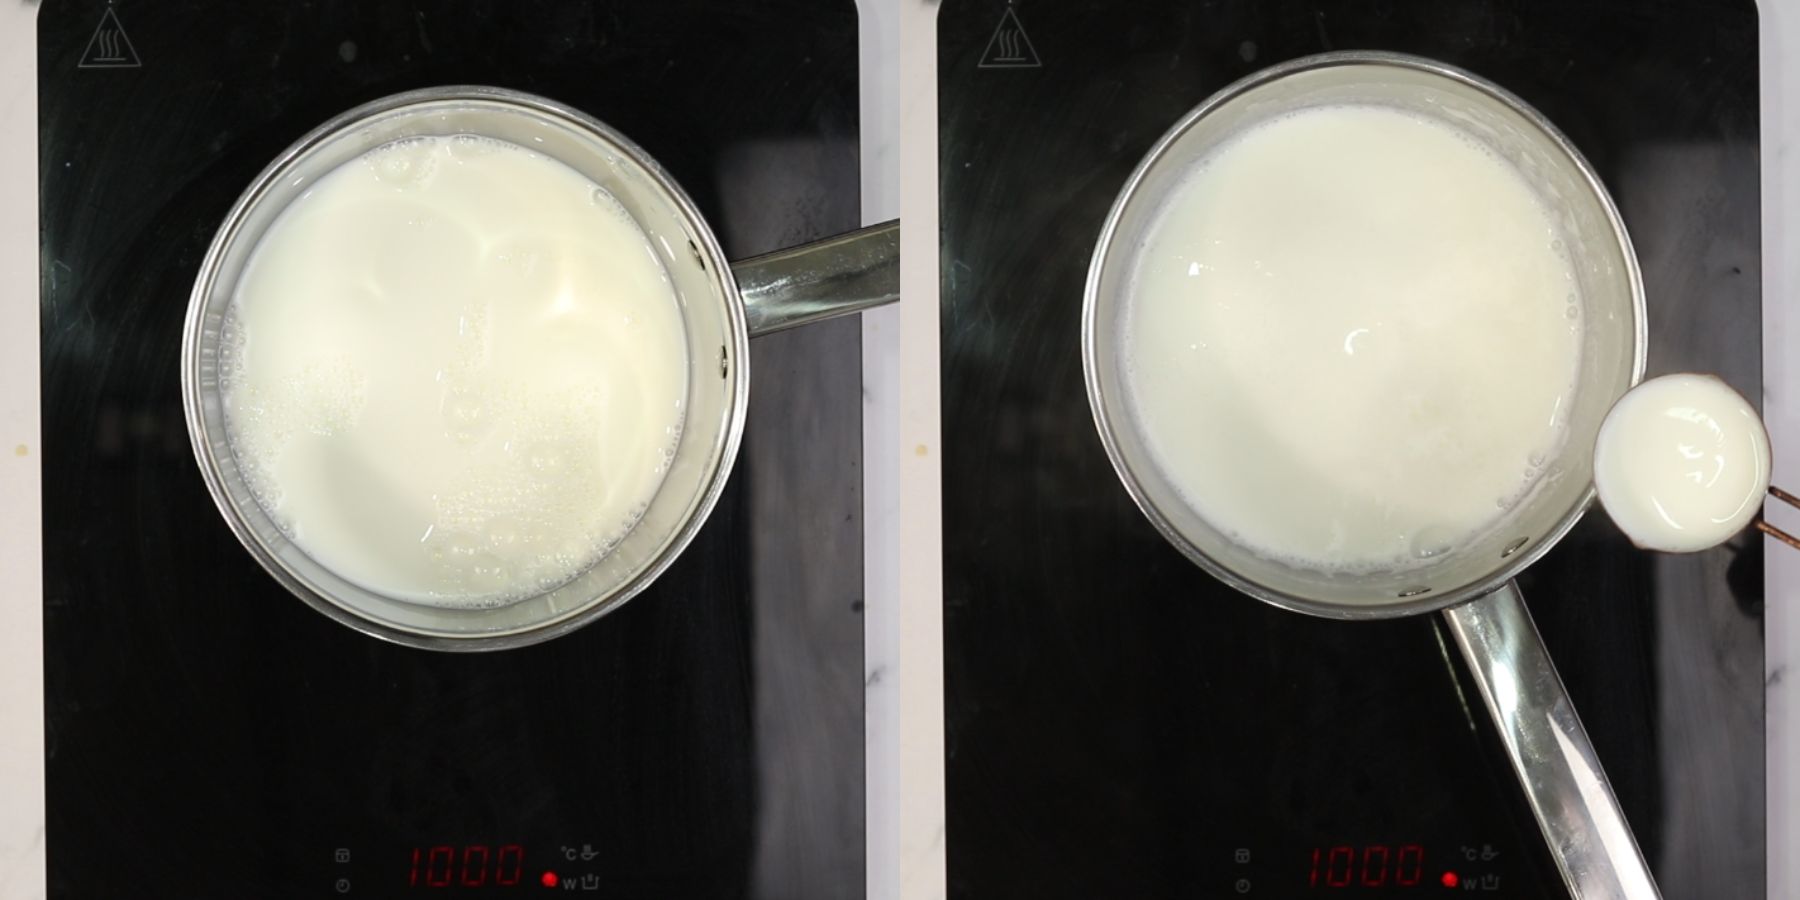
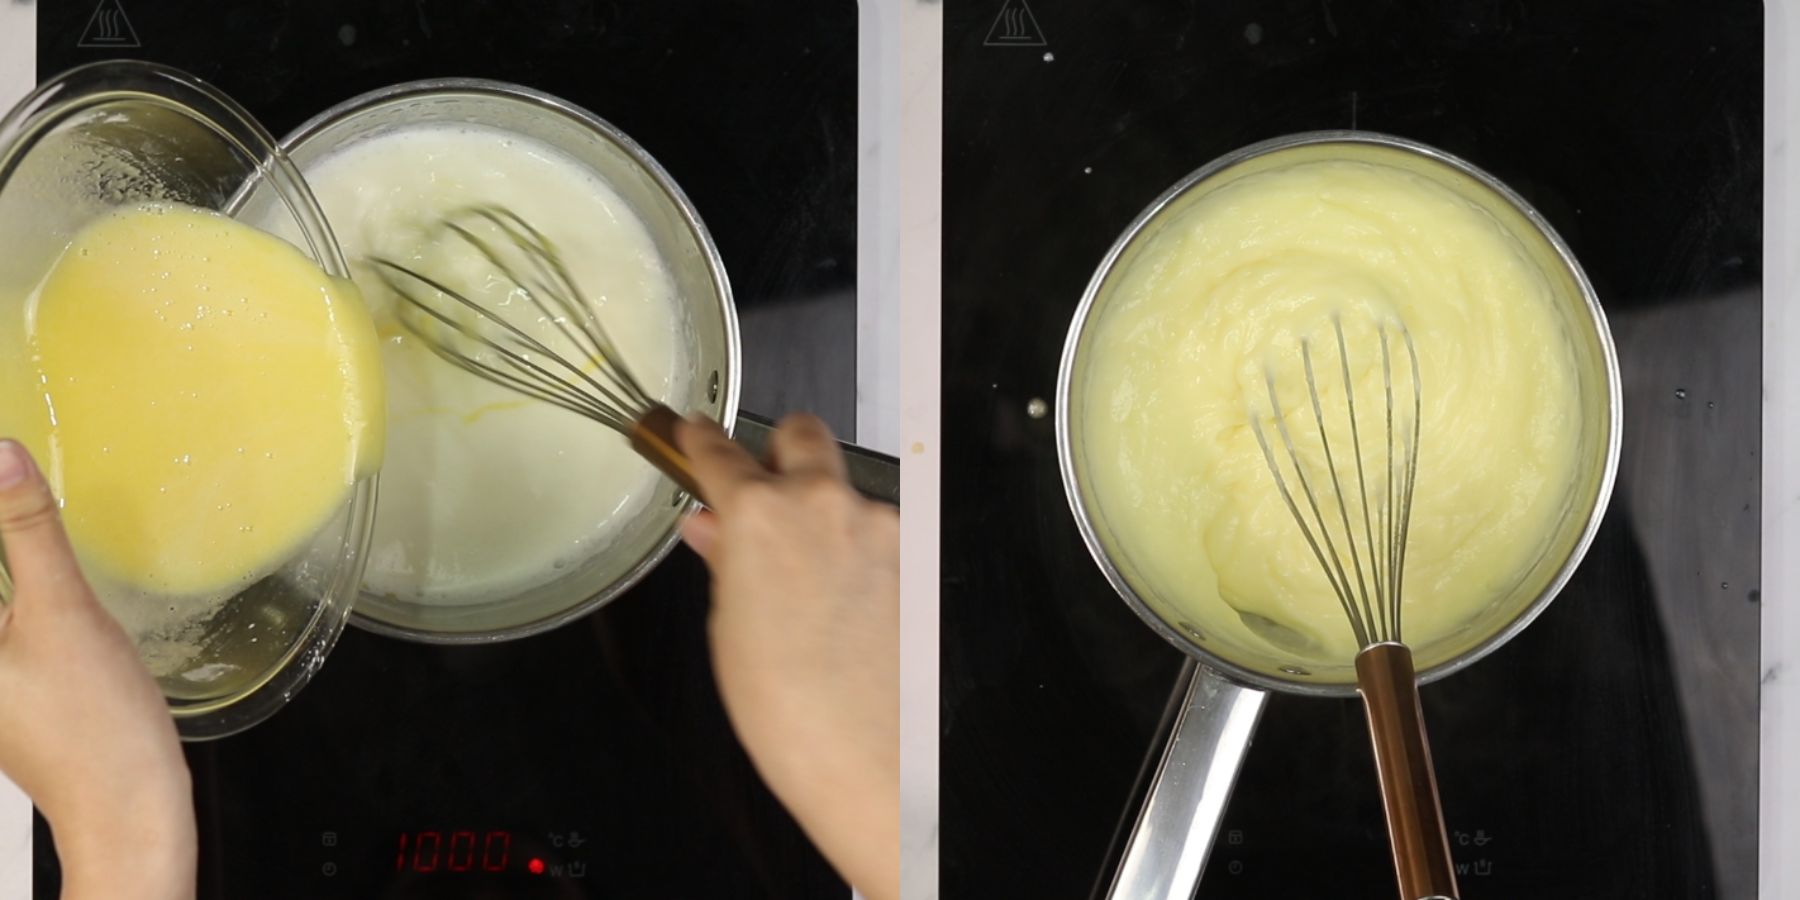
Place a saucepan over high heat and fill it with the milk and vanilla extract. Let it simmer, and remove it from the heat. Scoop ¼ cup of the milk and set aside.
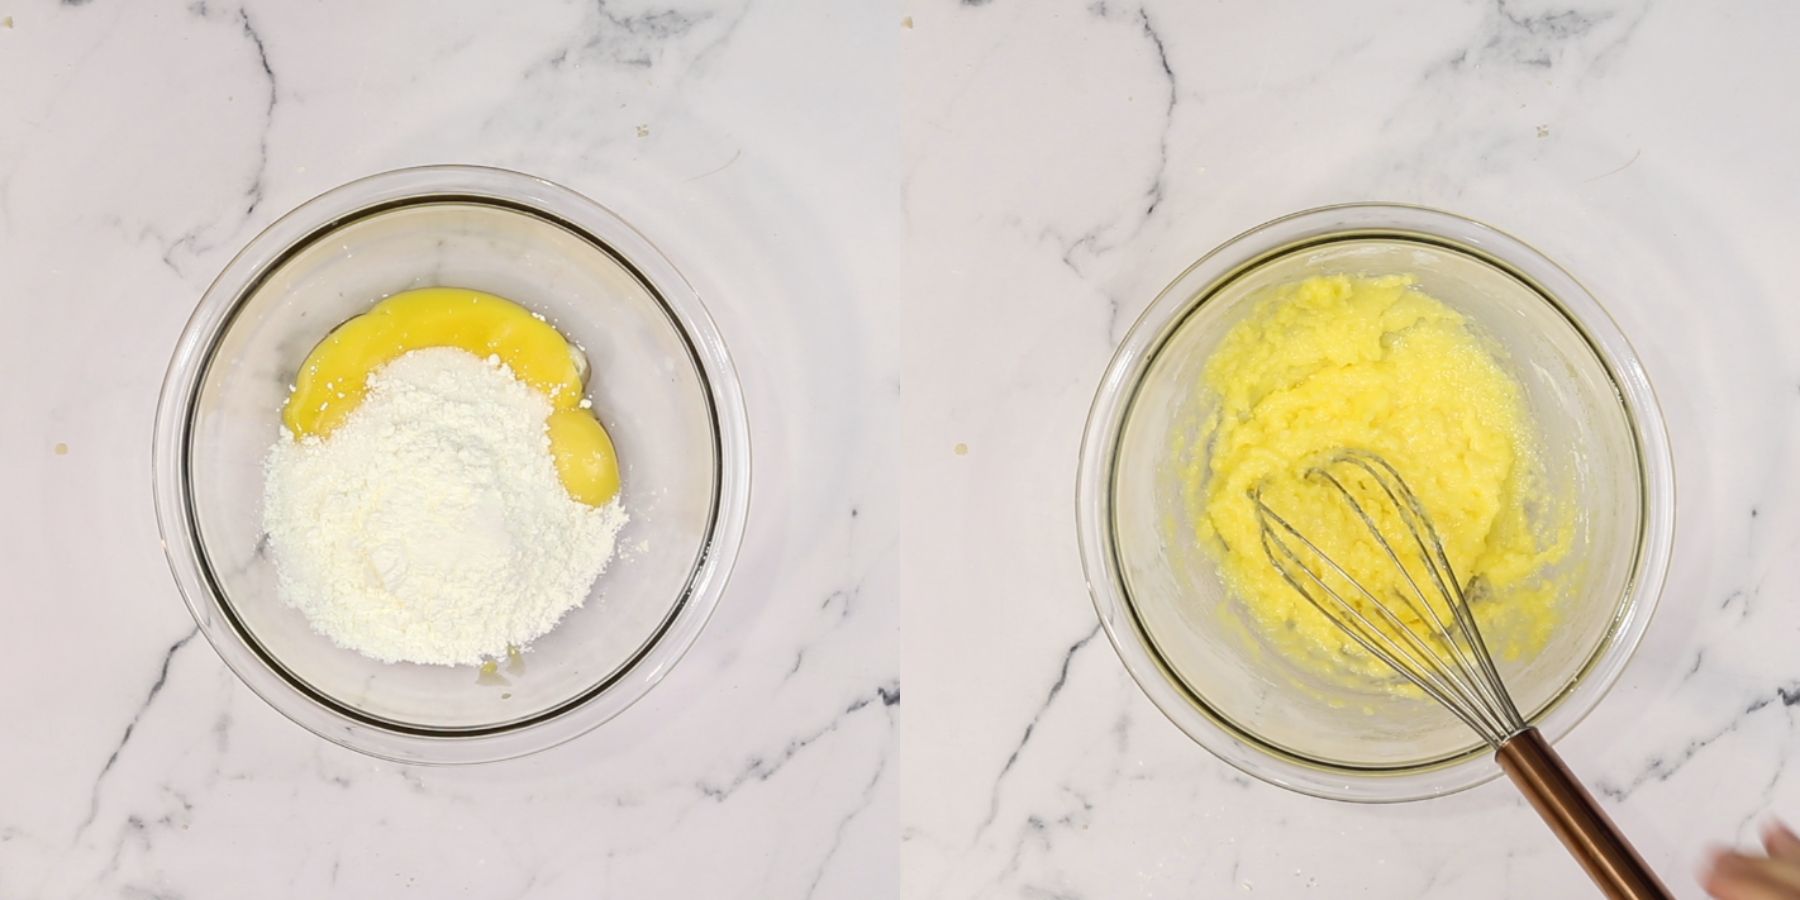
In a small mixing bowl, add the sugar and cornstarch. Mix with a whisk until combined. Add the egg yolks and mix.
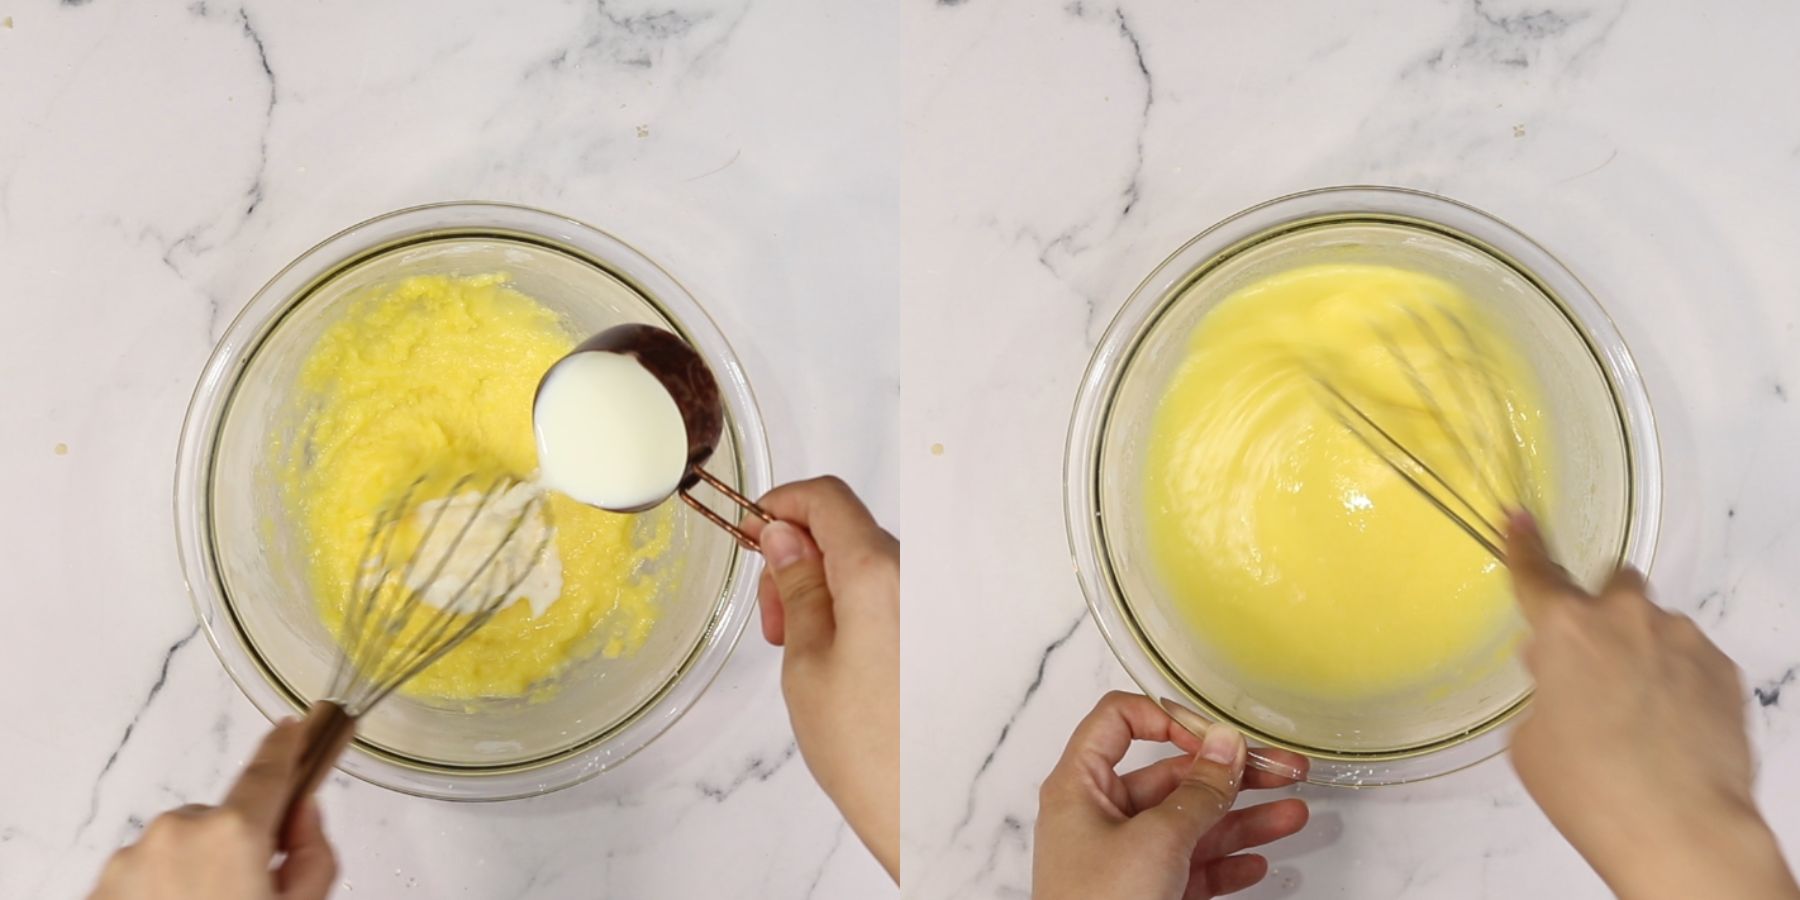
Gradually add the ¼ cup of milk and mix constantly with a whisk. This step is used to temper the egg yolks and avoid them from cooking too fast.
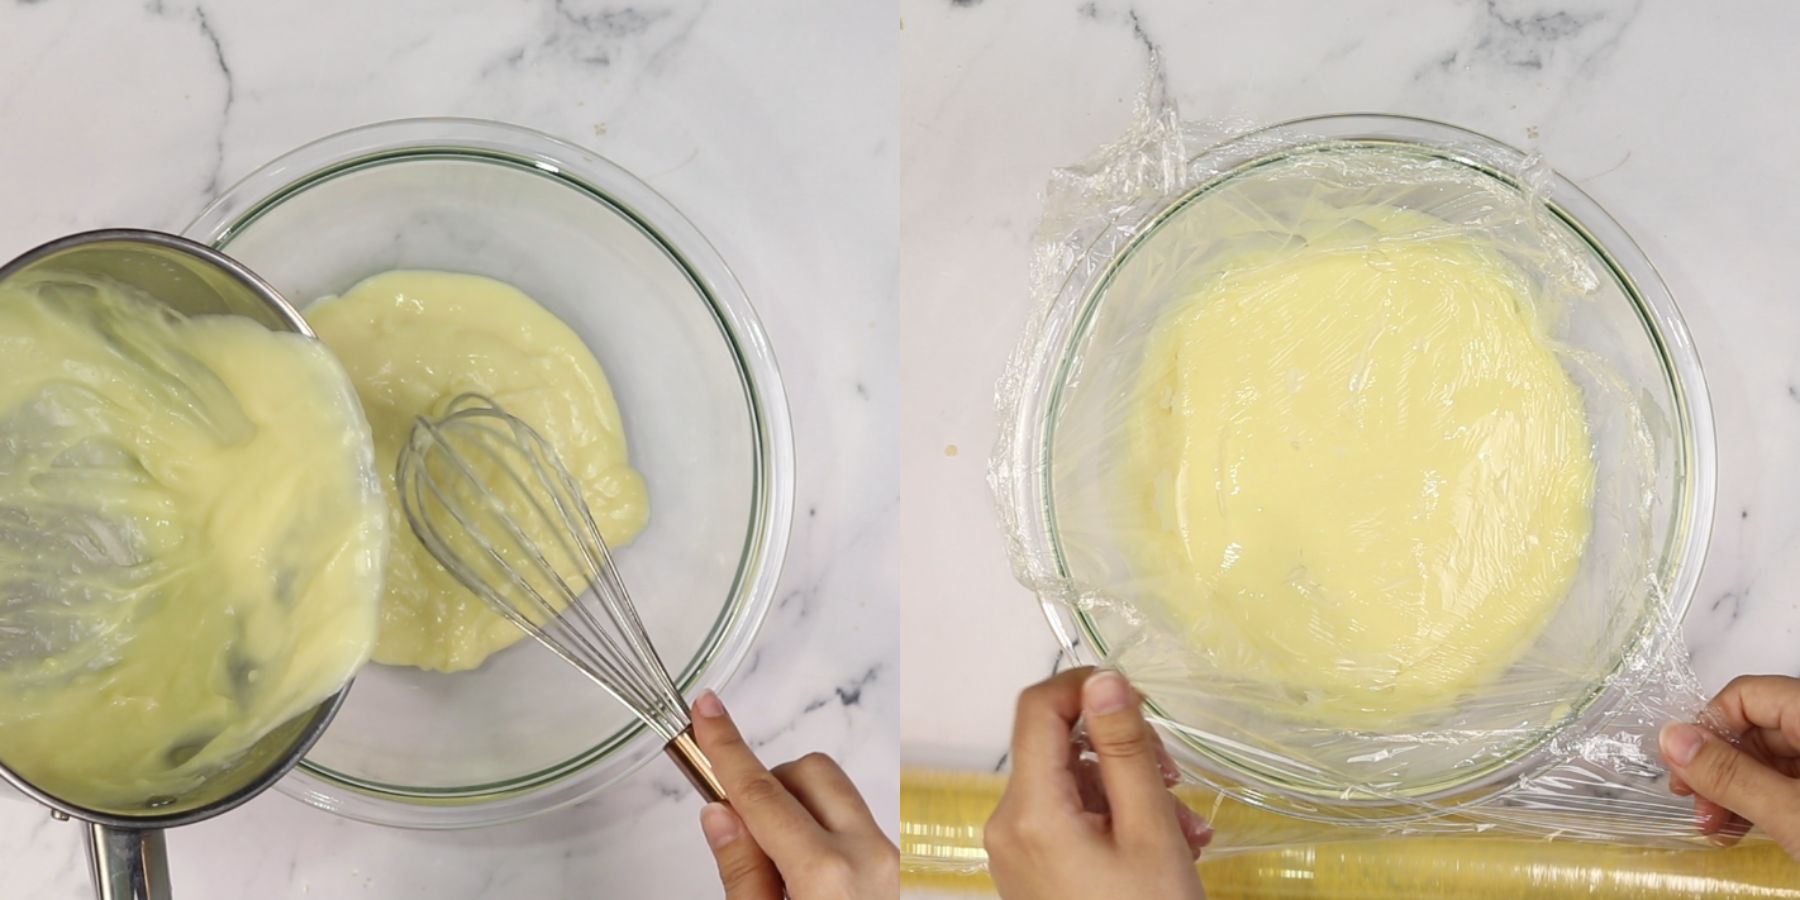
Transfer the mixture to a bowl and cover it with plastic wrap tightly. Place the bowl in the fridge. Allow it to set and cool for a few hours.
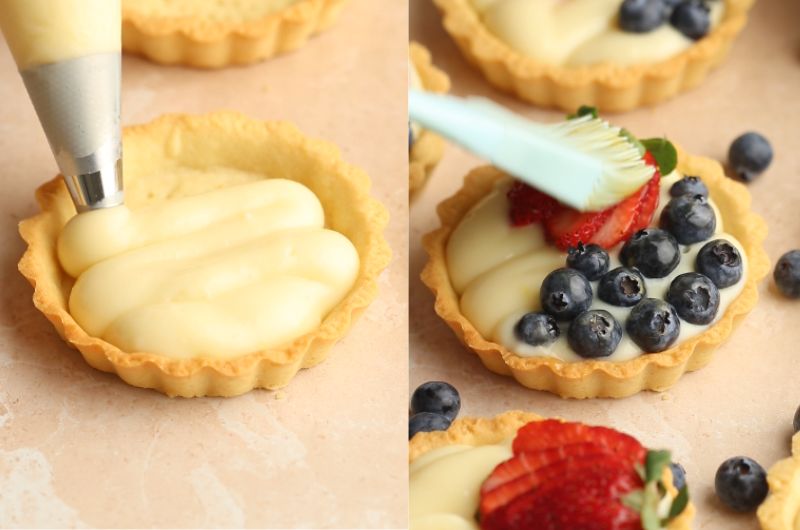
Now it's time to assemble the tarts! Transfer the pastry cream into a piping bag with a round tip. Pipe the custard inside the mini tart shells, and top the cream with washed and dried berries or fruit of your choice.
Optional: Make a simple glaze by mixing 1 tablespoon of apricot jam with ½ teaspoon of water and brush the fruit with the glaze.
Expert Tips
- Use COLD butter for the crust, I suggest cutting the butter into cubes and then placing it in the fridge, so when you are ready to use it, it will be very cold.
- If the crust puffs a bit while baking, press it down using a cup.
- Freeze the crust for at least 20 minutes before baking it. This will keep your crust from collapsing while baking.
- Let the pastry dough rest in the fridge for at least 1 hour before handling it. This will make it easier to roll out the crust and handle it.
- If your pastry cream is too thick, add a splash or two of milk to loosen it up.
- Use a piping bag for neat filling. Fill a piping bag with your cooled pastry cream for precise and mess-free filling of the tart shells. This technique will give your tarts a professional appearance.
- Select fresh, ripe fruits that are in season for the best flavor and appearance. Wash and dry the fruits thoroughly before arranging them on the tarts.
- Glaze for shine and preservation. Brush a thin layer of warmed, strained apricot jam or a neutral glaze over the fruit. This will give your tarts a beautiful shine and help preserve the freshness of the fruit.
- Use an easy-release tartlets pan. I use an easy-release tartlets pan for all of our tart recipes. This makes sure that your delicious mini fruit tart will be easy to release from the pan.
- Cool components properly. Allow both the tart shells and pastry cream to cool completely before assembling. This will prevent the cream from melting and ensure a stable structure for your tarts.
- Refrigerate your assembled tarts for at least 30 minutes before serving. This will allow the flavors to meld and ensure that the pastry cream sets properly, making the tarts easier to slice and serve.
Faq's
The best way to prevent a fruit tart from getting soggy is to bake the crust until it's lightly golden brown and not underbake it.
Another way to keep the tarts from getting soggy is assembling the tarts right before you serve them.
The clear jelly on fruit tarts that creates a shiny look for the fruits is an easy glaze made with apricot jam or preserves, or honey.
Yes. You can make these with store-bought pastry shells. Simply skip the process of making the crust.
A small tart is called a tartlet. It's a mini version of a tart, made in a small mold and filled with sweet or savory fillings.
Storing
Store these in the fridge in an airtight container to prevent them from absorbing the aromas of the fridge. The tarts will last fresh for up to 5 days.
Freezing
These mini tarts are perfect for freezing! Cover them with a plastic wrap tightly (a few layers) and transfer them into an airtight freezer-friendly container and freeze them for up to 2 months.
I recommend freezing them without the fruit on top, and after you thaw them, top them with fresh fruit. To thaw, place it in the fridge overnight.
Make Ahead Instructions
You can make these ahead of time by prepping the pastry cream for up to 3 days in advance, making the tart shells a day or two ahead, and when you are ready to serve, assemble them as written in the instructions.
Substitutions
Gluten-free- make these gluten-free by replacing the flour with gluten-free flour or make your favorite gluten-free crust.
Dairy-free- to make these dairy-free, make vegan pastry cream and follow the rest of the instructions as written. Also, swap the butter in the pastry crust with vegan butter.
Variations
Fruit- top these mini tarts with your favorite type of fruit like clementines, your favorite berries, apples, pears, passion fruit, kiwi, grapes, etc.
Graham cracker crust- if you don’t want to make a crust from scratch, you can make a graham cracker crust. Mix 1 ½ cups of graham cracker crumbs with 1 teaspoon of sugar and ⅓ cup of melted unsalted butter.
Store-bought crust- you can use store-bought pastry shells instead of making homemade ones.
Filling- if you don't want to make your own homemade pastry cream, you can make this recipe with instant pudding mix, freshly made whipped cream, or my favorite- mascarpone whipped cream.
Equipment
- Easy-release tartlets pan- To shape and bake the tart shells.
- Mixing bowl (set of 3)- For preparing the tart dough and pastry cream.
- You will also need a food processor to make the crust (if you are not using a store-bought crust).
- Saucepan- To cook the pastry cream.
- Rubber spatula- For folding, mixing, and transferring the cream.
- Whisk- Essential for stirring the pastry cream smoothly without lumps.
- Fine mesh sieve (optional) – For straining the pastry cream if needed for extra smoothness.
- Piping bag (optional)- For neatly filling the tart shells with pastry cream.
- Cooling rack – To cool the tart shells after baking.
- Measuring cup set.
More tart recipes
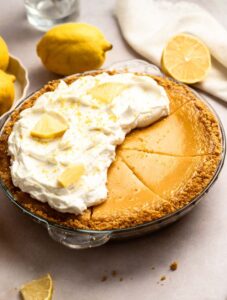
Lemon tart- This lemon tart is made with a buttery pastry crust and filled with a zesty lemon curd filling. This tart is a ray of sunshine in a dessert!
Mini Chocolate Tarts- These mini chocolate tarts are made with a buttery shortcrust pastry and filled with a silky smooth and rich chocolate ganache.
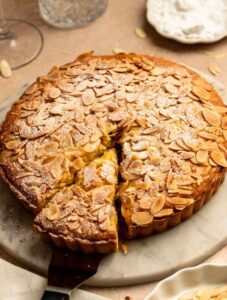
French Almond Tart- This French almond tart is made with a Pâte Sucrée crust, filled with almond cream frangipane filling, and topped with sliced almonds.
If you tried this recipe, don’t forget to leave a rating and a comment below. I love hearing from you.
If you liked this recipe
📖 Recipe

Mini Fruit Tarts With Pastry Cream
Ingredients
Mini tart crust
- ½ cup Butter unsalted, cold
- 1 Egg
- ½ teaspoon Vanilla extract
- ½ cup Powder sugar
- ¼ teaspoon Kosher salt
- 2 cups Flour
Vanilla pastry cream
- 1 ¾ cups Milk
- 2 teaspoon Vanilla extract
- 5 Egg yolks
- ¼ teaspoon Kosher salt
- ½ cup Granulated sugar
- 3 tablespoon Cornstarch
Toppings
- Strawberries
- Blueberries
- 1 tablespoon Apricot jam
- ½ teaspoon Water
Instructions
- Start by making the tart dough. In a food processor, add the flour, powdered sugar, and salt, and mix until combined.
- Add the cold cubed butter, and blend until there are pea-sized pieces of butter. If you don't have a food processor, you can do it by hand, mixing the cold butter into the flour mixture. Make sure that your hands are cold.
- Then, add the egg, and the vanilla extract and mix until a dough forms. Try not to overmix the dough.
- Cover the dough with plastic wrap and let it chill in the fridge for at least an hour.
- Transfer the dough onto a clean floured surface and roll it with a rolling pin into a rectangle.
- Use a cookie cutter or a round bowl (1 inch larger than the mini tart pans) and cut small rounds of the pastry.
- Place the pastry inside the mini tart pans and press it down using your clean hands.
- Cut off the extra edges. Make holes in the bottom of the pan with a fork and place them in the freezer for at least 20 minutes.
- Bake in a 180c (350f) preheated oven for about 15-20 minutes or until the crust is a light golden brown color. Remove from the oven and let it cool while making the filling.
Make the pastry cream
- Place a saucepan over high heat and fill it with the milk and vanilla extract. Let it simmer, and remove it from the heat. Scoop ¼ cup of the milk and set aside.
- In a small mixing bowl, add the sugar and cornstarch. Mix with a whisk until combined. Add the egg yolks and mix.
- Gradually add the ¼ cup of milk and mix constantly with a whisk. This step is used to temper the egg yolks and avoid them from cooking too fast.
- Mix over medium-low heat and mix constantly with a whisk until the mixture thickens. Don't increase the heat, be patient it will be worth it!
- Transfer the mixture to a bowl and cover it with plastic wrap tightly. Place the bowl in the fridge. Allow it to set and cool for a few hours.
- Now it's time to assemble the tarts! Transfer the pastry cream into a piping bag with a round tip. Pipe the custard inside the mini tart shells, and top the cream with washed and dried berries or fruit of your choice.
- Optional: Make a simple glaze by mixing 1 tablespoon of apricot jam with ½ teaspoon of water and brush the fruit with the glaze.
Notes
- Use COLD butter for the crust, I suggest cutting the butter into cubes and then placing it in the fridge, so when you are ready to use it, it will be very cold.
- If the crust puffs a bit while baking, press it down using a cup.
- Freeze the crust for at least 20 minutes before baking it. This will keep your crust from collapsing while baking.
- Let the pastry dough rest in the fridge for at least 1 hour before handling it. This will make it easier to roll out the crust and handle it.
- If your pastry cream is too thick, add a splash or two of milk to loosen it up.
- Use a piping bag for neat filling. Fill a piping bag with your cooled pastry cream for precise and mess-free filling of the tart shells. This technique will give your tarts a professional appearance.
- Select fresh, ripe fruits that are in season for the best flavor and appearance. Wash and dry the fruits thoroughly before arranging them on the tarts.
- Glaze for shine and preservation. Brush a thin layer of warmed, strained apricot jam or a neutral glaze over the fruit. This will give your tarts a beautiful shine and help preserve the freshness of the fruit.
- Use an easy-release tartlets pan. I use an easy-release tartlets pan for all of our tart recipes. This makes sure that your delicious mini fruit tart will be easy to release from the pan.
- Cool components properly. Allow both the tart shells and pastry cream to cool completely before assembling. This will prevent the cream from melting and ensure a stable structure for your tarts.
- Refrigerate your assembled tarts for at least 30 minutes before serving. This will allow the flavors to meld and ensure that the pastry cream sets properly, making the tarts easier to slice and serve.
Dottie says
Can these be made a day ahead of time?
RichandDelish says
Yes!
Liz says
Love this recipe! Second time making it!!