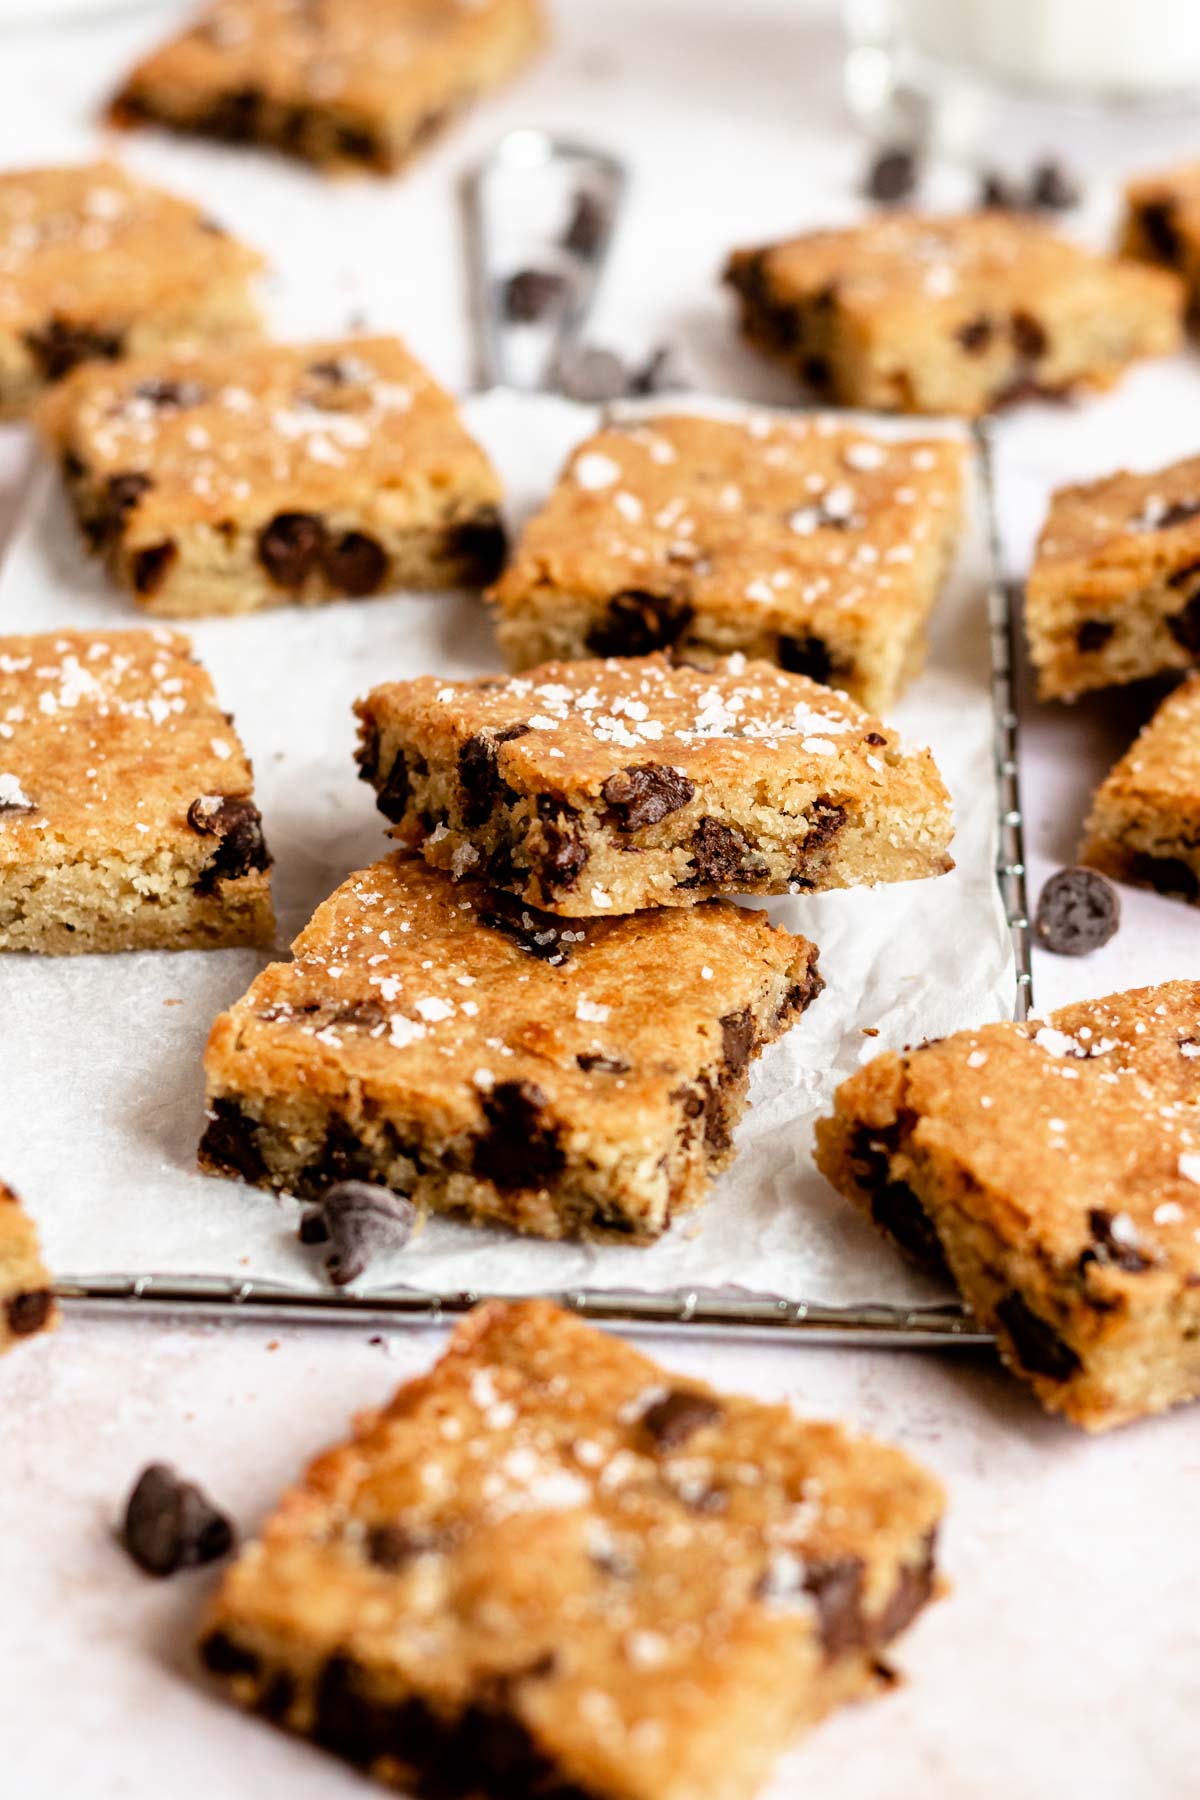
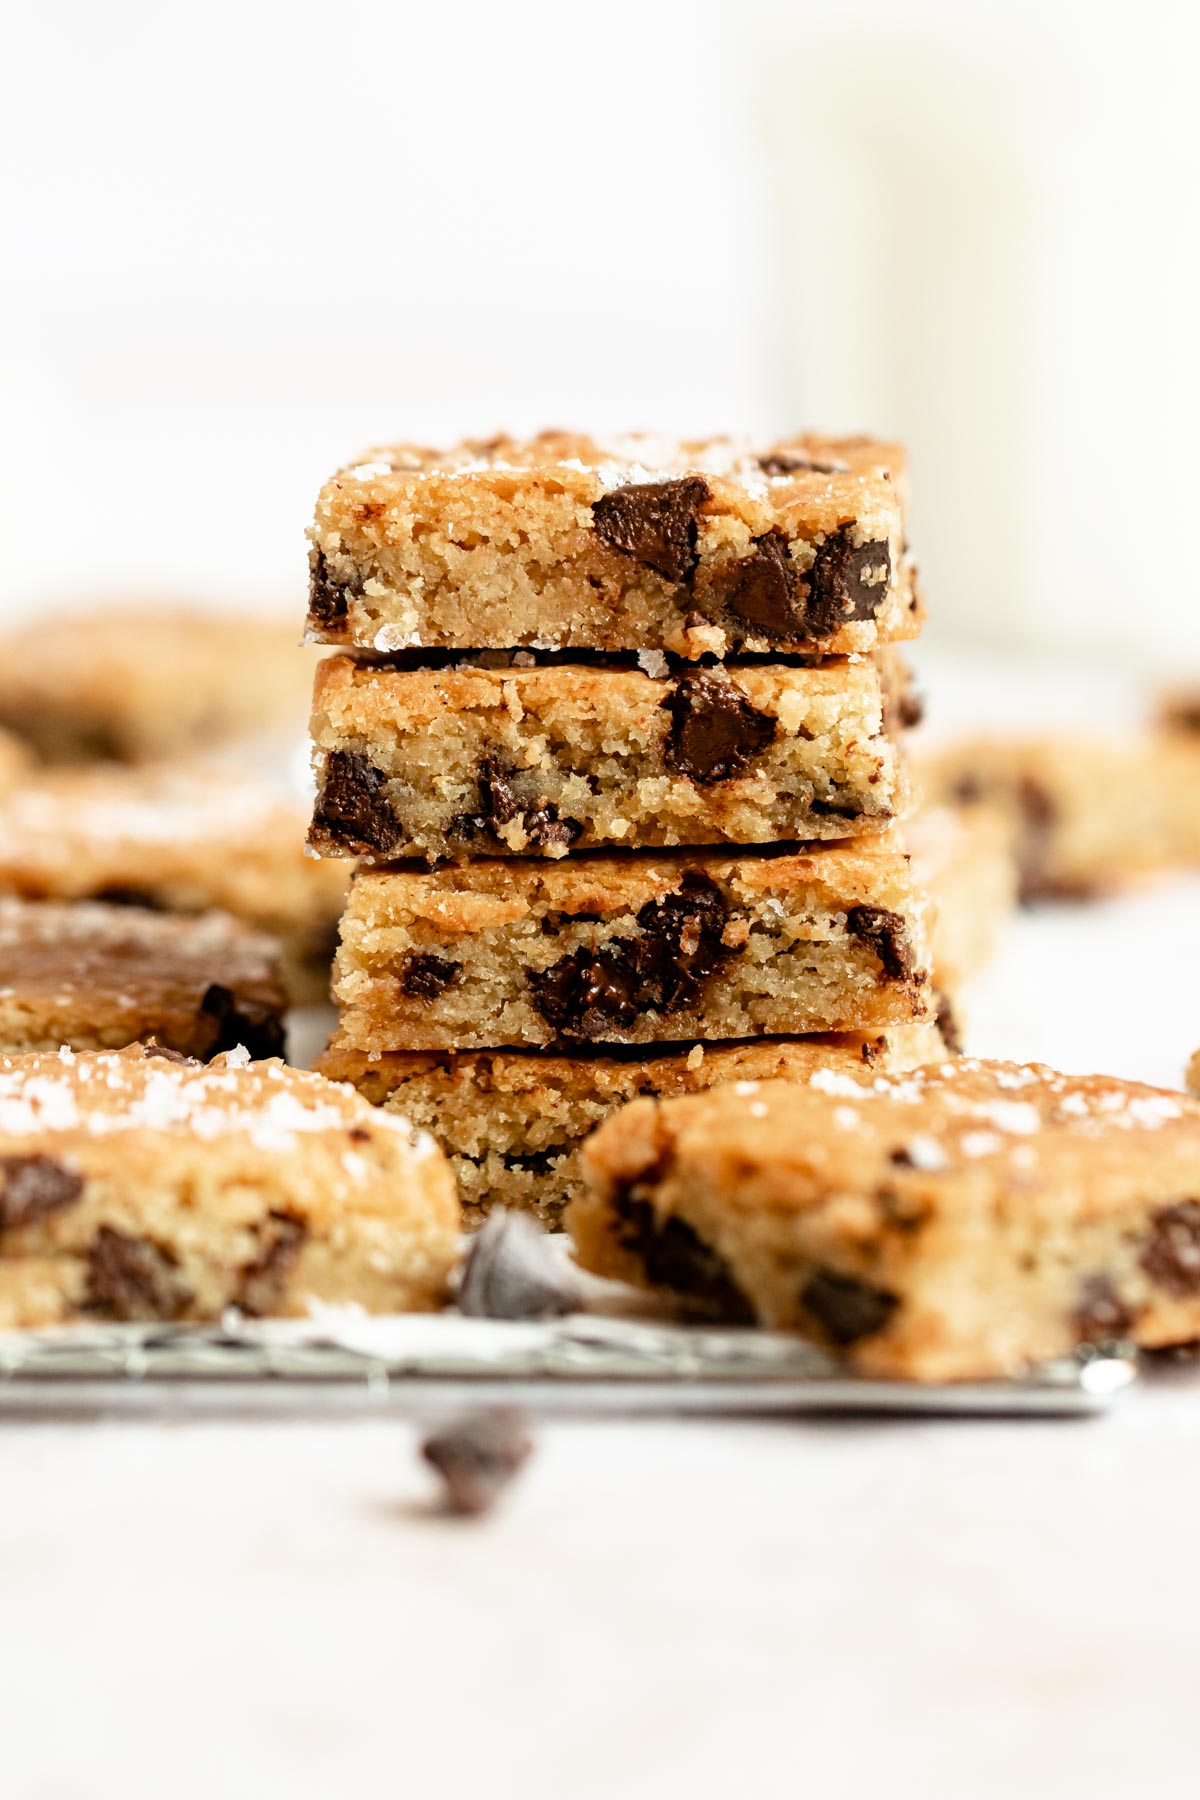
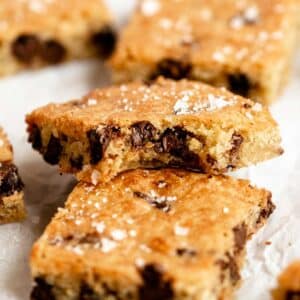
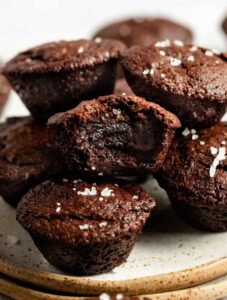
These one-bowl chocolate chip blondies have a fudgy, chewy center and gooey, melty chocolate pools, a crackly top, and they're ready in 35 minutes.

By using melted butter and brown sugar, you get a super chewy, caramel-like center that’s way more flavorful than a basic cookie bar.
What makes them truly special is the contrast: you get huge, melty chocolate pools from the chocolate chunks and a shiny, crackly top all in one bite.
Since you only need one bowl and 35 minutes, they’re the perfect "emergency" dessert that tastes like you spent hours in the kitchen!
For more chocolate chip desserts, check out my chocolate chip cookie dough cake, small batch chocolate chip cookies, and our Oreo chocolate chip cookies.
Jump to:
- Why this recipe works
- What are blondies?
- Ingredients
- Instructions
- Expert Tips
- Faq's
- Storing
- Freezing
- Substitutions
- Variations
- Equipment
- What are scoopable cookies?
- Why this recipe works
- Ingredients
- Instructions
- Expert Tips
- Faq's
- Troubleshooting
- Storing And Reheating
- Freezing
- Substitutions
- Variations
- Serving Tips
- Equipment
- 📖 Recipe
- 💬 Comments
Why this recipe works
- One-Bowl- Since everything happens in one bowl, you can have the kitchen spotless before the timer even goes off.
- Chewy texture- Using melted butter and dark brown sugar creates a dense, fudgy center that stays soft for days.
- Bakery-Style Top- That thin, shiny, crackly crust happens naturally without any fancy techniques or extra ingredients.
- Gooey Chocolate Chunks- Using hand-chopped chocolate chunks instead of chips creates huge, melty "pools" that stay gooey in every bite.
- 35-Minute- These go from your pantry to your plate in just over half an hour, making them the ultimate stress-free dessert.
What are blondies?
Think of a blondie as a brownie’s golden, buttery cousin. Instead of cocoa, it uses melted butter and brown sugar to create a deep, caramel-like flavor that tastes just like butterscotch.
They have the same dense, fudgy texture as a brownie but with a rich, vanilla-forward vibe.
When loaded with chocolate chunks and baked with a crackly top, they’re the ultimate treat for anyone who loves a chewy, cookie-style dessert.

Ingredients
Before you start to make this recipe, measure and prepare your ingredients so the cooking process will go smoothly and easily.
Full measurements are in the recipe card below.
Unsalted Butter (Melted)- Melting the butter is the secret to a dense, fudgy texture rather than a fluffy, cake-like one.
Dark Brown Sugar- Packed with molasses to give your blondies a deep, chewy, and caramel-like flavor.
Granulated Sugar- Just enough to help create that signature shiny, crackly crust on top.
Large Egg + Extra Egg Yolk- The extra yolk adds richness and ensures the center stays perfectly gooey.
Pure Vanilla Extract- Since there’s no cocoa powder, vanilla is the star of the show—use the good stuff!
All-Purpose Flour- Provides the structure; just be sure not to overmix it for a tender bite.
Salt- A must-have to balance the sweetness and bring out the buttery notes.
Semi-Sweet Chocolate Chunks- Hand-chopped chunks create those big, melty pools of chocolate that chips just can't match.
Flaky Sea Salt- An optional finishing touch for that perfect salty-sweet balance.
Instructions
Preheat your oven to 350°F (175°C). Line an 8x8-inch square baking pan with parchment paper, leaving a little overhang on the sides for easy removal.
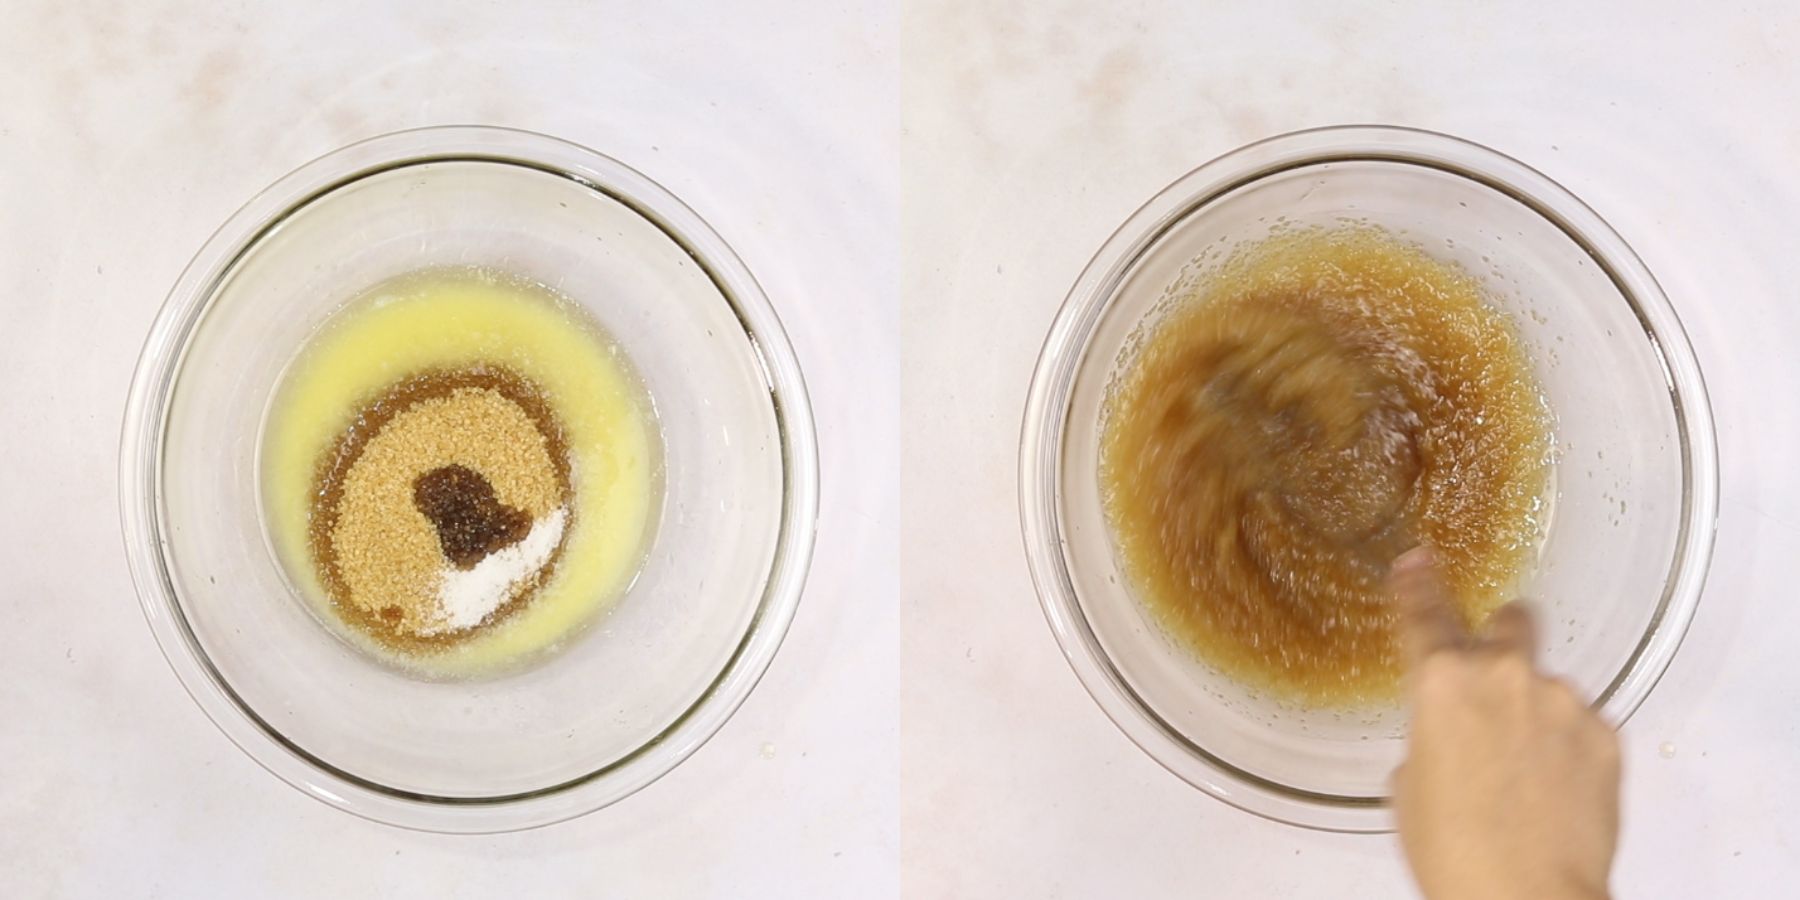
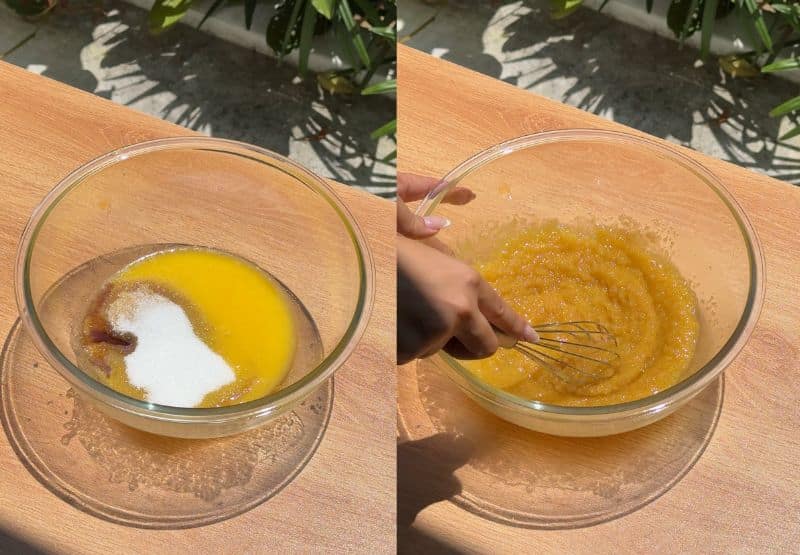
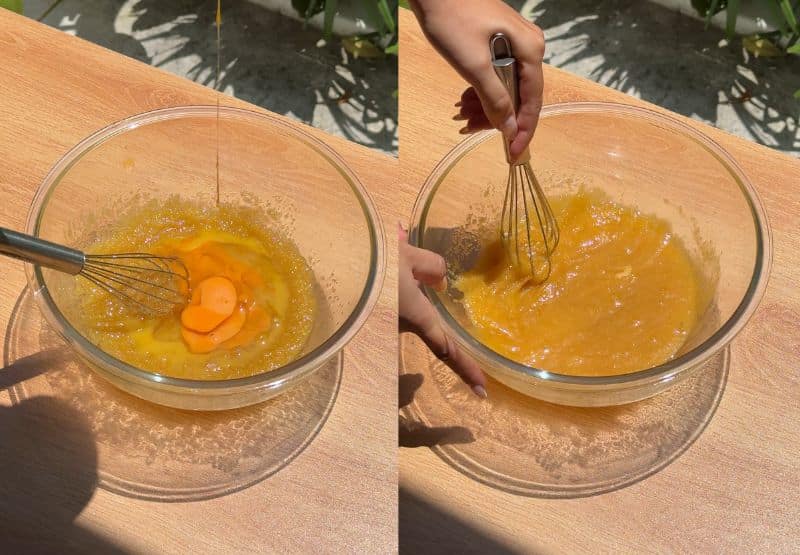
In a large bowl, combine the melted butter, brown sugar, salt, vanilla extract, and granulated sugar.
Whisk vigorously for 2 minutes. This dissolves the sugar into the fat, which is what creates that shimmering, paper-thin crust.
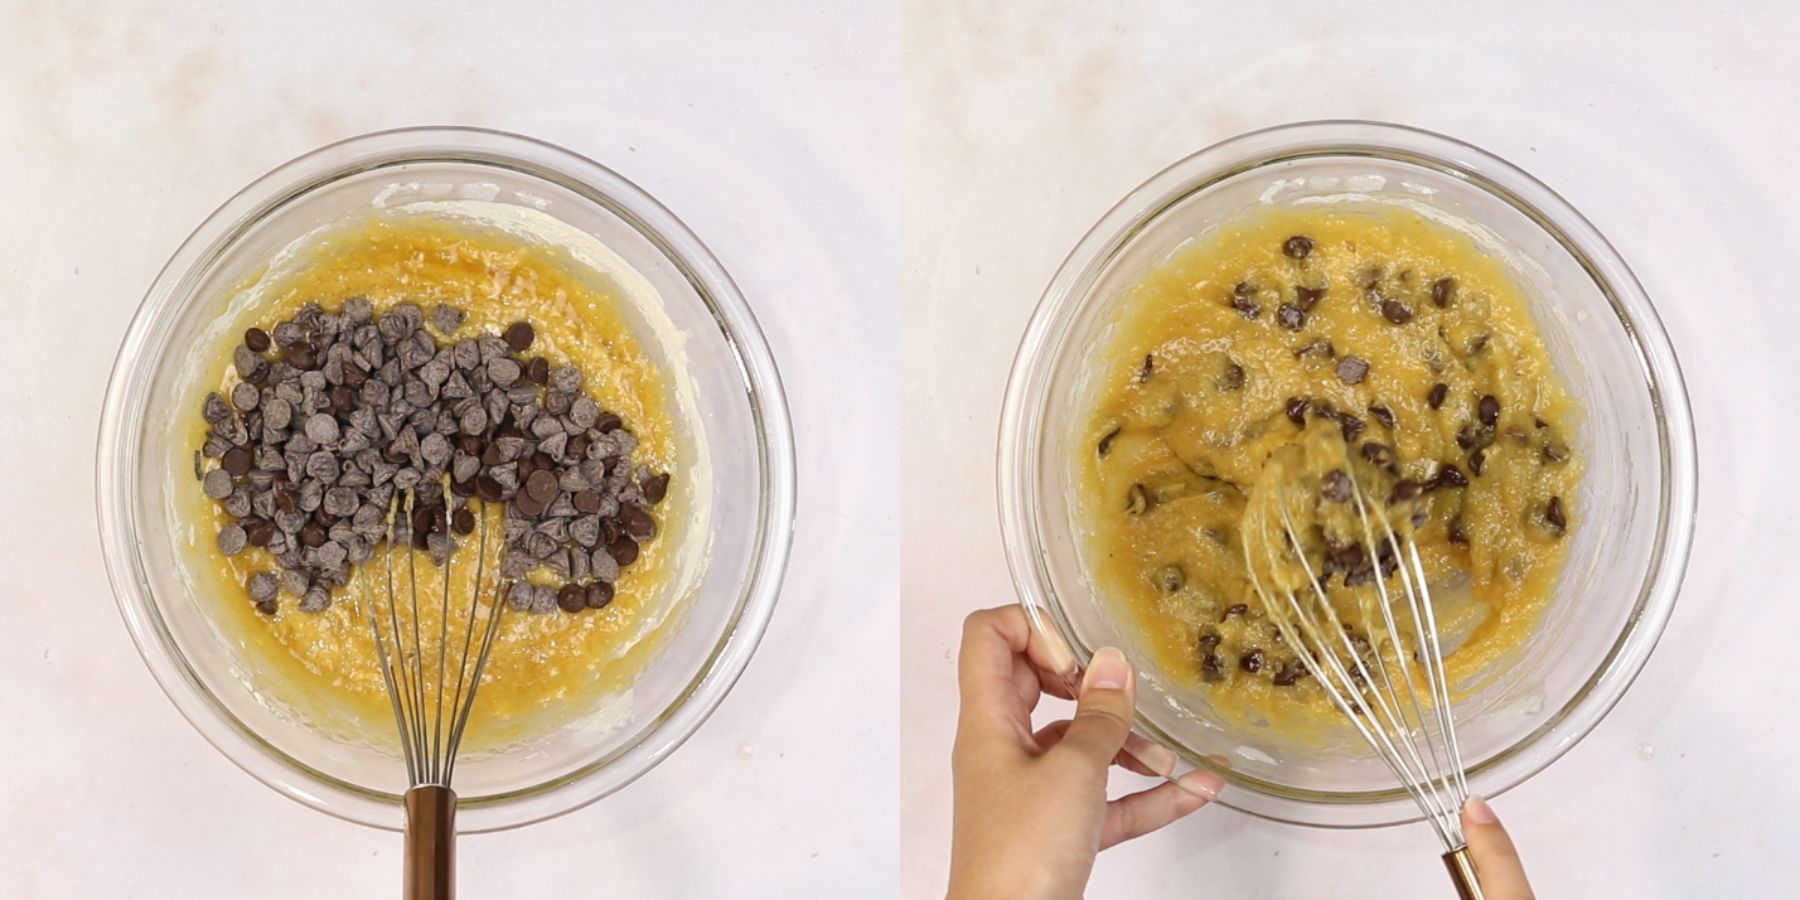
Whisk in the egg and the extra egg yolk. Keep stirring until the mixture looks glossy and smooth.

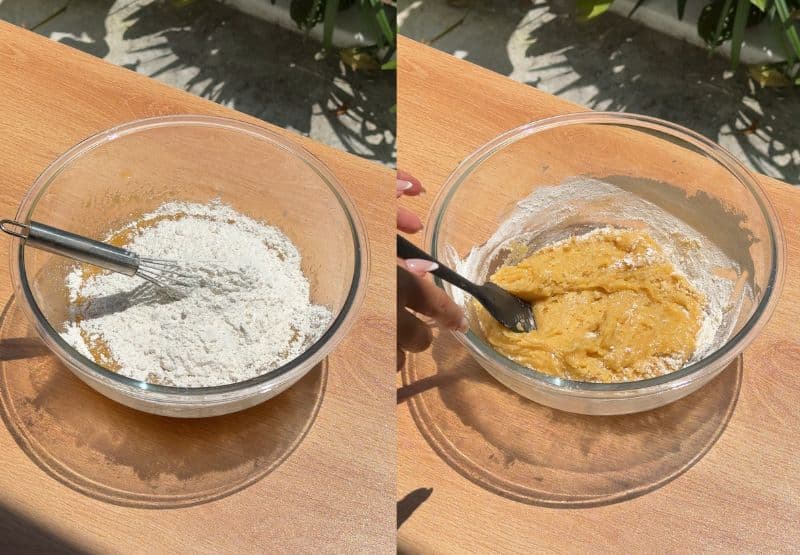
Add the flour. Switch to a spatula and gently fold the dry ingredients into the wet batter. Stop mixing the moment the last streak of flour disappears to keep them tender.

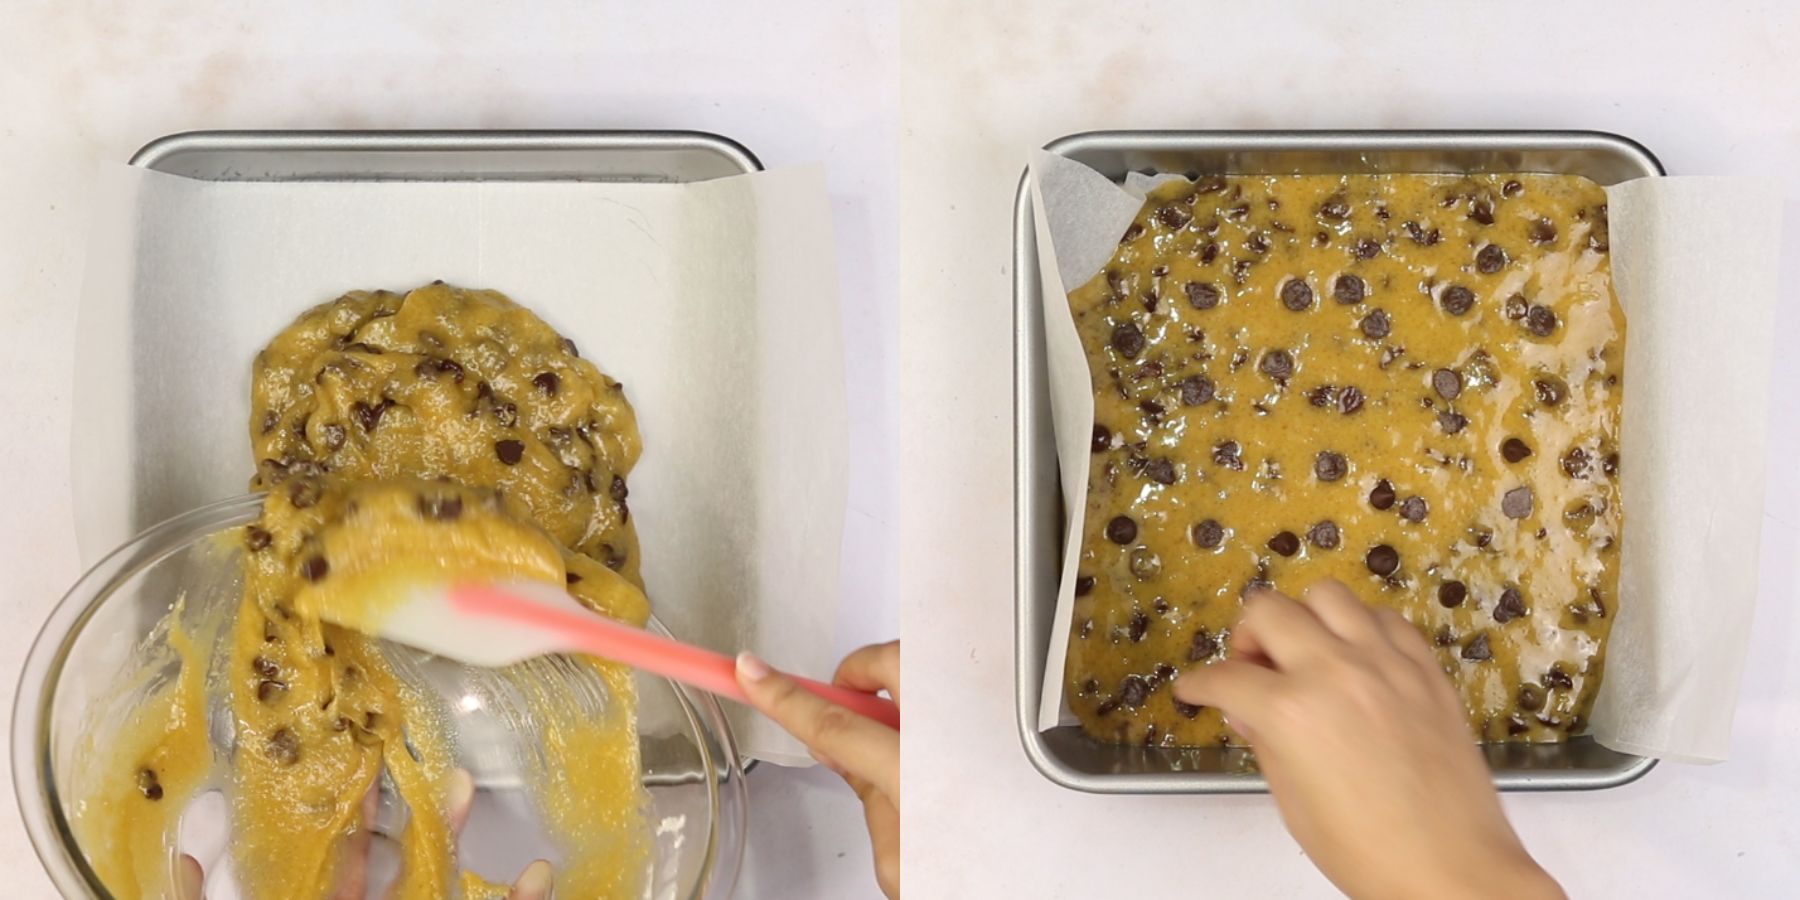
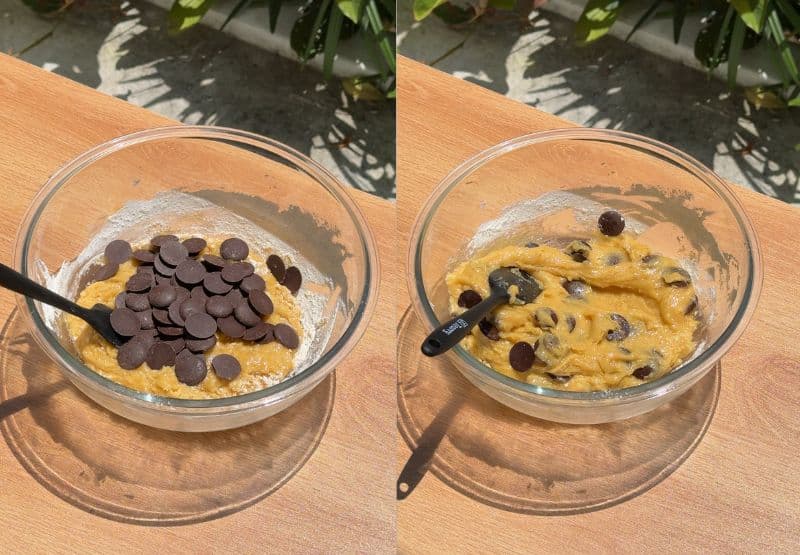
Gently fold in about ¾ of your hand-chopped chocolate chunks. Spread the batter into the pan and press the remaining chunks onto the top for those signature melty pools.
Bake for 22–25 minutes. The edges should be golden, but the center should still have a very slight "wobble." They will firm up as they cool into a perfect fudge. Let them cool for 20 minutes before slicing.

Expert Tips
- Use Room Temp Eggs: Cold eggs can seize up your melted butter. Room temperature eggs emulsify better, leading to a smoother, glossier batter.
- The 2-Minute Whisk: Don't skip the vigorous whisking of the butter and sugar! This process dissolves the sugar, which is exactly how you get that "meringue-like" crackly top.
- Spoon and Level: If you aren't using a scale, fluff your flour with a spoon before scooping it into the measuring cup. Packing the flour too tightly results in dry, bready blondies.
- Chop Your Own Chocolate: Bars of chocolate contain more cocoa butter than chips. Chopping them yourself creates those stunning, melty "pools" and irregular shards throughout.
- Don’t Overmix: Once the flour goes in, stop as soon as it's incorporated. Overmixing develops gluten, which turns fudgy blondies into tough ones.
- The "Wobble" Rule: Pull the pan out when the edges are set and golden, but the center still has a slight jiggle. It will finish "baking" in the pan as it cools.
- Parchment Overhang: Leave a 2-inch "handle" of parchment paper hanging over the sides. This lets you lift the entire slab out for perfect bakery-style cuts.
- Wait to Slice: I know it's hard, but let them cool for at least 20–30 minutes. Slicing too early causes the gooey center to ooze out instead of holding its shape.
- Add a Salt Finish: A tiny sprinkle of flaky sea salt on top right after baking balances the brown sugar and makes the chocolate flavor pop.
- Metal vs. Glass: If possible, use a light-colored metal pan. Glass retains heat longer and can lead to overbaked, dry edges.
Faq's
This is usually caused by too much flour or over-beating the eggs. Ensure you measure your flour accurately and only fold in the dry ingredients until just combined.
Yes! Dark brown sugar has more molasses, which adds extra chew and a deeper caramel color, but light brown sugar will still produce a delicious, buttery blondie.
Look for the "shrink." The edges will just barely start to pull away from the parchment paper, and the top will look dry and crinkled rather than wet or shiny.
Storing
Keep your blondies at room temperature in an airtight container for up to 4 days. To maintain that signature crackly top, avoid layering them while they are still warm.
For a firmer, extra-fudgy bite, you can store them in the fridge for up to one week.
Freezing
These bars freeze beautifully for up to 3 months. Wrap individual squares tightly in plastic wrap and place them in a freezer-safe bag.
When a craving hits, thaw a square at room temperature for an hour, or pop it in the microwave for 15 seconds for a "just-out-of-the-oven" experience.
Substitutions
Gluten-Free- Swap the flour for a 1:1 gluten-free baking blend. Since blondies are naturally dense, the texture remains almost identical.
Dairy-Free- Replace the butter with a high-quality vegan butter stick and use dairy-free chocolate chunks.
The Sugar- If you only have light brown sugar, it works perfectly—the flavor will just be a little more like a sugar cookie and less like deep butterscotch.
Variations
Nuts- Fold in ½ cup of toasted pecans or walnuts to add a savory crunch to the sweet base.
Salted Caramel Swirl- Drizzle salted caramel over the batter once it's in the pan and use a knife to swirl it in before baking.
White Chocolate & Berry- Use white chocolate chunks and a handful of freeze-dried raspberries for a tart, colorful twist.
Espresso- Mix 1 teaspoon of espresso powder into the melted butter to make the chocolate flavor truly explode.
Equipment
- 8x8 Inch Baking Pan: For the perfect thickness and even baking.
- Parchment Paper: To easily lift the blondies out for clean slicing.
- Large Mixing Bowl: One bowl is all you need for the entire recipe.
- Whisk: Crucial for creating the signature crackly top.
- Silicone Spatula: For gently folding in the flour and chocolate chunks.
- Sharp Knife: For chopping chocolate into chunks and slicing the bars.
- Kitchen Scale: The most accurate way to measure flour and sugar.
More chocolate chip recipes
Chocolate chip cookies- These chewy chocolate chip cookies are soft and chewy and loaded with chocolate chips.
Chocolate chip pancakes- These chocolate chip pancakes are incredibly fluffy, filled with chocolate chips that add a delicious flavor, and they turn out amazing every time!
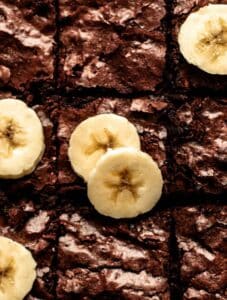
Chocolate chip banana bread- This chocolate chip banana bread is extra moist banana bread that is made with brown butter, greek yogurt, and plenty of mashed bananas making this banana bread super moist, flavorful, and fluffy.
These scoopable cookies have crisp golden brown edges, pools of melty chocolate, and a gooey center. The cookie dough is a no-chill recipe.
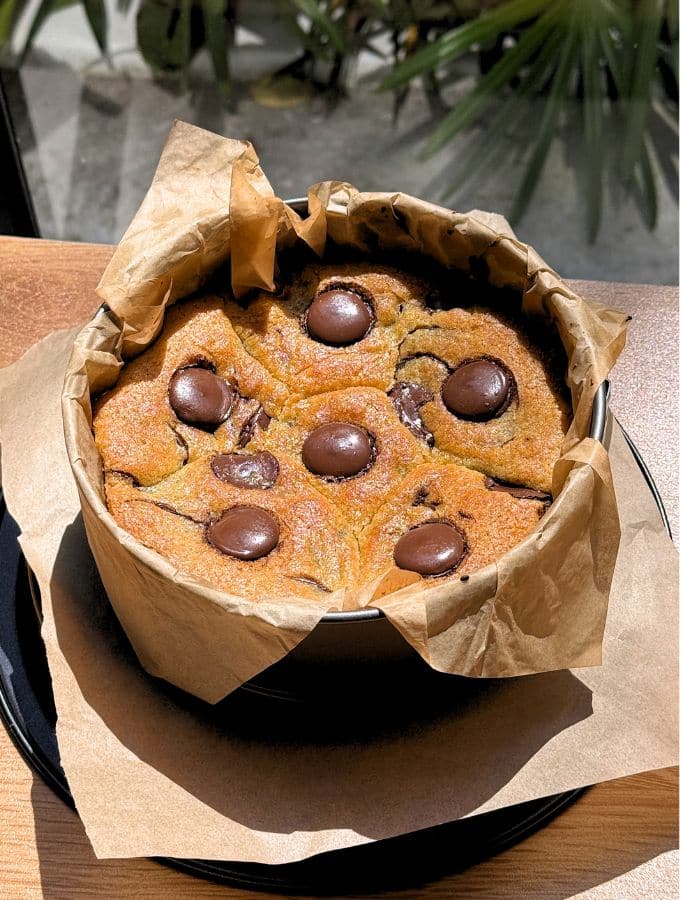
Scoopable cookies are the latest viral trend taking over the world, and for a good reason! Unlike traditional cookies that are baked separately on a flat sheet, these are baked close together in a small dish or pan.
This creates one big, gooey layer that stays incredibly soft and melty. Instead of picking them up with your hands, you use a spoon or an ice cream scoop to serve warm, messy portions straight from the pan.
For more cookie recipes, check out my small batch chocolate chip cookies, brown butter chocolate chunk cookies, crème brûlée cookies, and lemon crinkle cookies.
Jump to:
- Why this recipe works
- What are blondies?
- Ingredients
- Instructions
- Expert Tips
- Faq's
- Storing
- Freezing
- Substitutions
- Variations
- Equipment
- What are scoopable cookies?
- Why this recipe works
- Ingredients
- Instructions
- Expert Tips
- Faq's
- Troubleshooting
- Storing And Reheating
- Freezing
- Substitutions
- Variations
- Serving Tips
- Equipment
- 📖 Recipe
- 💬 Comments
What are scoopable cookies?
Scoopable cookies are a viral trend that feels like a mix between a regular cookie and warm cookie dough.
Instead of baking separate balls of dough, you put them close together in a small pan, so they bake into one thick, soft layer.
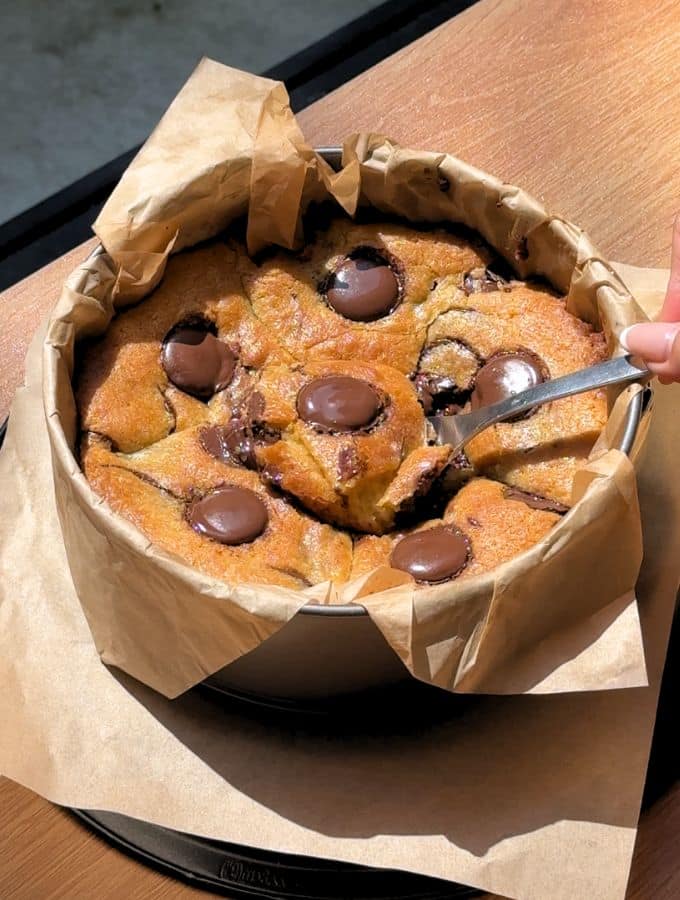
This makes the edges golden and crunchy while the middle stays very melty. These cookies are meant to be eaten warm right out of the pan with a spoon.
Top them with a scoop of cold vanilla ice cream and flaky salt for a perfect, messy dessert!
Why this recipe works
- No Chilling Required: Since these are scoopable and baked in a dish, you don’t have to wait for the dough to firm up. You can go from mixing to baking instantly.
- Melted Butter: Using melted butter instead of softened butter creates a much fudgier, denser texture that stays soft even after it cools.
- Perfectly Gooey: Because the cookies are crowded together in a small pan, the edges get golden and crisp while the centers stay melty, gooey, and spoonable.
- One-Bowl Cleanup: You only need one bowl and a spoon, making this the easiest dessert to whip up whenever a craving hits.
- Easy to Customize: This dough is incredibly versatile, so you can easily stuff the center with a big scoop of Nutella, peanut butter, or Biscoff for an extra gooey center.
Ingredients
Before you start to make this recipe, measure and prepare your ingredients so the cooking process will go smoothly and easily.
Full measurements are in the recipe card below.
Unsalted Butter: Melted and cooled. Using unsalted melted butter is the secret to making these cookies extra chewy and fudgy.
Brown Sugar: Provides a soft, moist texture and a deep caramel-like flavor. I used light brown sugar, but dark brown sugar will work as well.
Granulated Sugar: Helps the cookies spread just the right amount and creates those lightly crisp, golden edges.
Egg Yolk: It adds richness and keeps the cookies dense instead of cakey.
Vanilla Extract: Adds a sweet aroma and essential bakery flavor. Use pure vanilla extract or vanilla bean extract.
All-Purpose Flour: This is the base of the dough and provides the structure.
Baking Soda: Gives the cookies a tiny bit of lift as they bake.
Kosher Salt: Balances the sweetness of the sugars and makes the chocolate flavor pop.
Chocolate Chips: Use your favorite high-quality chocolate chips, coins, or chunks for melty pools in every bite.
Instructions
Preheat your oven to 350°F (180°C). Line an 18cm (7-inch) baking dish with parchment paper, leaving a bit of overhang on the sides for easy removal.
In a medium bowl, whisk together the melted butter, brown sugar, granulated sugar, salt, and vanilla extract until well combined.
Add the egg yolks and mix until smooth.
Fold in the flour and baking soda using a spatula. Mix just until the flour disappears. Don’t overmix.
Fold in ¾ of your chocolate chips or chunks.
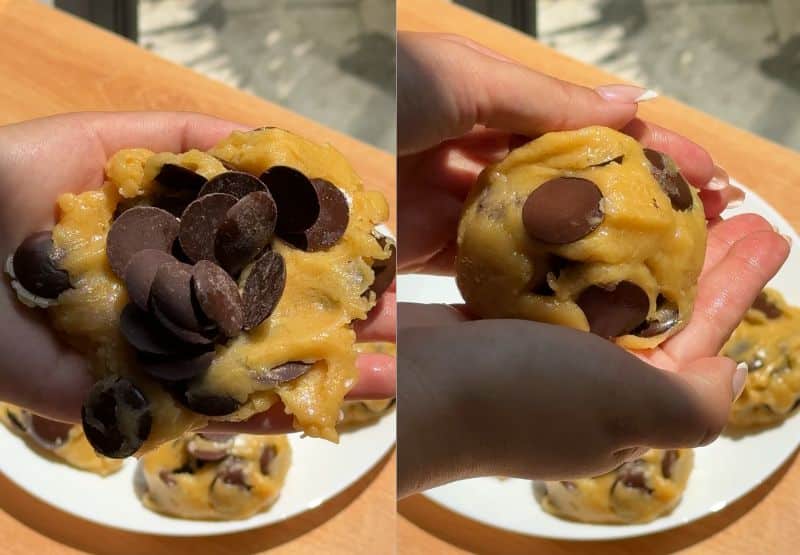
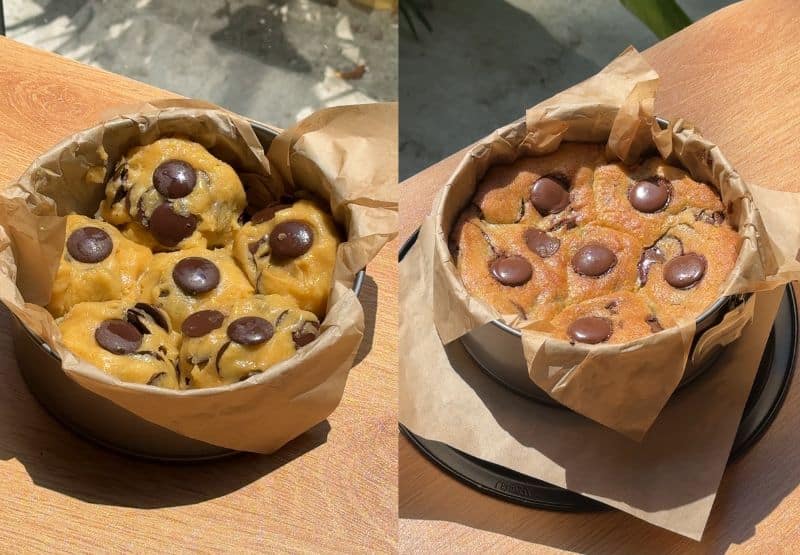
Divide the dough into 6 equal portions. Flatten each piece slightly in your hand, place a few chocolate coins or large chunks in the center, and roll the dough back into a ball to seal the chocolate inside.
Place the 6 balls into your prepared baking dish. They should be placed close together so they merge as they bake, creating that signature scoopable texture.
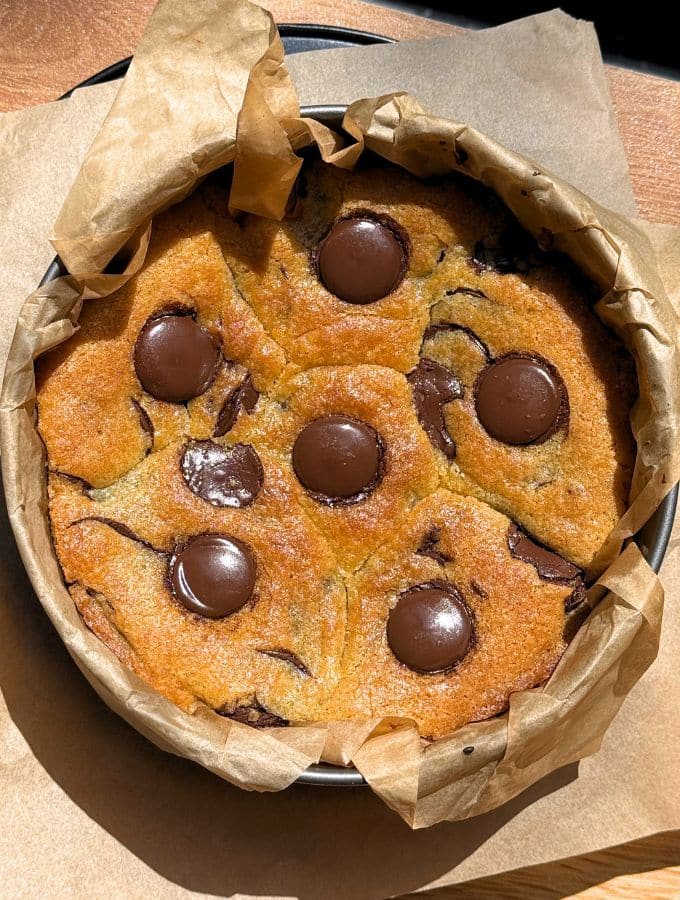
Bake for 20 minutes. The edges should be golden brown, but the centers will still look soft and gooey.
Remove from the oven and sprinkle with flaky salt if desired. For the best experience, serve immediately while hot with a big scoop of vanilla ice cream!
Expert Tips
- Don't Overbake: These cookies are meant to be gooey. Take them out when the edges are golden, but the centers still look slightly underdone; they will continue to set as they sit in the hot dish.
- Use Room Temperature Egg Yolks: To ensure the fat and sugar emulsify perfectly, make sure your egg yolk isn't cold from the fridge.
- Stuff with Variety: While chocolate coins are amazing, you can also stuff the centers with Nutella, peanut butter, or even a piece of caramel for a surprise filling.
- Don't Overmix: When adding the dry ingredients, mix only until the flour disappears. Overmixing can make the cookie tough instead of tender.
- Measure Flour Correctly: Use the "spoon and level" method or a kitchen scale. Too much flour will make the dough dry and prevent it from melting together into that perfect scoopable texture.
- Use High-Quality Chocolate: Since the chocolate is the star here, use chocolate coins or a chopped premium chocolate bar for the best "melty pool" effect.
- Line Your Pan: Don't skip the parchment paper! It prevents sticking and makes it much easier to clean the dish after you've finished scooping.
- Serve Immediately: The "scoopable" magic happens while the cookies are hot. If they cool down completely, they will firm up like a standard cookie bar.
- The Salt Balance: A generous sprinkle of flaky sea salt on top right after baking cuts through the sweetness and enhances the chocolate flavor.
- Add the Ice Cream Late: Wait about 2 minutes before adding the ice cream so it doesn't melt into a soup instantly, but still gets that creamy, half-melted consistency.
Faq's
It is best to avoid self-rising flour for these cookies. Because it contains added leavening agents and salt, it can make the dough rise too much, resulting in a cakey texture rather than the dense, gooey center that makes scoopable cookies so good.
Stick to just the yolk for this recipe. A whole egg adds too much moisture and protein, which can make the cookies airy and cakey.
Using only the yolk ensures the center stays dense, rich, and perfectly fudgy.
It is better to stick with all-purpose flour. Cake flour has a lower protein content, which would make these cookies too soft and delicate to hold their shape.
All-purpose flour provides the necessary structure to give you those slightly crisp edges while keeping the center perfectly chewy.
Troubleshooting
The chocolate didn't melt: If your chocolate chunks or coins stayed solid, you might be using "bake-stable" chips, which are designed to hold their shape.
For those gooey, melty pools, use high-quality chocolate bars chopped into pieces or chocolate coins with a higher cocoa butter content.
The center is too runny: If the middle feels more like liquid than a soft cookie, it likely needed a few more minutes in the oven. Every oven is different, so if your dish is deeper, you may need to extend the bake time.
Let it sit for 5 minutes after pulling it out; the residual heat from the dish will help the center firm up just enough.
The cookies are dry or cakey: This usually happens if the flour was over-measured or the dough was overmixed.
Make sure to fluff your flour with a spoon before leveling it off, and stop mixing as soon as you stop seeing white streaks of flour. Overbaking can also zap the moisture, so keep a close eye on them!
Storing And Reheating
Store any leftovers in an airtight container at room temperature for up to 2 days or in the fridge for up to 4 days.
Because these cookies are best enjoyed with a melty, gooey center, it is highly recommended to reheat them before serving.
Pop a portion in the microwave for 10–15 seconds or back into a warm oven until the chocolate is soft and the center is perfectly spoonable again.
Freezing
You can freeze the unbaked dough balls for up to 3 months by placing them in a freezer-safe bag. When you're ready to bake, simply place the frozen balls into your lined dish and add a few extra minutes to the baking time.
If you have already baked the cookies, freeze them in an airtight container and thaw them before reheating to restore that signature gooey texture.

Substitutions
Flour: You can swap all-purpose flour for a 1:1 gluten-free flour blend if needed, though the texture may be slightly less chewy.
Butter: If you are out of unsalted butter, use salted butter and skip the extra salt called for in the recipe.
Egg Yolk: If you need a vegan option, a tablespoon of applesauce or a flax egg can work, but the cookies will be softer and have less of that rich, traditional "yolk" chew.
Variations
S'mores Scoopable: Fold mini marshmallows and crushed graham crackers into the dough. Top with extra chocolate coins and bake until the marshmallows are toasted and gooey.
Nutella Stuffed: Instead of chocolate chunks, place a chilled teaspoon of Nutella in the center of each dough ball before sealing.
Triple Chocolate: Use a mix of white chocolate, milk chocolate, and dark chocolate chunks. The different sugar levels in the chocolates create a variety of melty textures and a deeper flavor in every bite.
Serving Tips
For the best experience, serve the cookies warm about 5 to 10 minutes after baking to ensure the center is perfectly molten.
Top the dish with a large scoop of cold vanilla ice cream and a drizzle of chocolate sauce, then grab a few spoons and enjoy it straight from the pan while the chocolate is still melty!
Equipment
- 7 inch Baking Dish: An 18cm (7-inch) round or square baking dish.
- Parchment Paper: To line the dish for easy cleanup and to prevent sticking.
- Mixing Bowls: One medium-sized bowl for combining the ingredients.
- Whisk: For blending the melted butter and sugars together smoothly.
- Rubber Spatula: To gently fold in the flour and chocolate chunks without overmixing.
- Kitchen Scale or Measuring Cups: To ensure accurate measurements of the flour and sugar.
- Cookie Scoop or Large Spoon: To divide the dough into equal portions.
- Oven Mitts: To safely handl the hot dish when removing it from the oven.
More cookie recipes
Pecan Pie Cookies- These rich and thick pecan pie cookies are made with a soft cinnamon cookie base and filled with a gooey caramel pecan pie filling.
Almond Croissant Cookies- These soft almond croissant cookies are filled with almond cream (frangipane) and topped with sliced almonds and powdered sugar.
Lemon Meringue Cookies- These zesty lemon meringue cookies are made with a soft lemon cookie filled with lemon curd and topped with toasted Swiss meringue.
Connect With Us
Review: Leave a rating and comment below if you enjoyed this recipe. Socials: Follow on Facebook, Instagram, and Pinterest. Save: Pin this recipe to Pinterest for later.
📖 Recipe
Best Chocolate Chip Blondies
Ingredients
- ⅔ cup Butter melted and cooled, unsalted
- ¾ cup Brown sugar
- ½ cup Granulated sugar
- ⅓ teaspoon Kosher salt
- 2 teaspoon Vanilla extract
- 1 Egg
- 1 Egg yolk
- 1 cup Flour
- ⅓ teaspoon Cinnamon
- 1 cup Chocolate chips or chocolate chunks.
Instructions
- Preheat your oven to 350°F (175°C). Line an 8x8-inch square baking pan with parchment paper, leaving a little overhang on the sides for easy removal.
- In a large bowl, combine the melted butter, brown sugar, salt, vanilla extract, and granulated sugar.
- Whisk vigorously for 2 minutes. This dissolves the sugar into the fat, which is what creates that shimmering, paper-thin crust.
- Whisk in the egg and the extra egg yolk. Keep stirring until the mixture looks glossy and smooth.
- Add the flour. Switch to a spatula and gently fold the dry ingredients into the wet batter. Stop mixing the moment the last streak of flour disappears to keep them tender.
- Gently fold in about ¾ of your hand-chopped chocolate chunks. Spread the batter into the pan and press the remaining chunks onto the top for those signature melty pools.
- Bake for 22–25 minutes. The edges should be golden, but the center should still have a very slight "wobble." They will firm up as they cool into a perfect fudge. Let them cool for 20 minutes before slicing.
Notes
- Use Room Temp Eggs: Cold eggs can seize up your melted butter. Room temperature eggs emulsify better, leading to a smoother, glossier batter.
- The 2-Minute Whisk: Don't skip the vigorous whisking of the butter and sugar! This process dissolves the sugar, which is exactly how you get that "meringue-like" crackly top.
- Spoon and Level: If you aren't using a scale, fluff your flour with a spoon before scooping it into the measuring cup. Packing the flour too tightly results in dry, bready blondies.
- Chop Your Own Chocolate: Bars of chocolate contain more cocoa butter than chips. Chopping them yourself creates those stunning, melty "pools" and irregular shards throughout.
- Don’t Overmix: Once the flour goes in, stop as soon as it's incorporated. Overmixing develops gluten, which turns fudgy blondies into tough ones.
- The "Wobble" Rule: Pull the pan out when the edges are set and golden, but the center still has a slight jiggle. It will finish "baking" in the pan as it cools.
- Parchment Overhang: Leave a 2-inch "handle" of parchment paper hanging over the sides. This lets you lift the entire slab out for perfect bakery-style cuts.
- Wait to Slice: I know it's hard, but let them cool for at least 20–30 minutes. Slicing too early causes the gooey center to ooze out instead of holding its shape.
- Add a Salt Finish: A tiny sprinkle of flaky sea salt on top right after baking balances the brown sugar and makes the chocolate flavor pop.
- Metal vs. Glass: If possible, use a light-colored metal pan. Glass retains heat longer and can lead to overbaked, dry edges.
Comments
No Comments