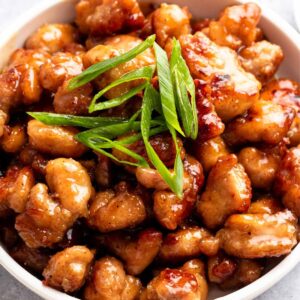
This 30-minute honey butter chicken is crispy, sweet, and juicy. Instead of deep-frying, it is shallow-fried in a pan with very little oil.
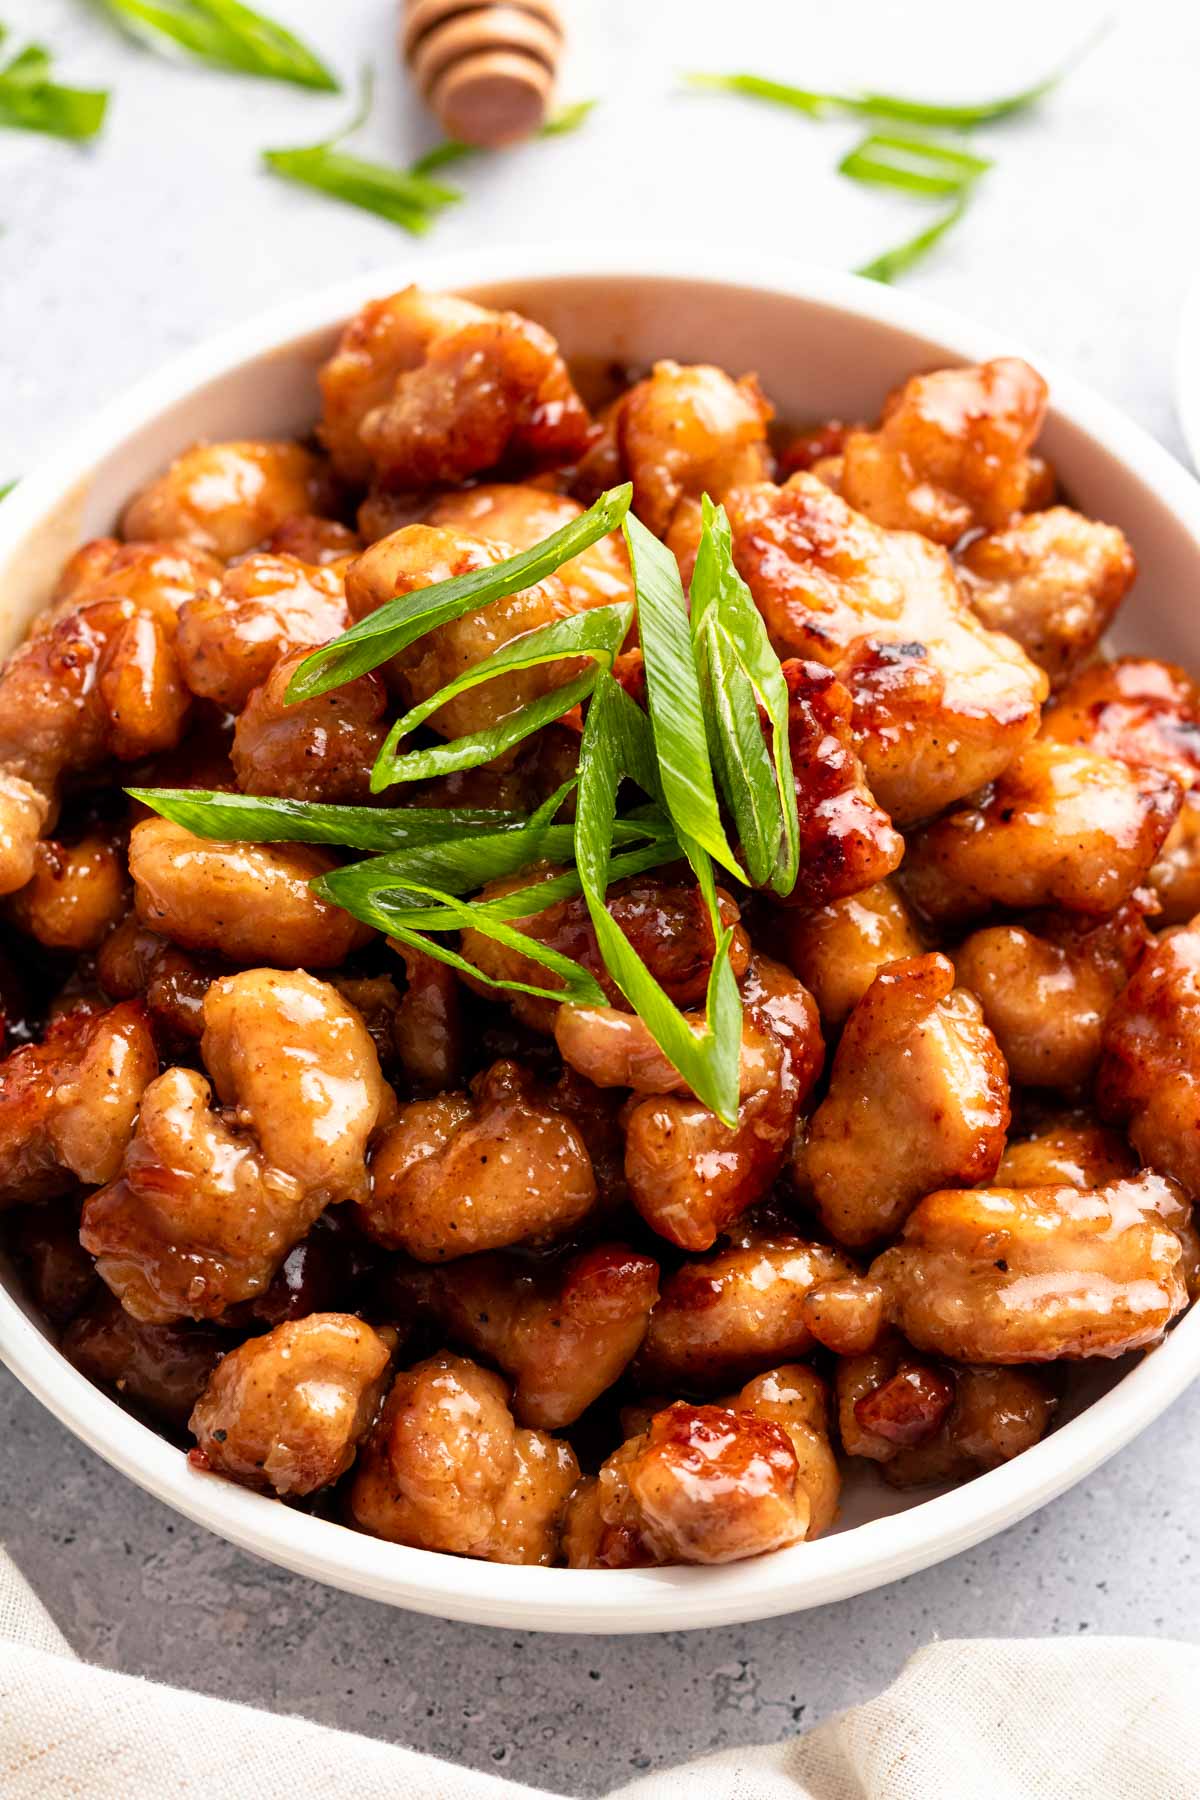
This 30-minute honey butter chicken is crispy, sweet, and juicy. It is shallow-fried in one pan for easy cleanup and a lighter alternative to deep-frying. Use chicken thighs for the best results, or sub with breasts.
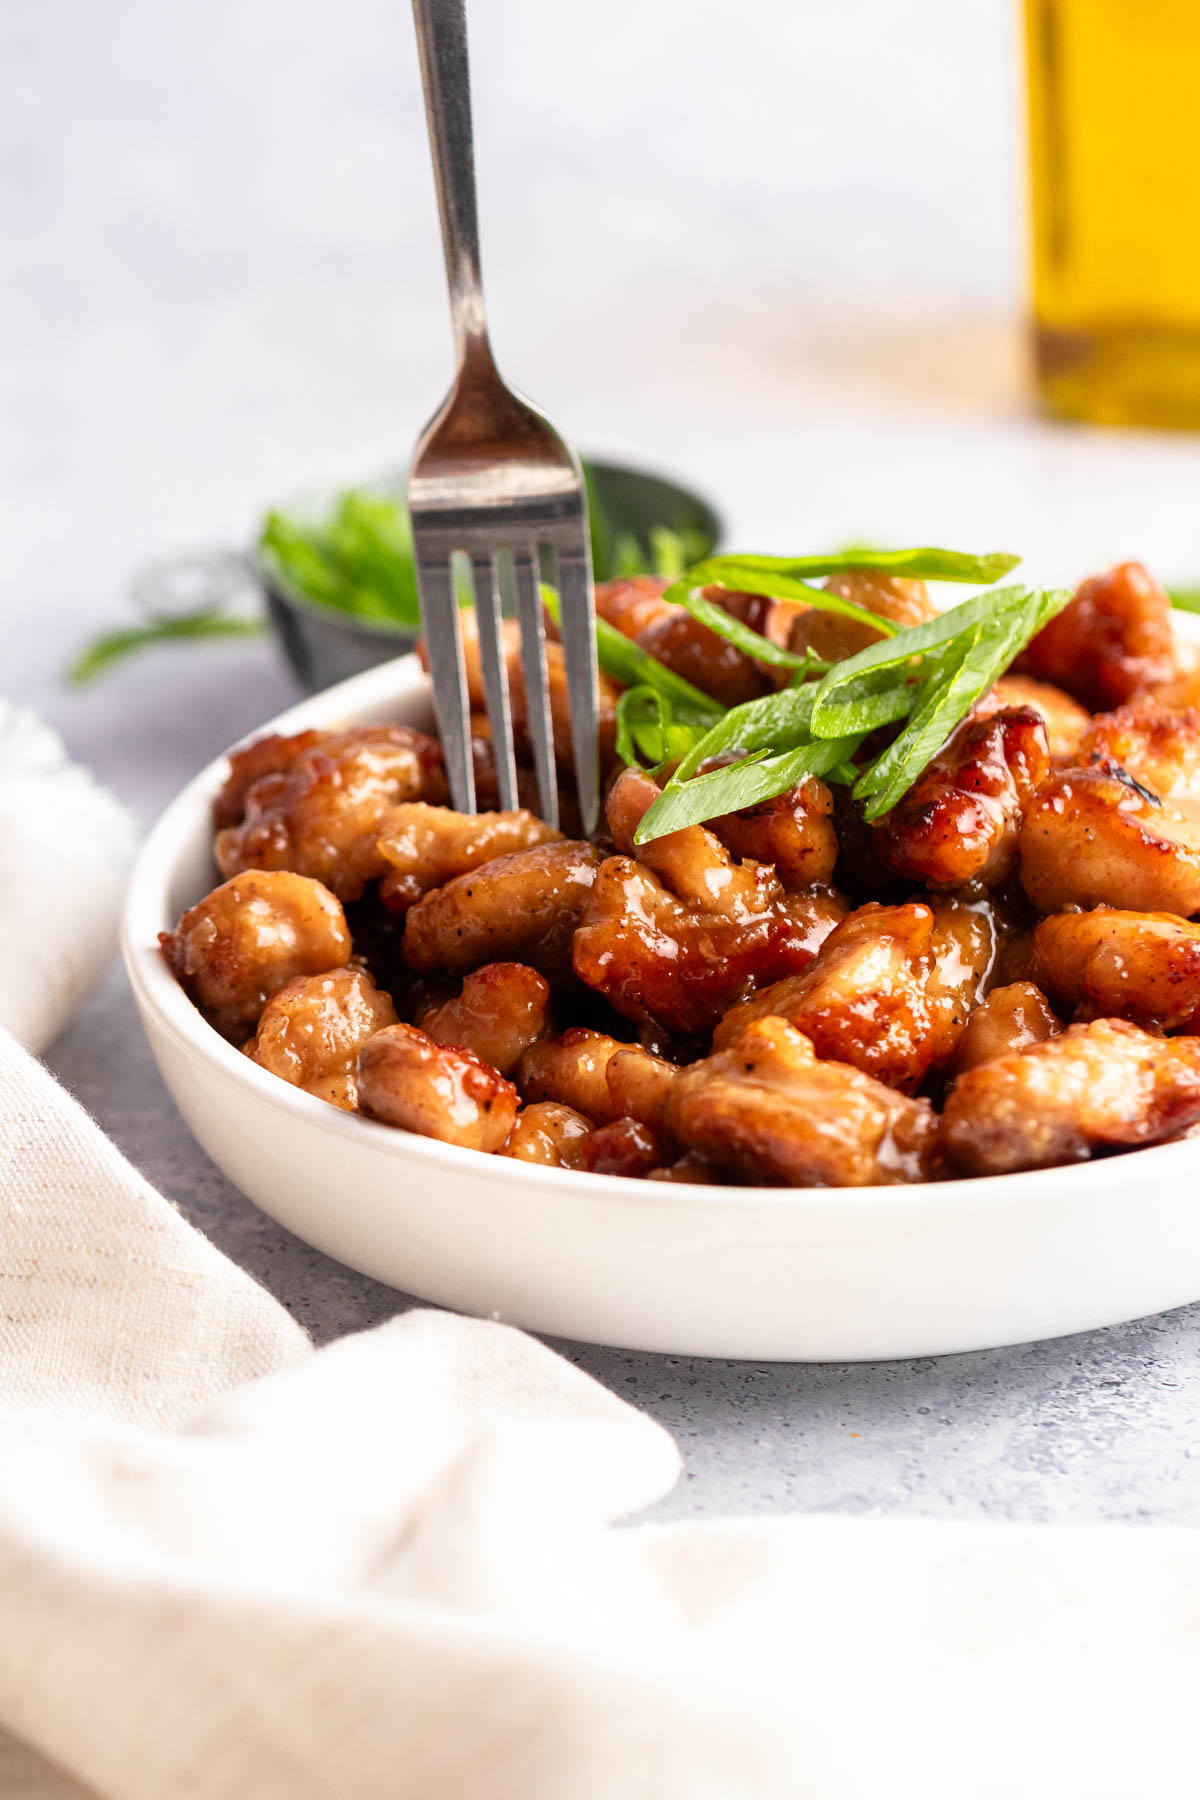
Serve over rice or mashed potatoes for a simple, restaurant-quality meal using basic pantry staples.
For more delicious chicken recipes, check out my creamy chicken limone, and Greek chicken gyros.
Jump to:
Why this recipe works
- Shallow-Frying Technique: By using a small amount of oil in a hot pan, you achieve a golden, crispy crust without the heaviness or mess of deep-frying.
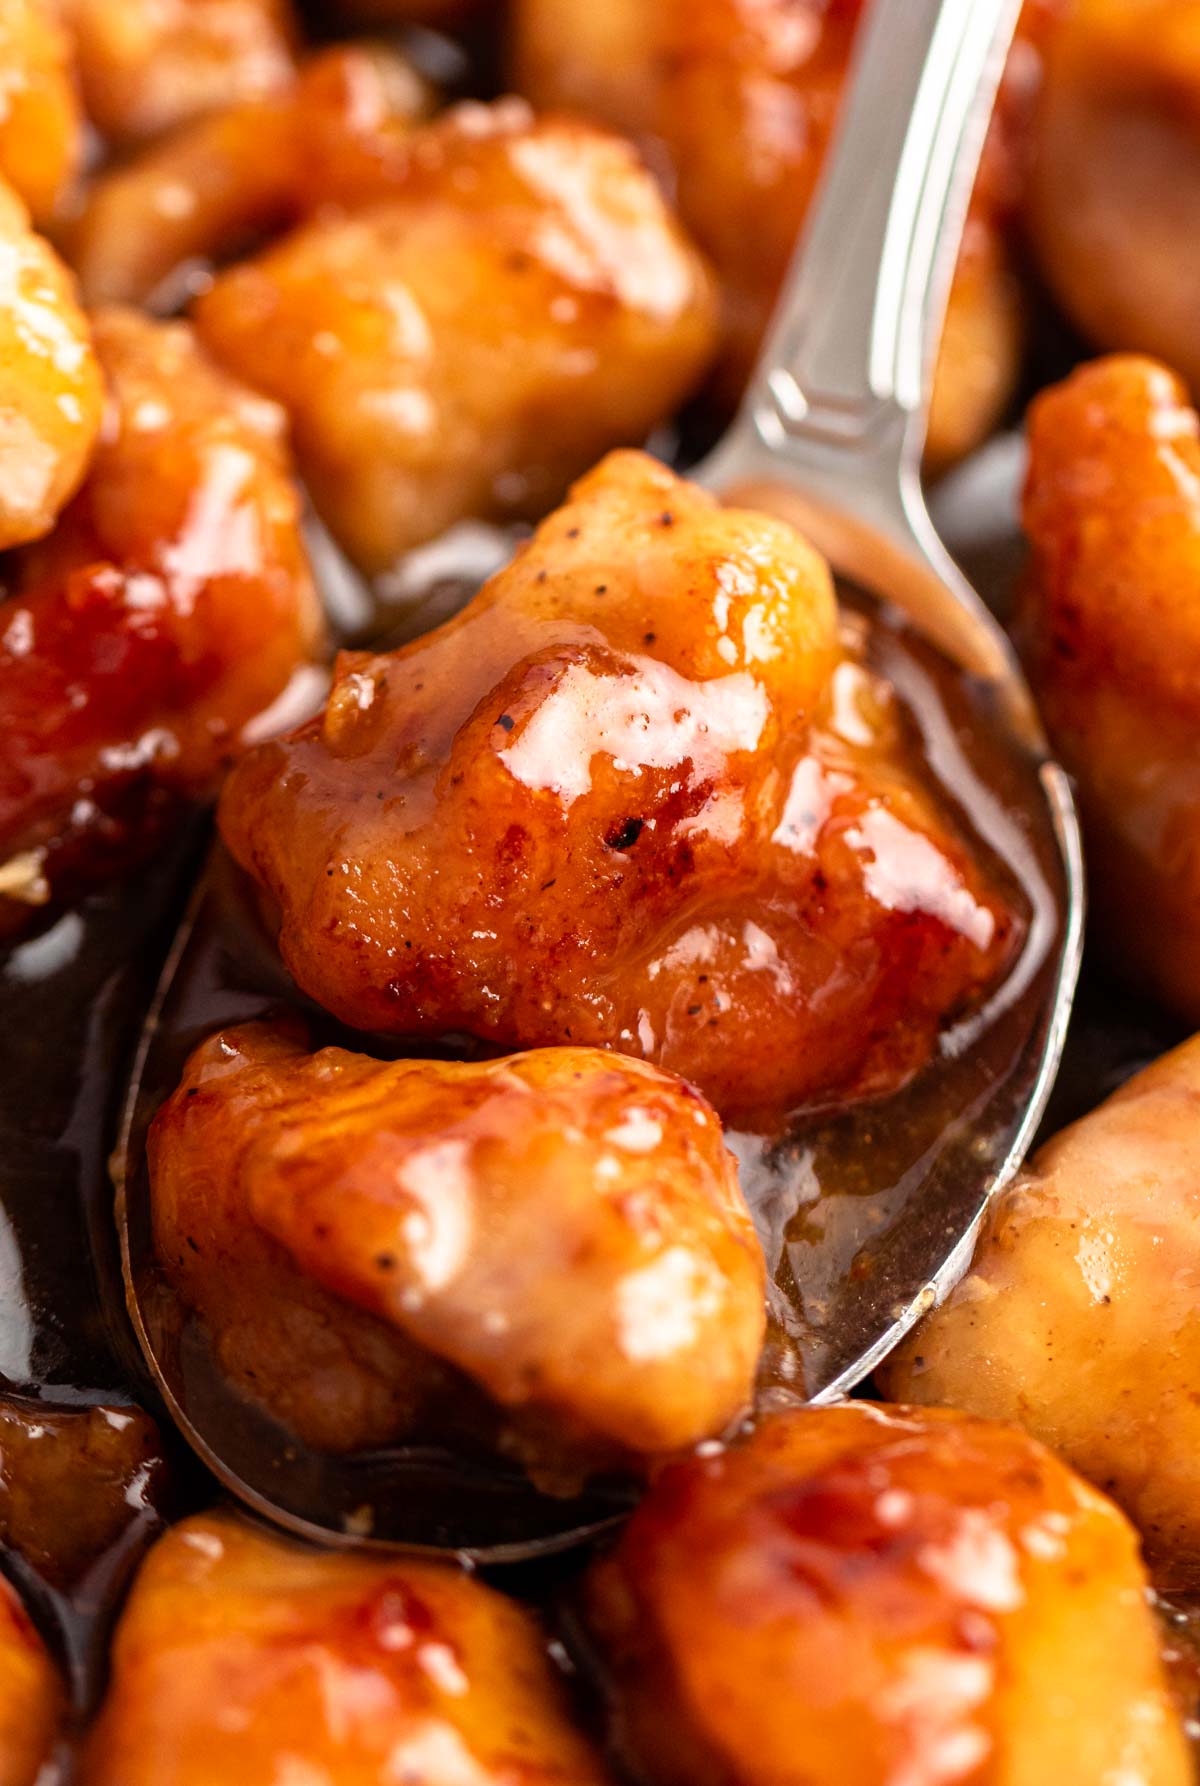
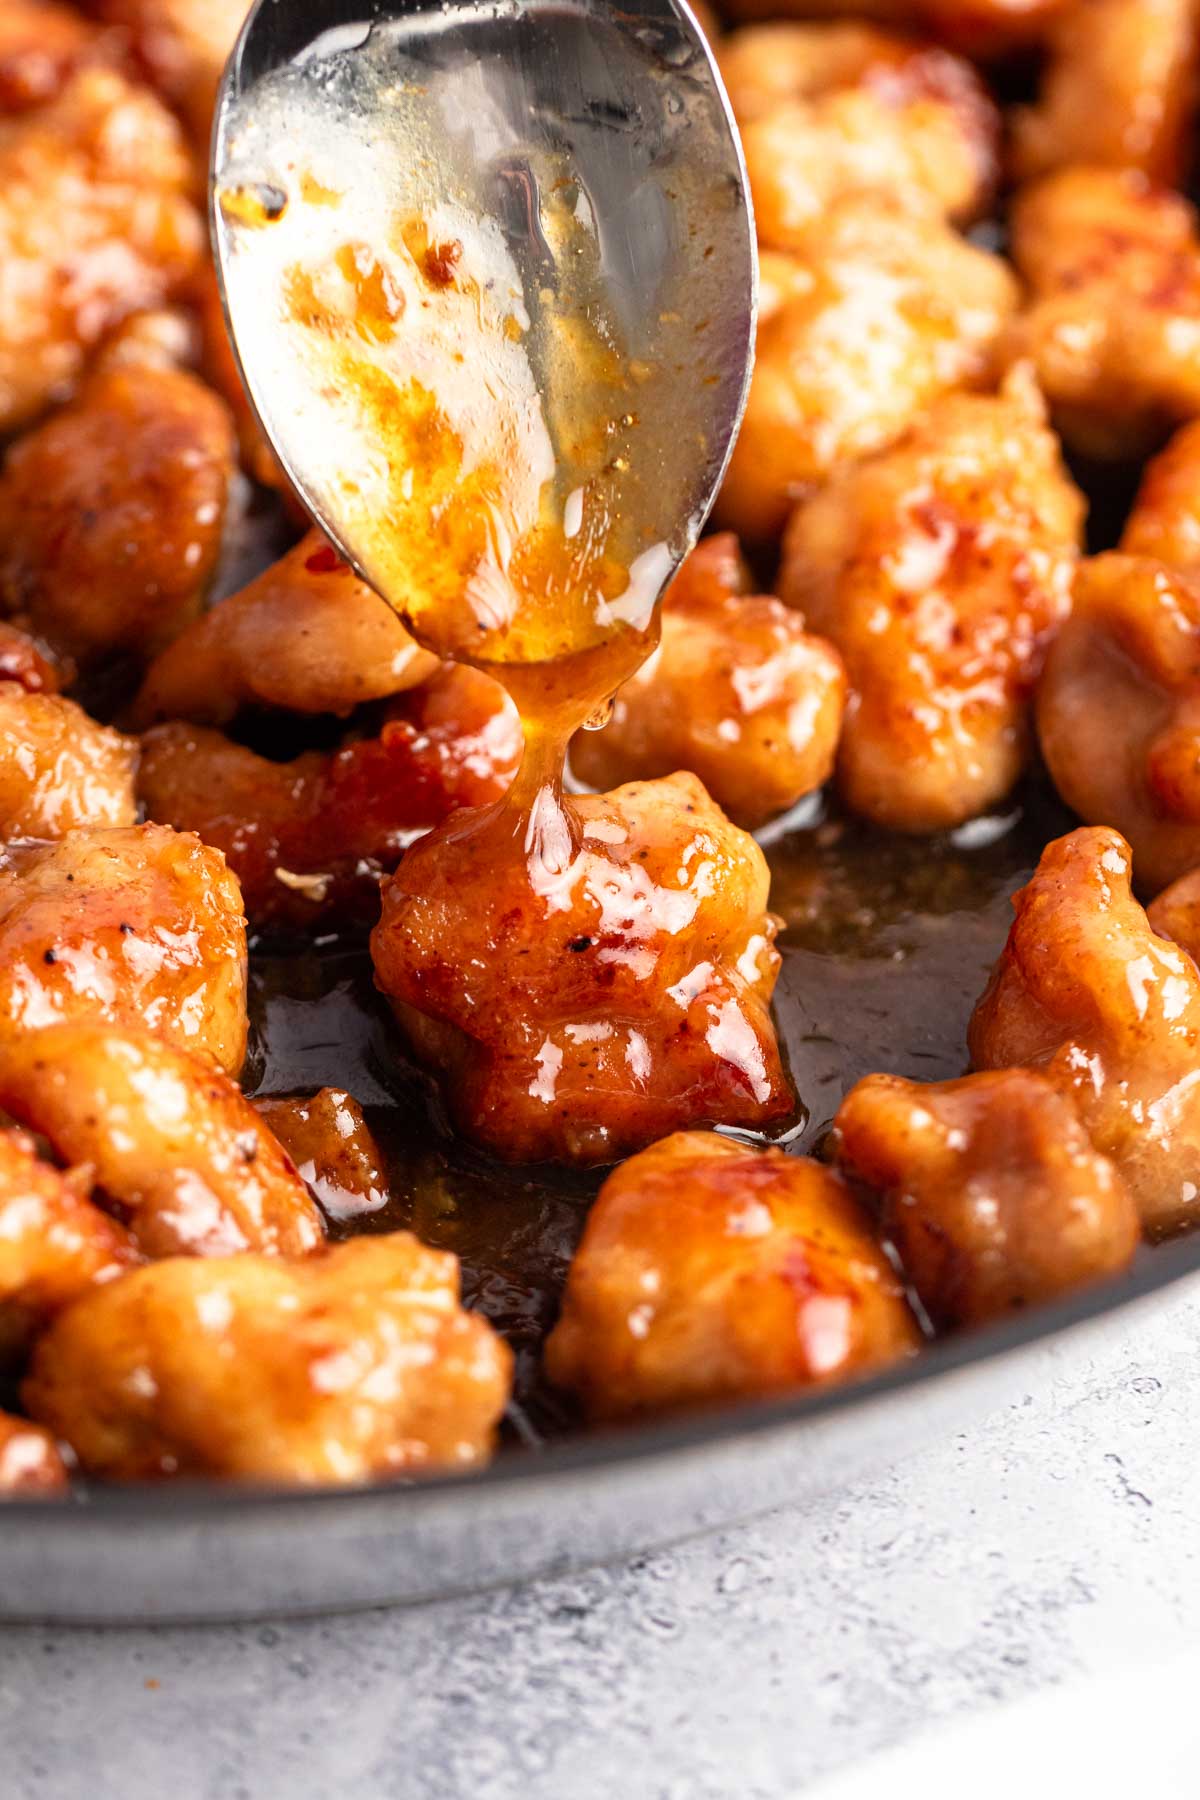
- Honey-Butter Glaze: The natural sugars in the honey caramelize quickly in the pan, creating a sticky, thick sauce that clings to the chicken instead of sliding off.
- One-Pan Emulsion: Building the sauce in the same pan used to cook the chicken incorporates the flavorful pan drippings (fond), adding a savory depth to the sweet glaze.
- Thigh vs. Breast Balance: Using chicken thighs ensures the meat stays tender and juicy even as the sauce simmers and thickens, preventing the "dry" texture often found in quick chicken recipes.
Ingredients
Before you start to make this recipe, measure and prepare your ingredients so the cooking process will go smoothly and easily.
Full measurements are in the recipe card below.
Chicken Thighs: Boneless and skinless thighs are best for staying juicy and tender. Cut them into bite-sized pieces for even cooking and maximum surface area for the glaze.
Cornstarch or Flour: Provides the light coating needed to create a crispy exterior when shallow-frying.
Honey: The base of the glaze. It provides a natural sweetness and creates that signature sticky texture.
Unsalted Butter: Adds a rich, silky finish to the sauce. Using unsalted allows you to control the seasoning perfectly.
Garlic: Freshly minced cloves offer an aromatic punch that balances the sweetness of the honey.
Soy Sauce: Adds a savory, umami depth and helps balance the sugar in the honey.
Apple Cider Vinegar (or Lemon Juice): A touch of acidity is the secret to cutting through the richness of the butter and brightening the overall flavor.
Salt and Black Pepper: Essential for seasoning the chicken before it hits the pan to ensure flavor in every layer.
Red Chili Flakes (Optional): Add a pinch if you prefer a subtle "hot honey" kick to your sauce.
Oil: Use a high-smoke point oil like vegetable, canola, or avocado oil for the best shallow-fry results.
Instructions
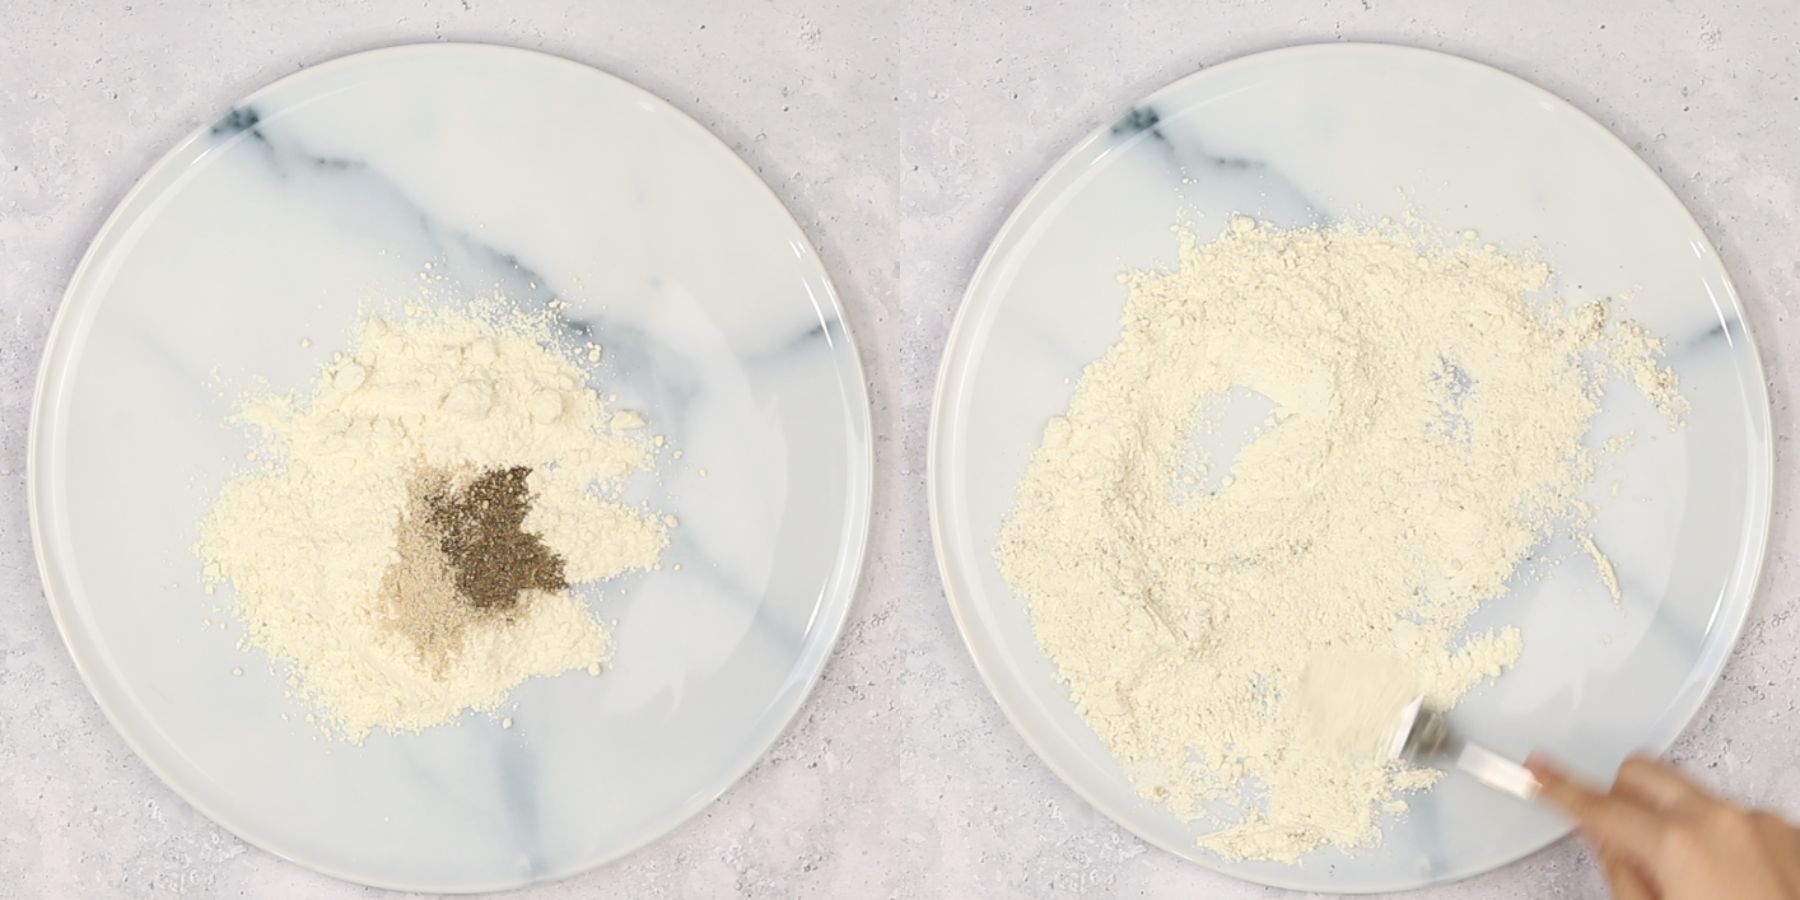
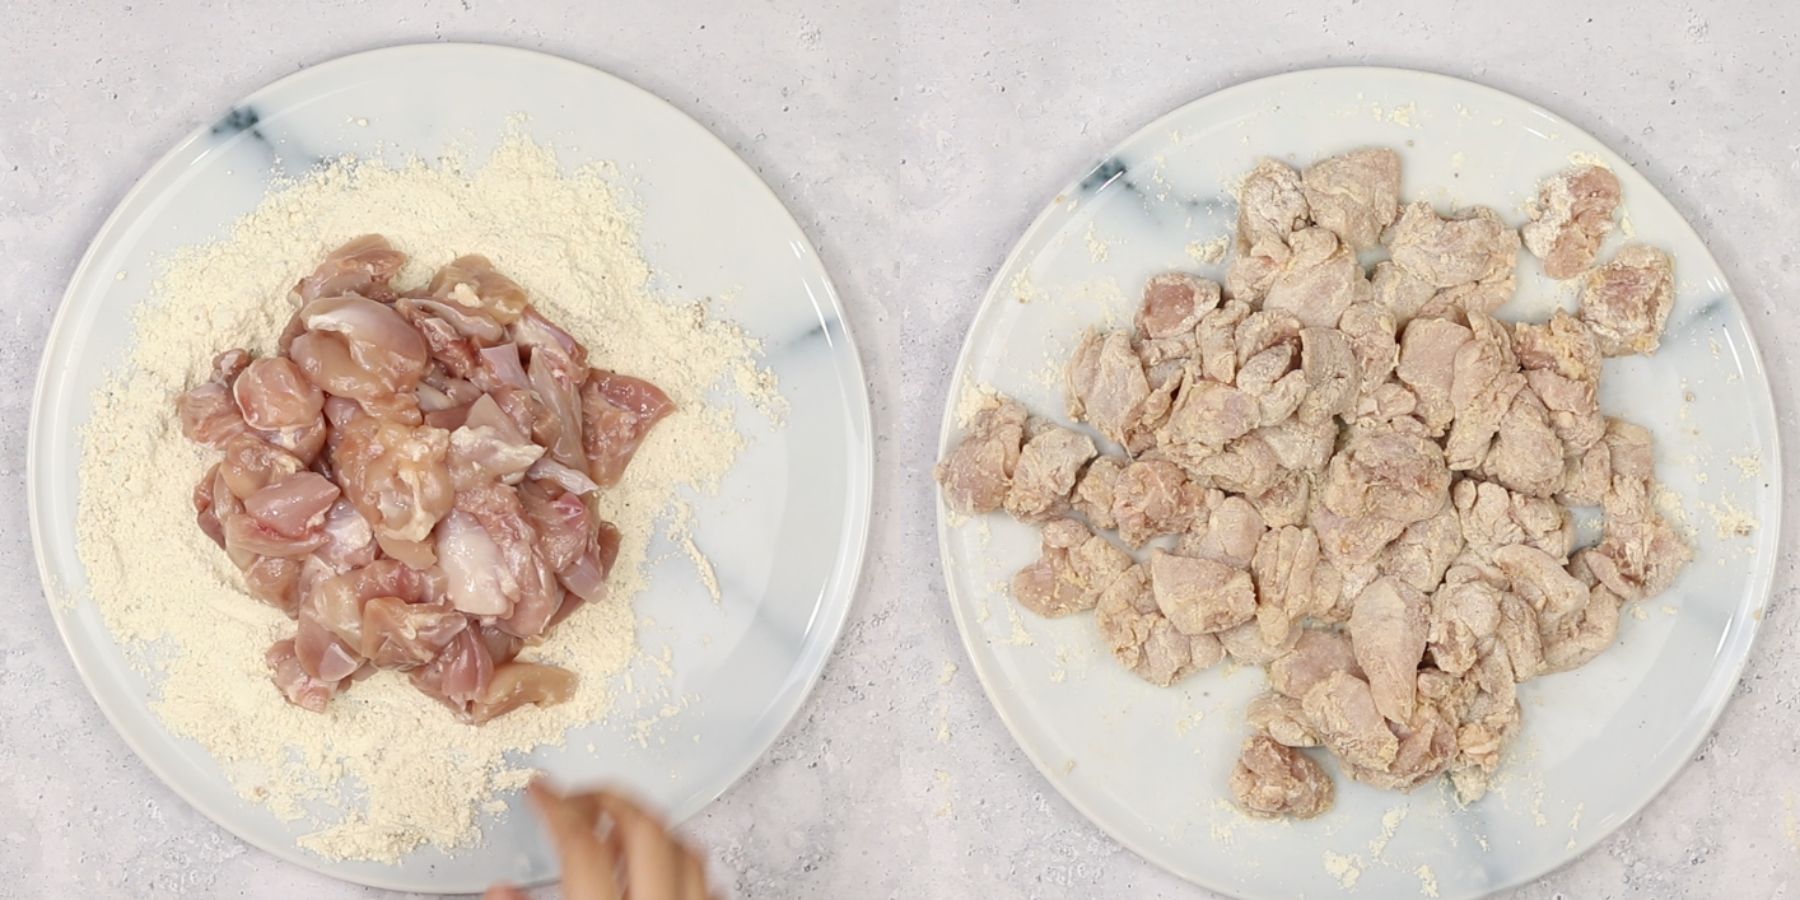
In a large bowl or flat plate, whisk together the flour, salt, black pepper, and garlic powder. Add the chicken chunks and toss until every piece is thoroughly coated.
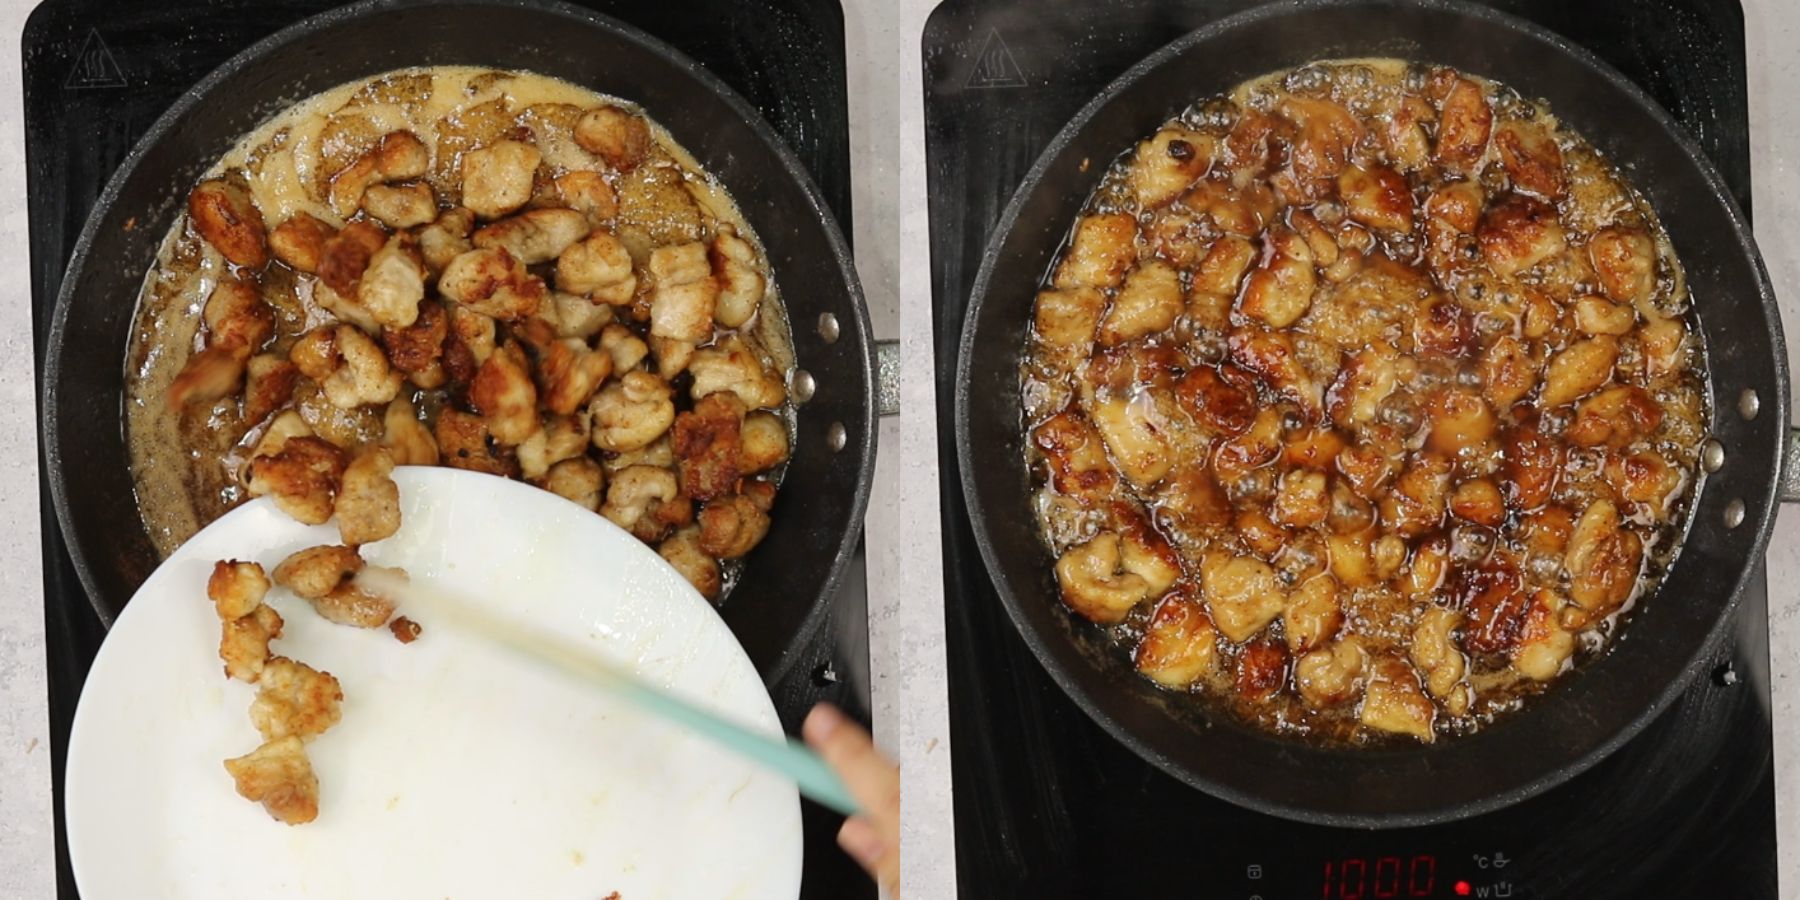
Heat oil in a large pan over medium-high heat. Fry the chicken pieces until they are golden brown and crispy on all sides. Remove the chicken and set it aside on a plate.

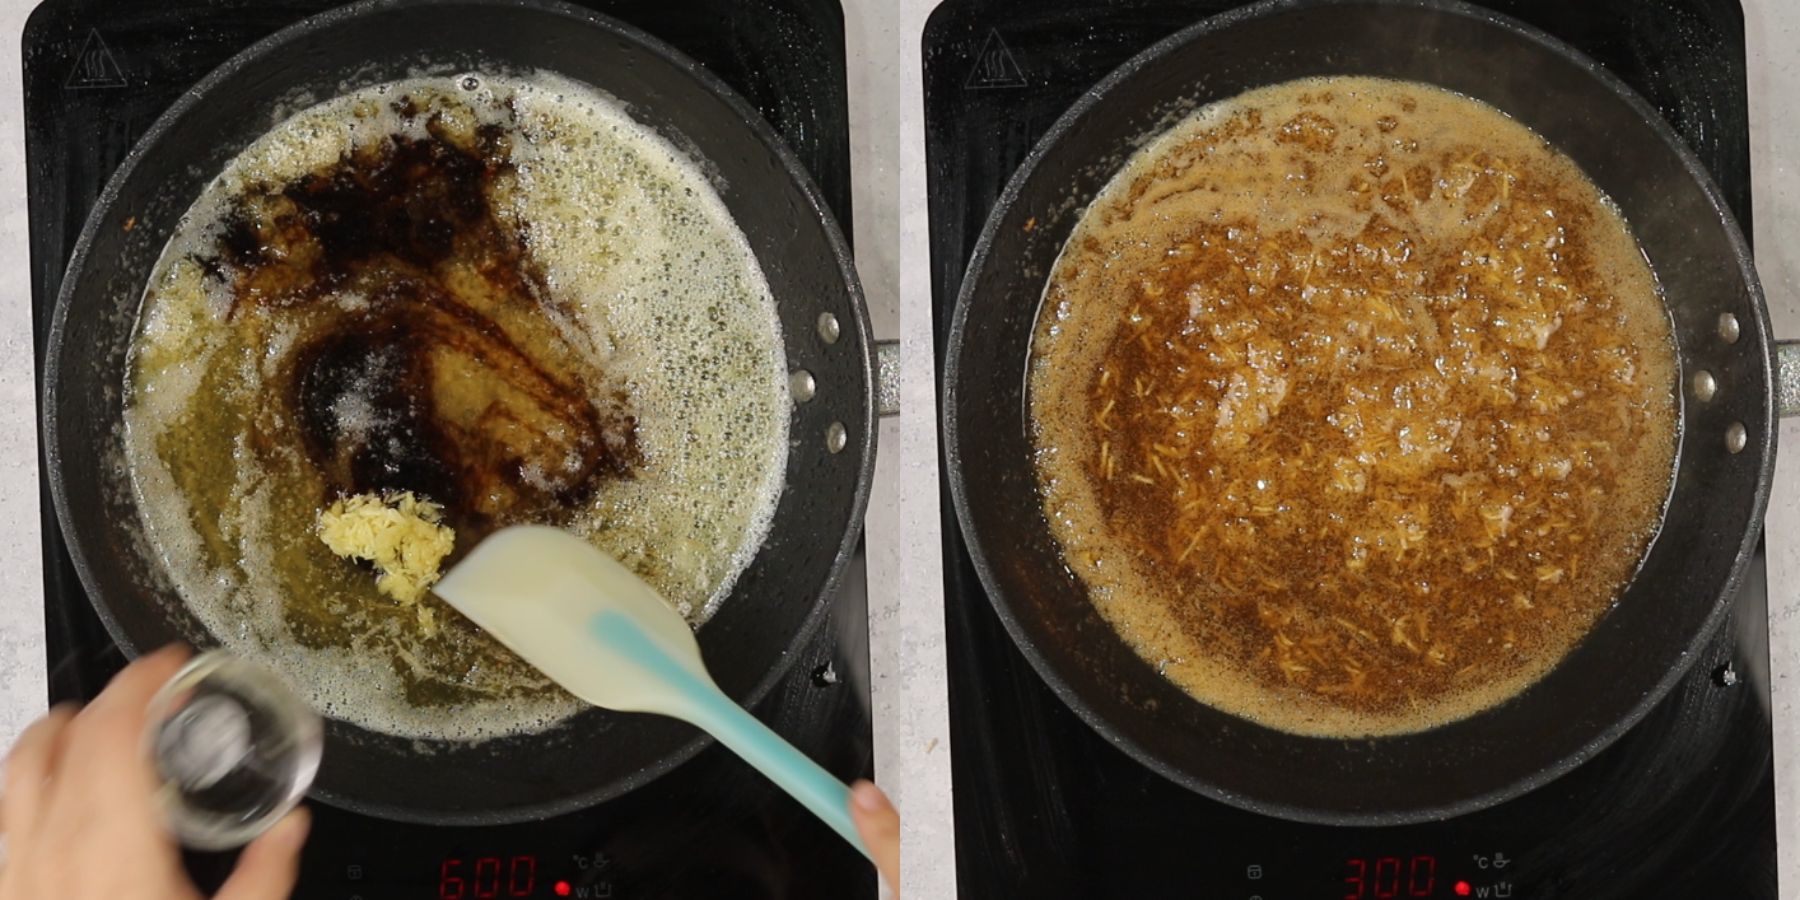
Reduce the heat to medium. In the same pan, melt the butter with the honey, soy sauce, and minced garlic. Stir well and let the mixture simmer for about 2 minutes until it becomes thick and bubbly.
Add the crispy chicken back into the pan. Toss for 1 minute, allowing the glaze to thicken further and cling to the crust. Serve immediately while hot.
Expert Tips
- Don't Overcrowd the Pan: For the crispiest results, fry the chicken in batches. If the pan is too full, the chicken will steam instead of fry, resulting in a soggy crust.
- Shake Off Excess Flour: Before the chicken hits the oil, shake off any extra flour coating. This prevents the oil from becoming "gunky" and ensures a light, thin, shatter-crisp exterior.
- Use a High-Smoke Point Oil: Use vegetable, canola, or avocado oil for shallow-frying. These can handle the medium-high heat without burning or smoking.
- The Honey Watch: Honey caramelizes quickly due to its sugar content. Once the sauce begins to bubble and thicken, move fast to toss the chicken and remove the pan from the heat to avoid burning.
- Let the Sauce Thicken First: Ensure the honey, butter, and soy sauce mixture is bubbly and syrupy before adding the chicken back in. This ensures the glaze clings to the crust rather than soaking into it.
Troubleshooting
My chicken isn't getting crispy.
Your oil likely wasn't hot enough, or the pan was too crowded. Make sure the oil is shimmering before adding the chicken, and give each piece plenty of space.
The sauce is too thin and won't stick.
Let the honey and butter mixture simmer for an extra minute or two. It needs to reach a "bubbly" state where the water has evaporated, leaving a thick, concentrated syrup.
The sauce tastes too sweet.
Balance is key! If it's too sweet, add a teaspoon of apple cider vinegar or a squeeze of fresh lemon juice. The acidity will cut through the sugar and brighten the flavors.
The coating is falling off the chicken.
Make sure to pat the chicken dry with paper towels before coating it in the flour. If the chicken is too wet, the flour will turn into a paste that slides off during frying.
Faq's
Yes! While thighs are juicier and more forgiving, chicken breasts work well, too. Just be careful not to overcook them, as they can dry out faster than thighs.
To make this gluten-free, simply swap the all-purpose flour for a 1:1 gluten-free flour blend or cornstarch, and use tamari or coconut aminos instead of soy sauce.
Yes. Coat the chicken in the flour mixture, spray generously with oil, and air fry at 200°C for 12–15 minutes, flipping halfway. Toss in the prepared sauce on the stove right before serving.
This dish is best served fresh to maintain the crispy texture of the chicken. However, you can prep the chicken by coating it in the flour mixture up to 30 minutes in advance.
If you have leftovers, reheat them in a skillet over medium heat or in an air fryer to help bring back some of the crunch.
Storing
Place leftovers in an airtight container once they have cooled to room temperature. Store for up to 3–4 days.
Freezing
You can freeze the cooked chicken in a freezer-safe bag for up to 2 months. For the best texture, freeze the crispy chicken and the sauce separately, then combine them when reheating.
Reheating
Air Fryer (Best): Reheat at 180°C for 3–5 minutes. This is the best way to bring back the crispiness of the crust.
Oven: Place on a baking sheet at 190°C until heated through and sizzling.
Stovetop: Warm in a skillet over medium heat with a tiny splash of water or extra honey to loosen the sauce.
Microwave: This is the fastest method, but note that the chicken will lose its "crunch" and become soft.
Pro Tip: If you know you'll have leftovers, try to keep some of the sauce and chicken separate. Reheat the chicken in the air fryer to get it crispy again, then toss it in the warmed sauce right before eating!
Substitutions
The Flour: Use cornstarch for a lighter, "shatter-crisp" texture. For a gluten-free version, use a 1:1 gluten-free flour blend.
The Protein: Swap chicken for shrimp (cook 2 mins per side) or extra-firm tofu (press dry before coating).
The Sweetener: Maple syrup or agave can replace honey, though the glaze will be slightly thinner.
Variations
Hot Honey: Stir in 1 teaspoon of red chili flakes or Sriracha into the bubbling glaze.
Sesame Style: Add 1 teaspoon of toasted sesame oil to the sauce and garnish with toasted sesame seeds.
Extra Garlic: Add 1 teaspoon of garlic powder to the flour mixture for a double-layer garlic flavor.
Equipment
Large Skillet: A heavy-bottomed or non-stick pan ensures even heat and prevents the honey from sticking.
Tongs: Essential for flipping small chunks of chicken without knocking off the breading.
Wire Rack (Optional): Placing fried chicken on a rack while making the sauce keeps the bottom from getting soggy.
More Easy Chicken Recipes
- Marry Me Chicken: A viral one-pan dinner featuring a creamy sun-dried tomato sauce. It’s herby, tender, and pairs perfectly with pasta or rice.
- Cast Iron Skillet Chicken: Achieve a restaurant-quality, golden-brown sear with this simple technique. This juicy chicken is a versatile protein for any side dish.
- Air Fryer Chicken Tenders: Get a crispy crunch in under 30 minutes without the mess of deep-frying. These are a family-favorite for quick lunches and busy weeknights.
Connect With Us
Review: Leave a rating and comment below if you enjoyed this recipe. Socials: Follow on Facebook, Instagram, and Pinterest. Save: Pin this recipe to Pinterest for later.
📖 Recipe
Honey Butter Chicken (30-Minute!)
Ingredients
- 1.7 lbs Boneless chicken thighs or chicken tenders
- ⅔ cup Flour
- 1 teaspoon Kosher salt
- ½ teaspoon Black pepper
- 1 teaspoon Garlic powder
- 3 tablespoon Olive oil or canola oil or vegetable oil
For the honey butter sauce
- ⅓ cup Honey
- ½ cup Butter unsalted
- 2 cloves Garlic minced
- 2 tablespoon Soy sauce light soy sauce
Instructions
- In a large bowl or flat plate, whisk together the flour, salt, black pepper, and garlic powder. Add the chicken chunks and toss until every piece is thoroughly coated.
- Heat oil in a large pan over medium-high heat. Fry the chicken pieces until they are golden brown and crispy on all sides. Remove the chicken and set it aside on a plate.
- Reduce the heat to medium. In the same pan, melt the butter with the honey, soy sauce, and minced garlic. Stir well and let the mixture simmer for about 2 minutes until it becomes thick and bubbly.
- Add the crispy chicken back into the pan. Toss for 1 minute, allowing the glaze to thicken further and cling to the crust. Serve immediately while hot.
Notes
- Don't Overcrowd the Pan: For the crispiest results, fry the chicken in batches. If the pan is too full, the chicken will steam instead of fry, resulting in a soggy crust.
- Shake Off Excess Flour: Before the chicken hits the oil, shake off any extra flour coating. This prevents the oil from becoming "gunky" and ensures a light, thin, shatter-crisp exterior.
- Use a High-Smoke Point Oil: Use vegetable, canola, or avocado oil for shallow-frying. These can handle the medium-high heat without burning or smoking.
- The Honey Watch: Honey caramelizes quickly due to its sugar content. Once the sauce begins to bubble and thicken, move fast to toss the chicken and remove the pan from the heat to avoid burning.
- Let the Sauce Thicken First: Ensure the honey, butter, and soy sauce mixture is bubbly and syrupy before adding the chicken back in. This ensures the glaze clings to the crust rather than soaking into it.


Lisa says
This was the best recipe for garlic honey, butter chicken, that I have ever tasted.
Laura says
Great and easy. I did screw it up at the end, by letting the sauce boil for a few minutes after added to the chicken. The heat was too high and the butter separated. Still good, but would have been a lot better if I hadn’t let the sauce come to a full boil.
Che says
Delicious! I used 6 tbsp of butter and it did the trick! Will definitely make again!!
Cathy Fudala says
I used rice flour and it worked well. My husband and I both liked the dish, but it was a little too sweet. Thanks for posting this recipe.
JENNIFER says
This recipe was the best! Why i stayed away from this is beyond me. So easy and taste so good Thank you!
Katrina says
A very easy and delicious weeknight meal!