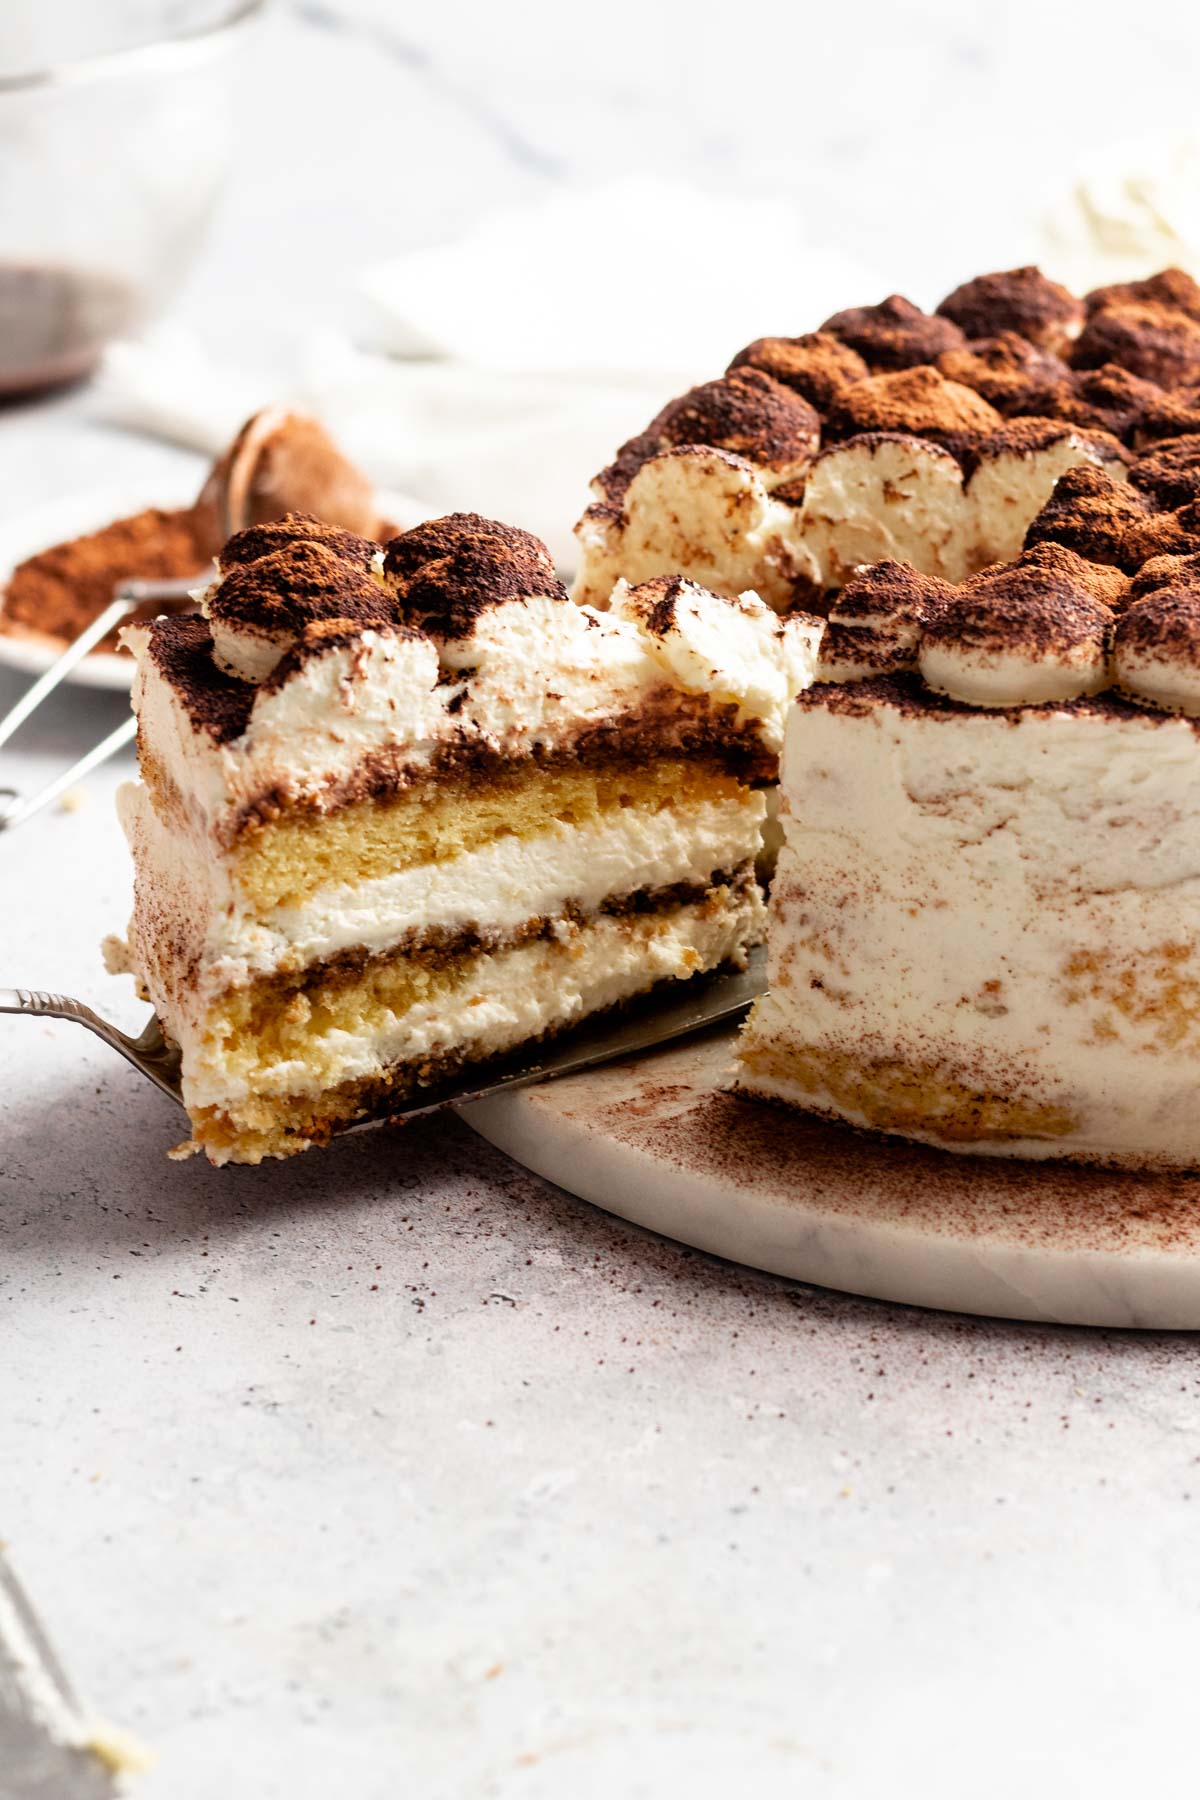
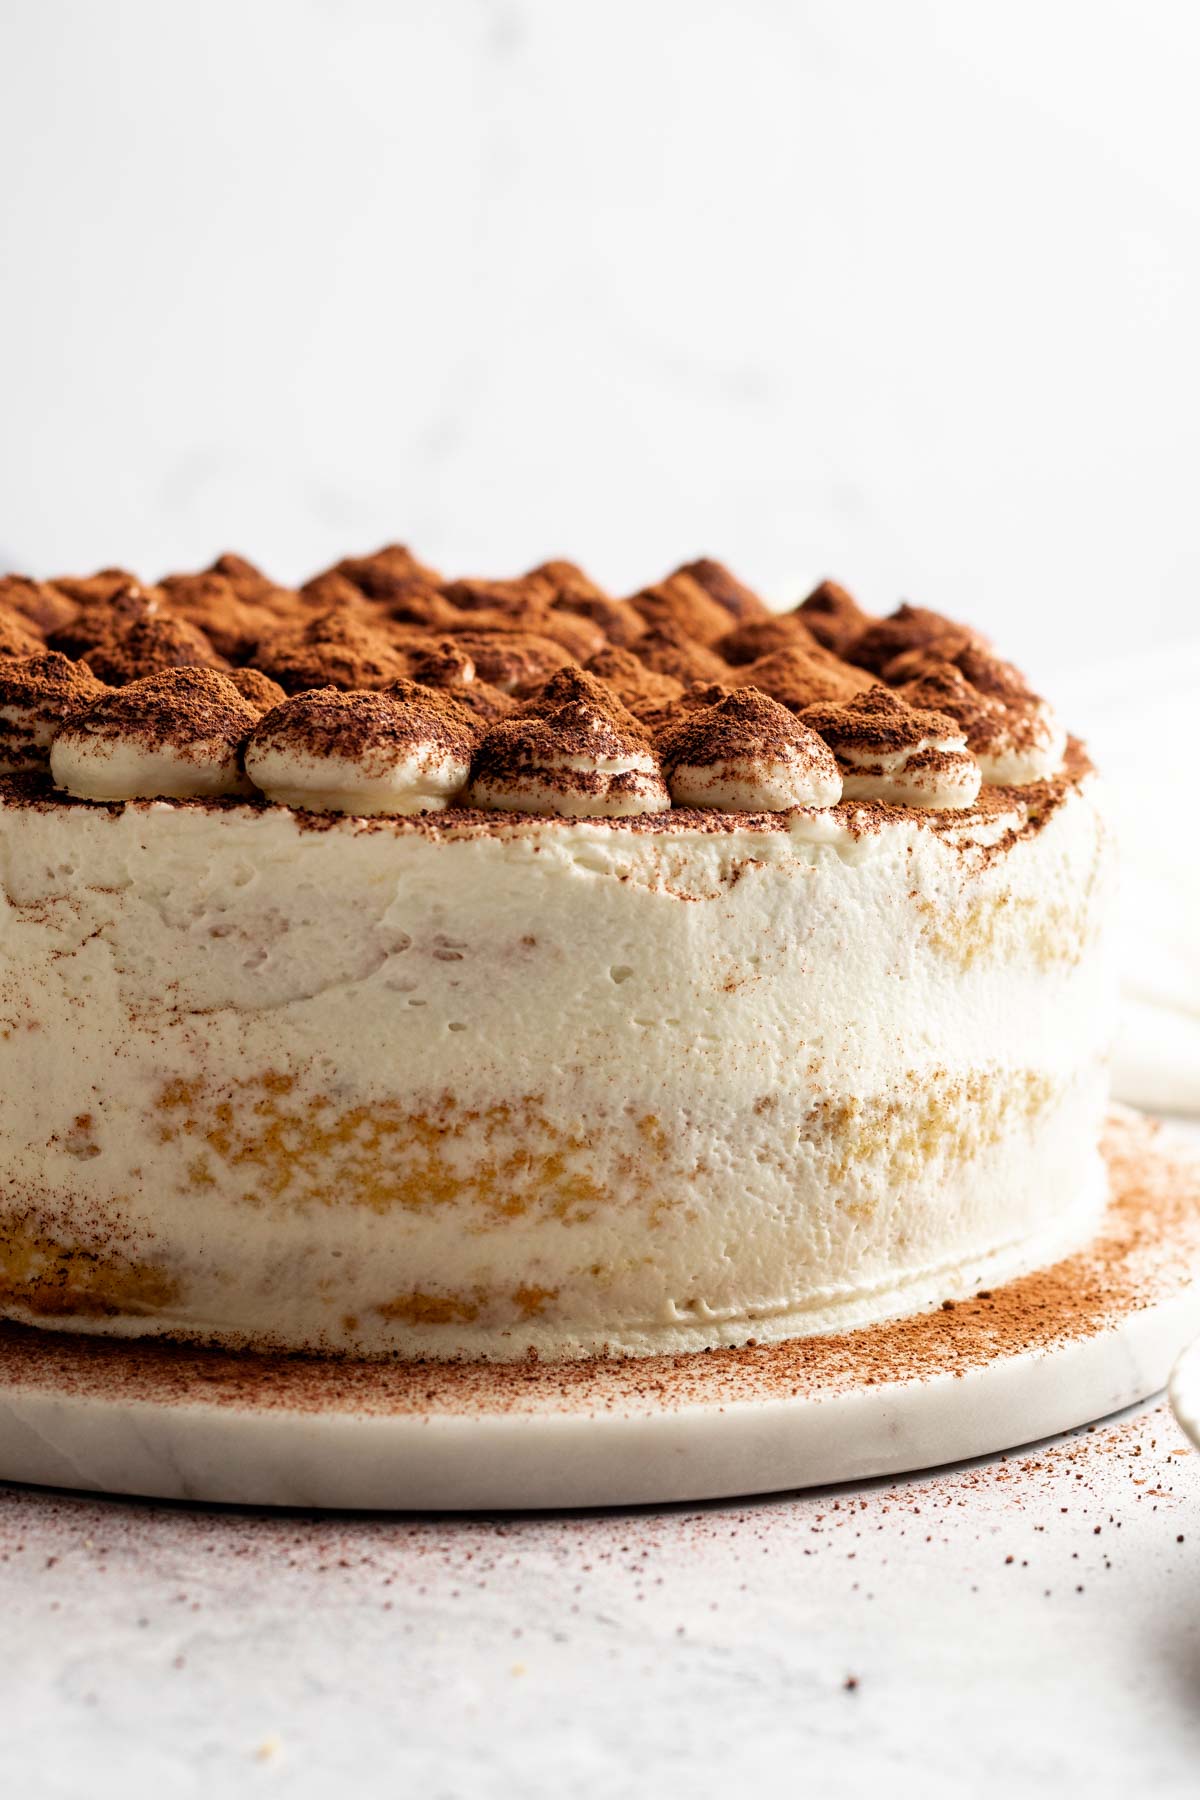
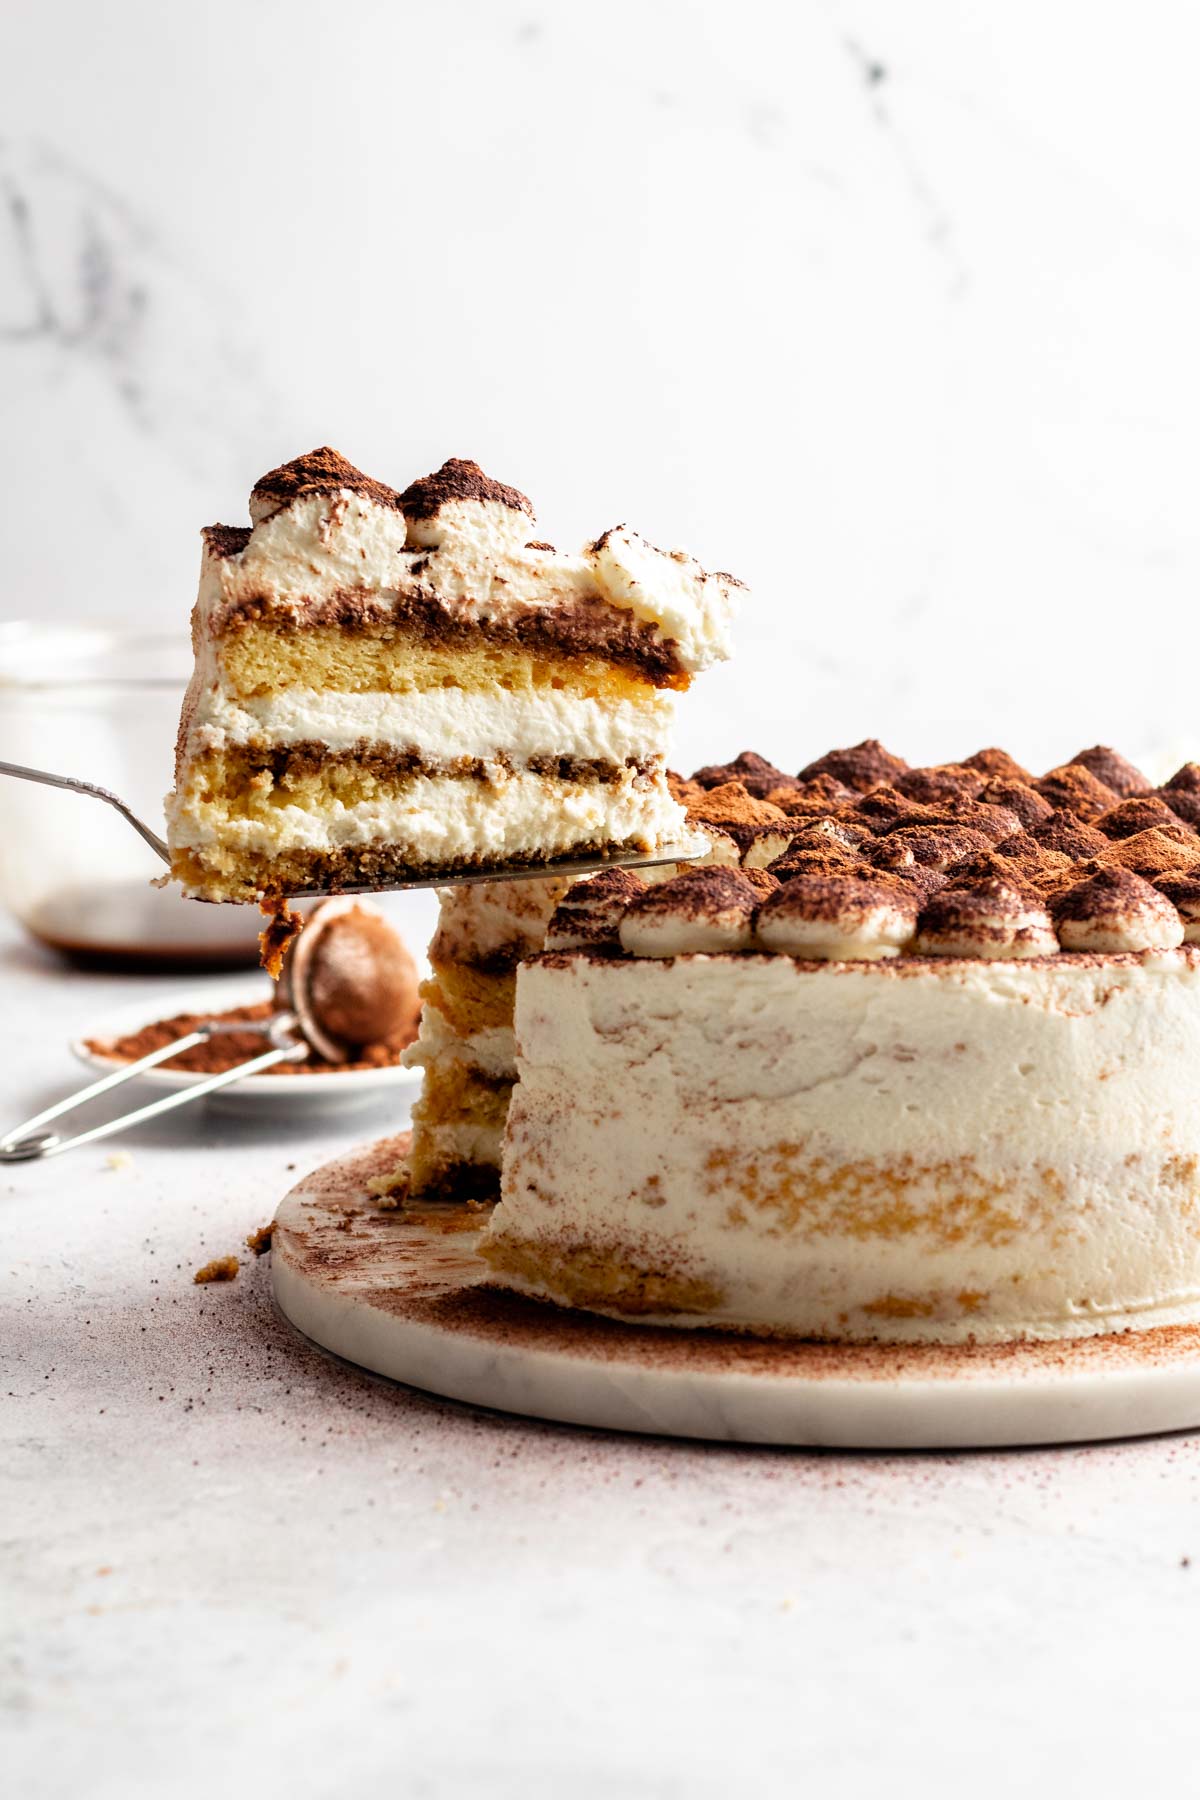
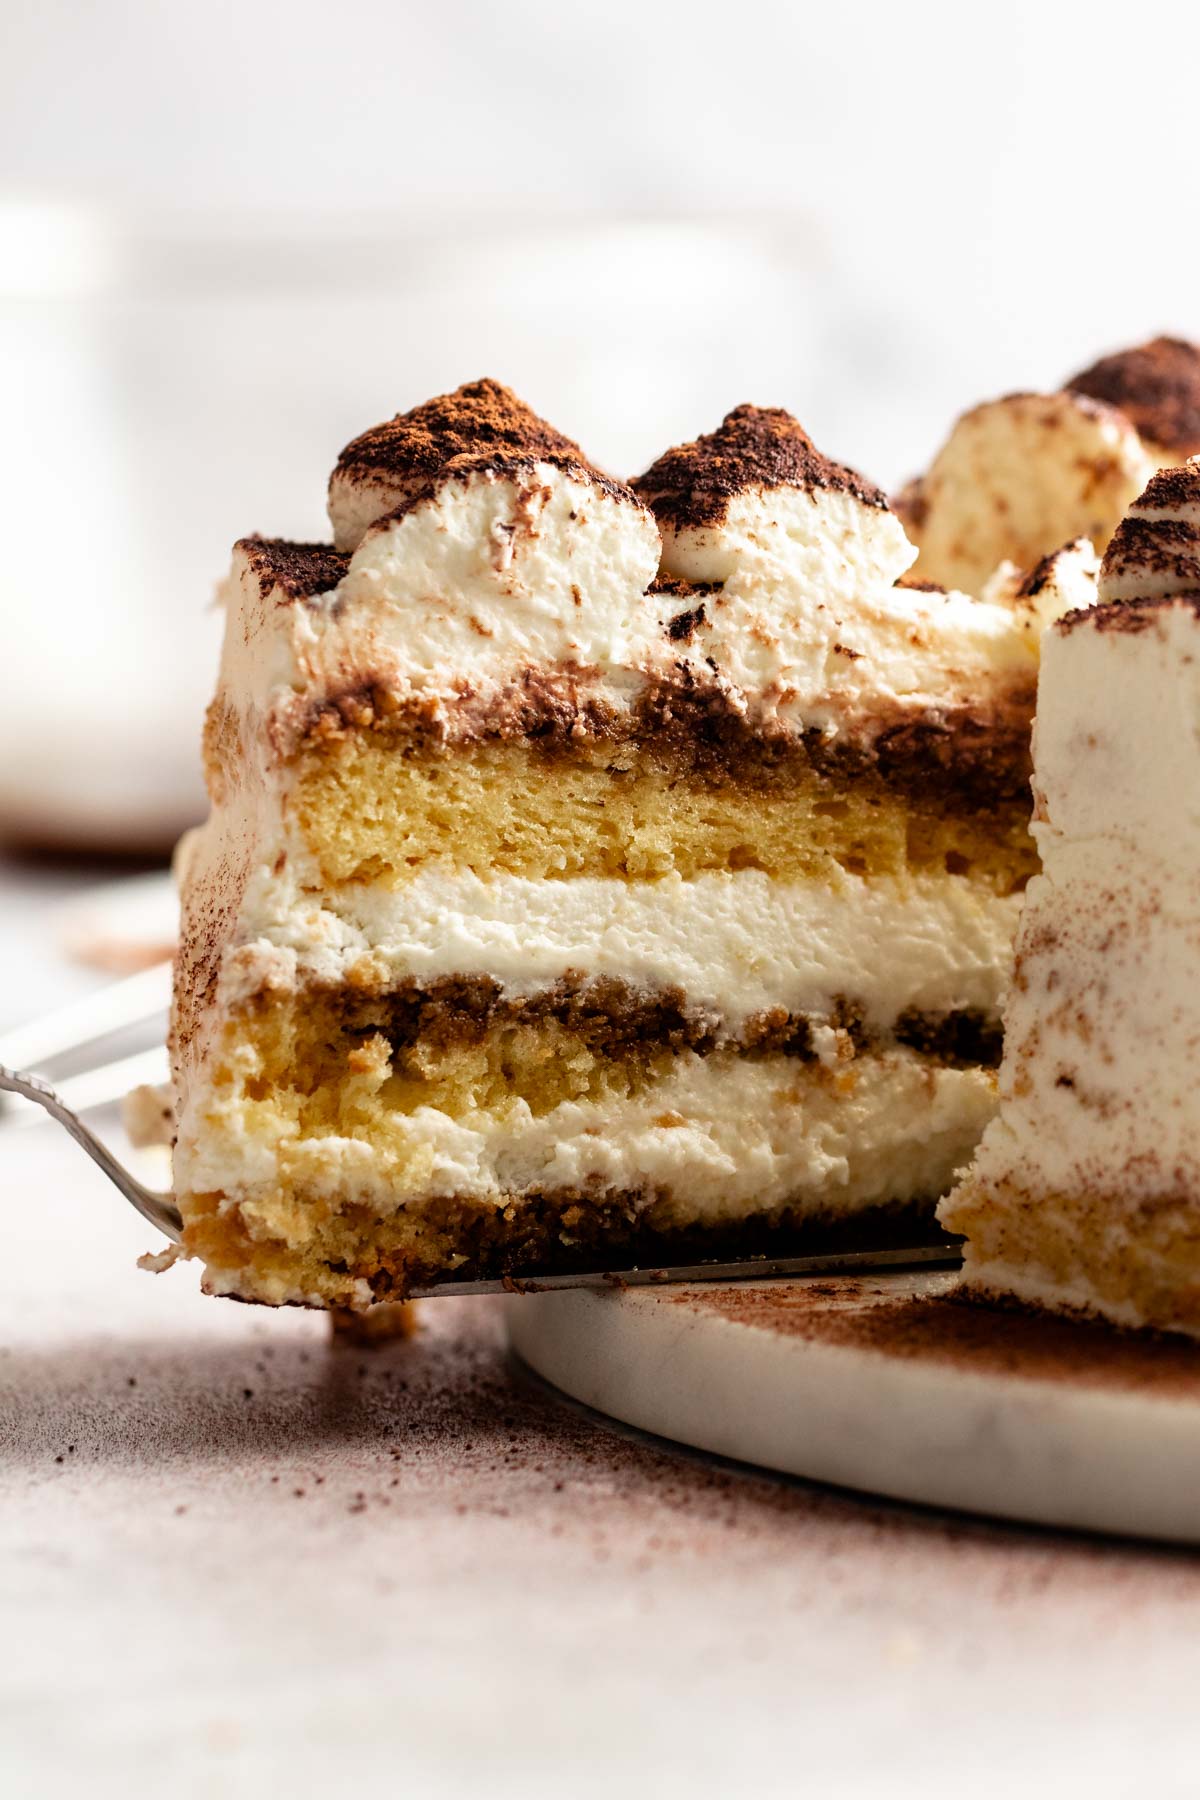
This tiramisu cake is made with genoise cake soaked with espresso filled with mascarpone cream, and topped with cocoa powder.
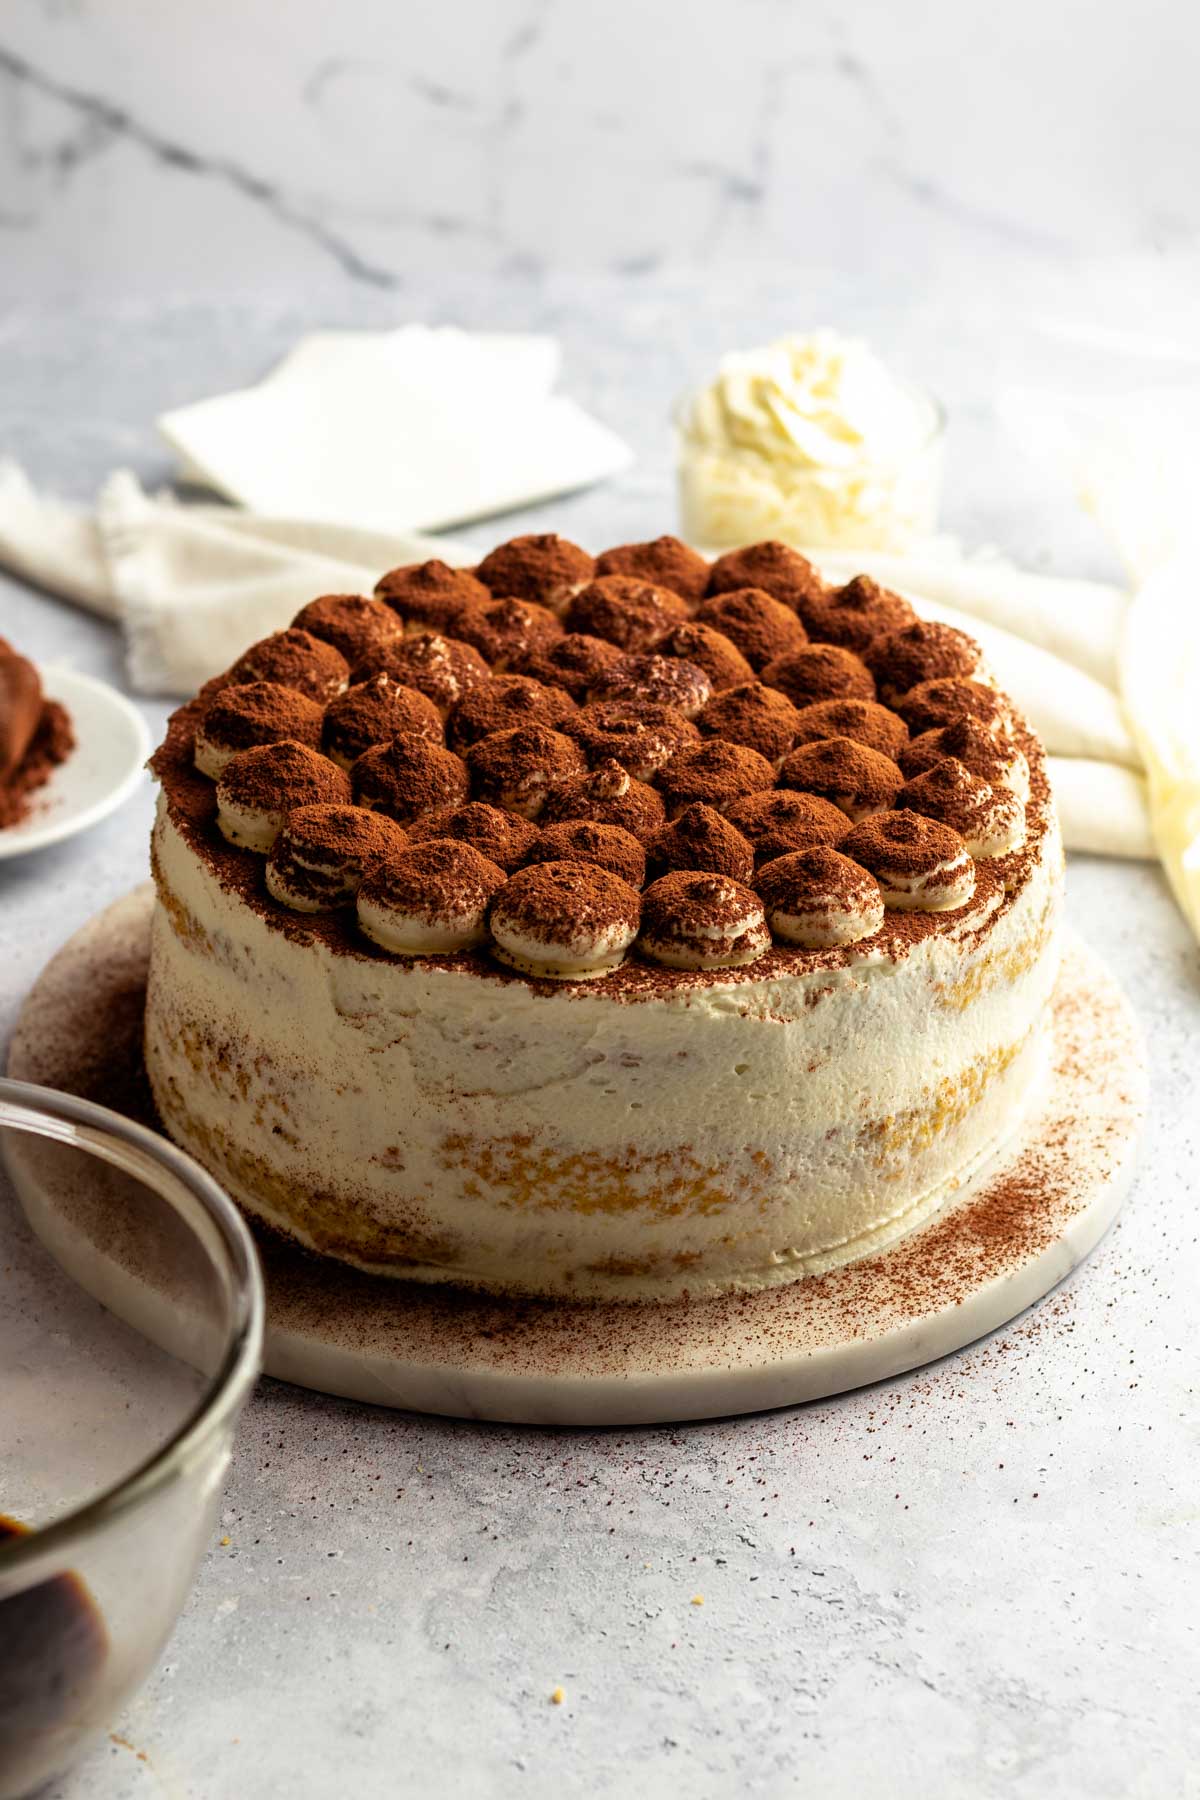
This tiramisu layer cake is light and soft and melts in your mouth. This cake is stunning and is easy to make and is made with simple ingredients.
This decadent treat features layers of coffee-soaked sponge cake, luscious mascarpone cream, and a dusting of cocoa powder for that perfect finishing touch.
Each bite offers a harmonious blend of sweet and bitter notes, creating a truly indulgent experience for any dessert lover.
Whether served on a special occasion or enjoyed as a weekend treat, tiramisu layer cake is sure to impress with its sophisticated flavors and beautiful layers.
For more layer cake recipes, check out my Matilda's chocolate cake, pistachio cake, snickers cake, lemon curd cake, and Ferrero Rocher cake.
Jump to:
Why this recipe works
- Texture- this cake is light and airy and will melt in your mouth in every bite. It is layered with layers of fluffy and light sponge cake, and filled with creamy and fluffy mascarpone cream.
- Flavor- this delicious cake has the exact flavors of tiramisu cake, it has rich and creamy layers of mascarpone cheese, coffee-soaked sponge cake, and a hint of cocoa powder. The combination of sweet, bitter, and creamy flavors creates the most delicious cake.
- Perfect for any occasion- this cake is perfect for any occasion from birthdays to holidays, to events.
- Light cake- It is light and fluffy and is not too sweet! You can make it sweeter by adding more sugar for a more sweet cake, but I it think is perfect.
- Simple- this cake is made with super simple ingredients you can find in any grocery store, nothing fancy, even though it look super fancy!
How to make even cake layers
My biggest tip to make even cake layers is to use a scale and cake strips. Weigh the cake batter and divide it into two even pans.
Then use cake strips to make sure your cake layers bake evenly and don’t develop a dome on top. Cake strips give you an evenly baked cake with a flat top.
Ingredients
Before you start to make this recipe, measure and prepare your ingredients so the cooking process will go smoothly and easily.
Full measurements are in the recipe card below.
For the sponge cake:
Flour– we used all-purpose flour for this recipe, cake flour will work great as well.
Baking powder– to allow the cake to rise. Ensure your baking powder is not expired.
Eggs- Make sure that your eggs are at room temperature.
Vanilla extract- adds extra flavor.
Sugar- we used granulated sugar for this recipe. You can use caster sugar as well.
Kosher salt- you will need about ½ teaspoon of kosher salt for this recipe.
For the mascarpone cream
Mascarpone cheese- is the most important ingredient, make sure that you put your mascarpone cheese at room temperature for at least 30 minutes before starting to make the recipe.
Heavy cream- make sure that your heavy cream is cold. Cold heavy cream whips better and quicker.
Espresso coffee- we made espresso coffee with our coffee machine, but you can use instant coffee and hot water and make a strong coffee as well. You will need ¾ cup of coffee for this.
Powder sugar- you will need powdered sugar for this recipe. you don’t have to buy powdered sugar, you can make it at home by blending granulated sugar in a blender or food processor.
Liqueur (optional)- tiramisu is usually made with liqueur. This step is optional. You can use any Italian liqueur like amaretto, marsala, etc. You add it to the coffee mixture.
Dutch-process cocoa powder– we like to use Dutch-process cocoa powder for this because we want the deep and rich chocolate taste, but the natural cocoa powder will work great as well!
Instructions
Preheat the oven to 180c (350f) and prep a parchment paper-lined 8-inch cake pan.
Into a large mixing bowl, add the eggs (room temp), granulated sugar, kosher salt, and vanilla extract. Mix with an electric hand mixer or use a stand mixer with the balloon attachment.
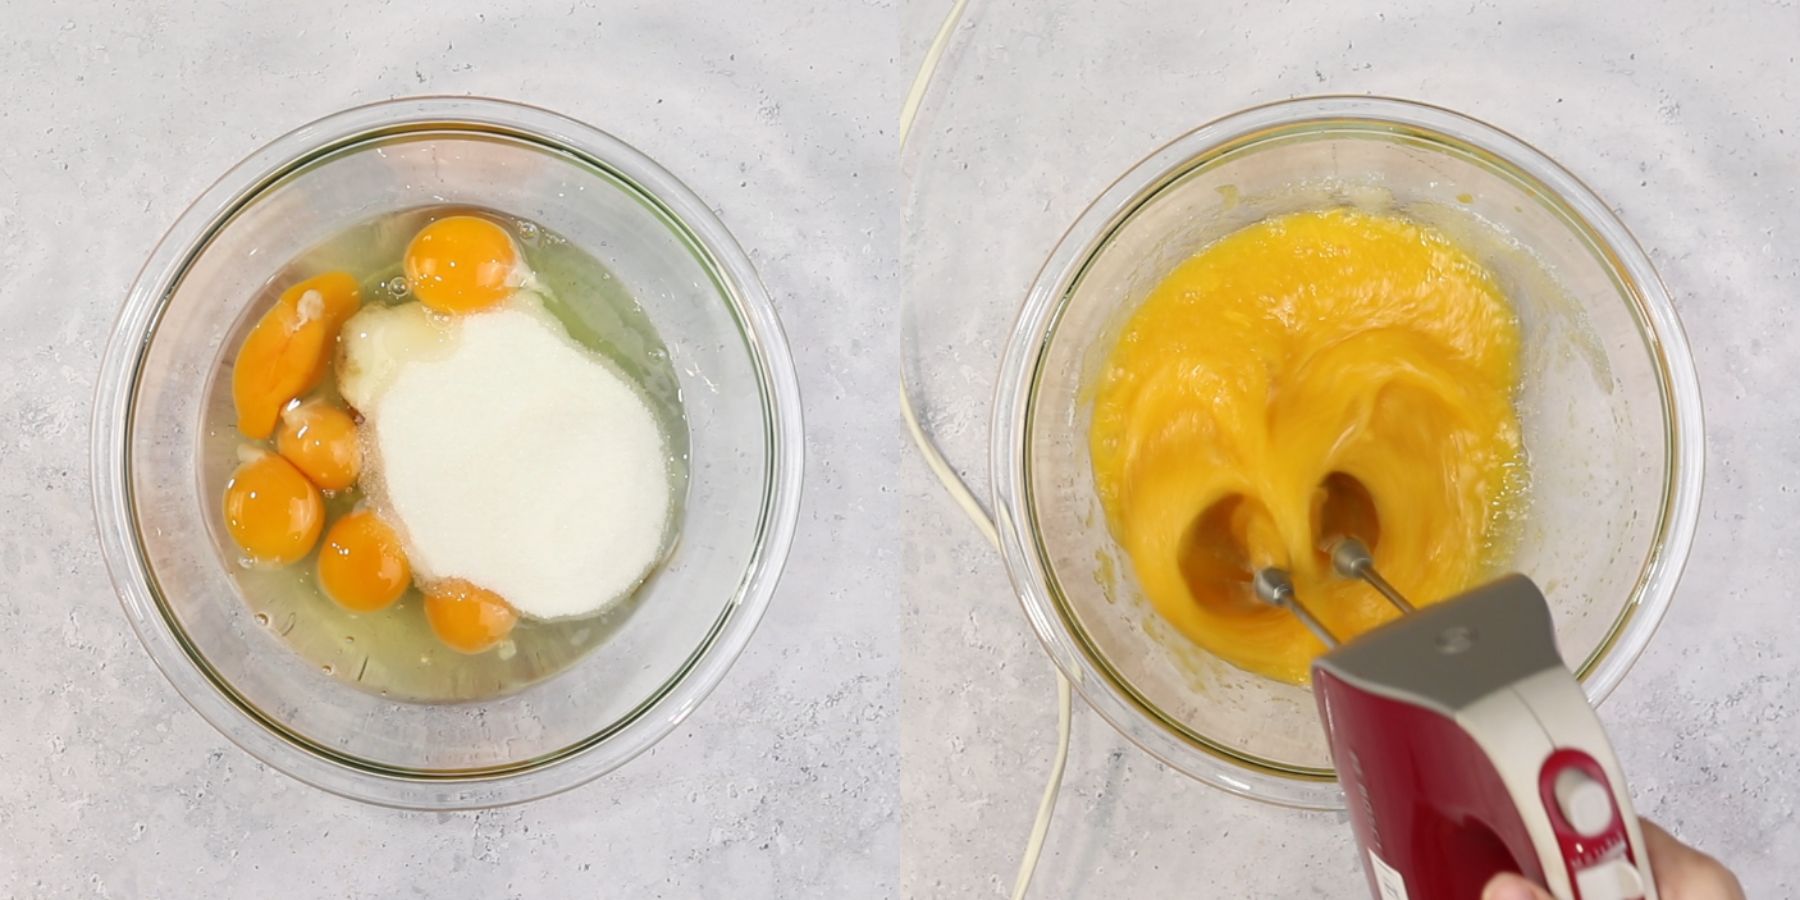
Mix for about 10 minutes on high speed (be patient) until you get a fluffy and light mixture.
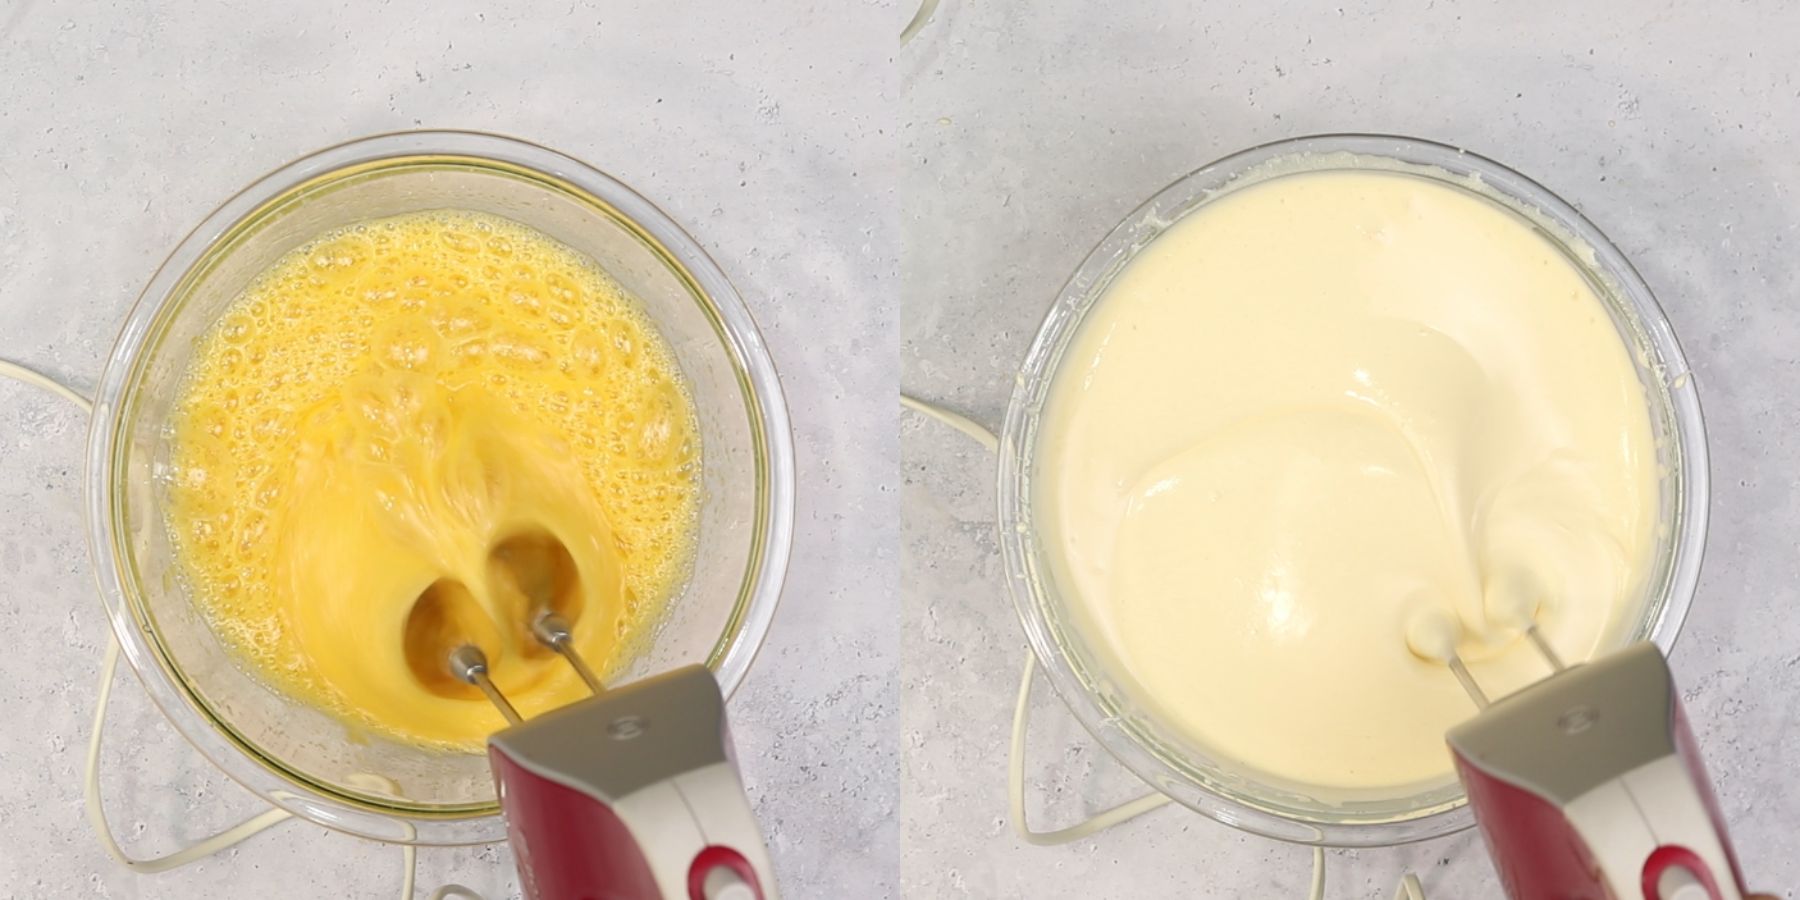
Sift the flour and baking powder into the whipped mixture and gently fold with a spatula until there are no streaks of flour visible.
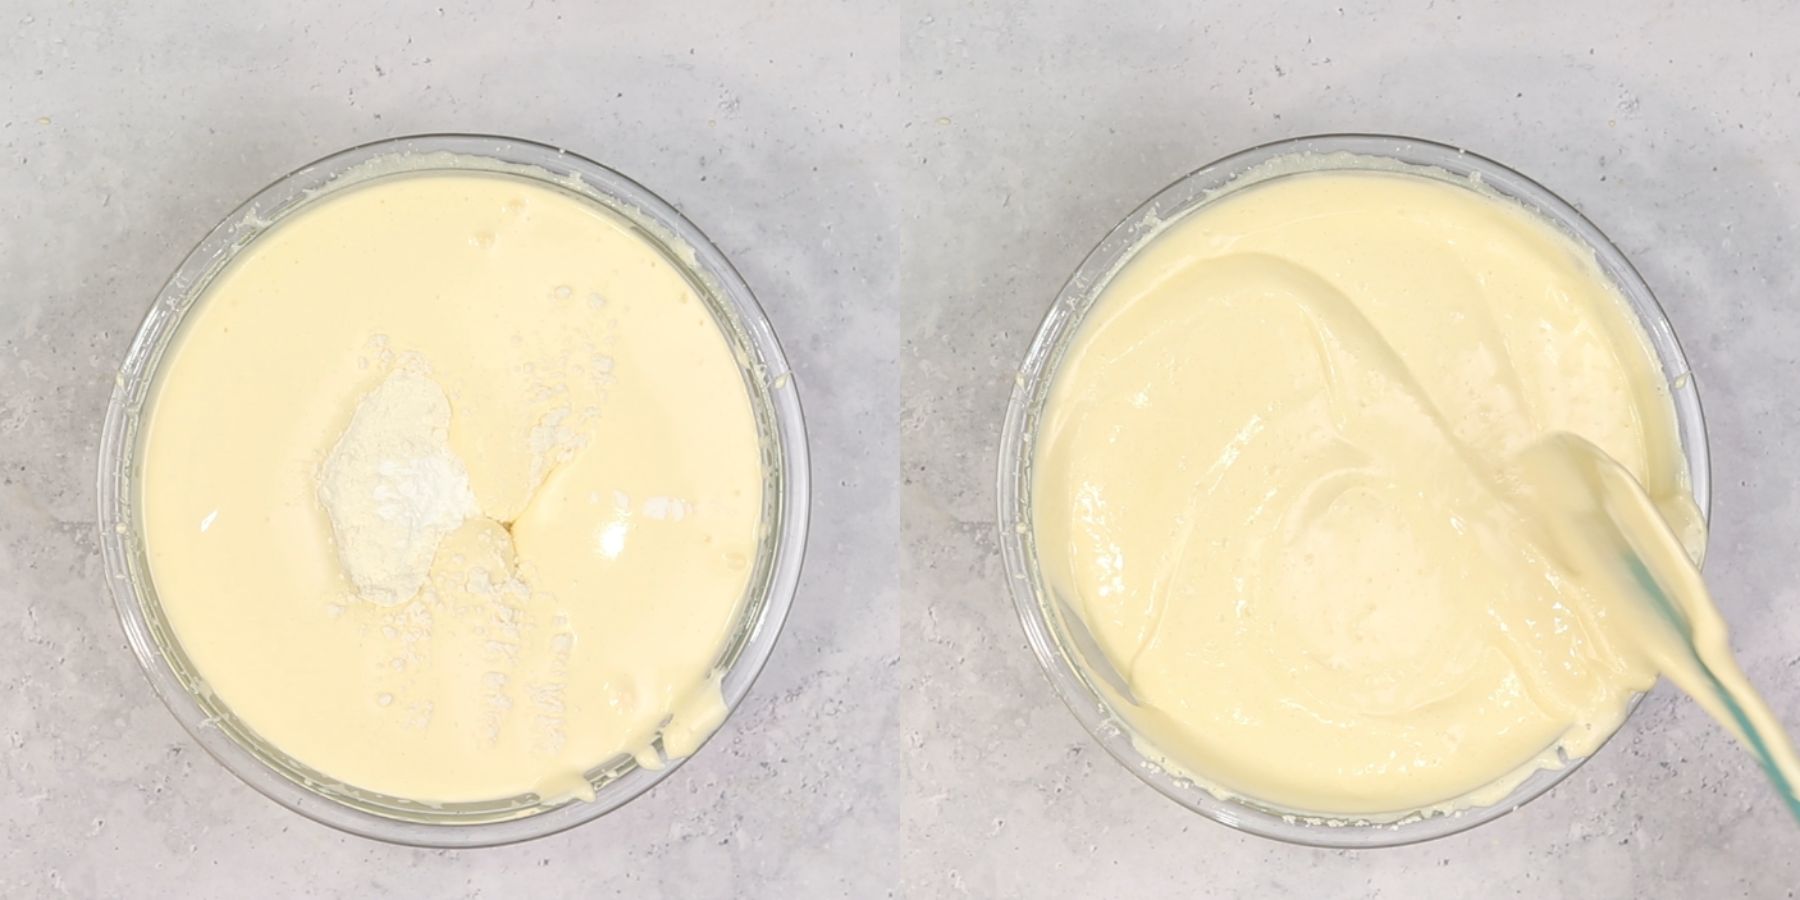
Pour the cake batter into a parchment paper-lined 8-inch baking pan and bake in a 180c (350f) preheated oven for 25-30 minutes or until a toothpick inserted into the cake comes out clean.
If you can, bake the cake in 3 separate 8-inch cake pans for about 18 minutes.
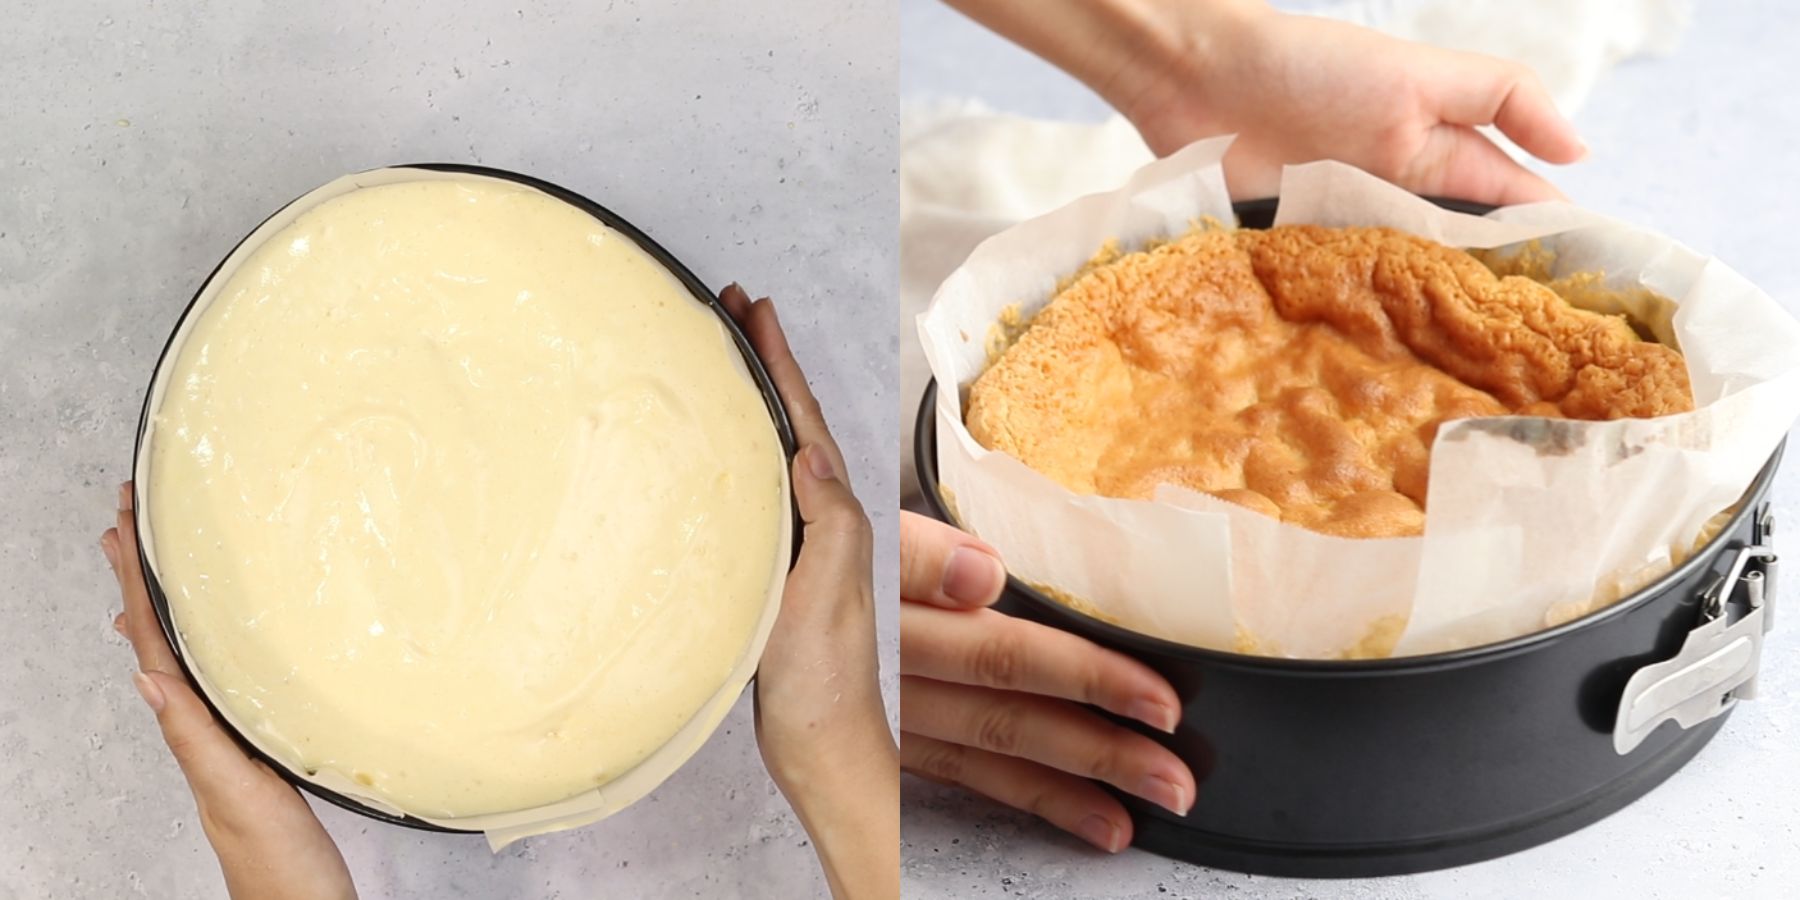
Let the cake cool completely before frosting so the frosting won't melt off the cake. If you made the cake in one pan, cut it with a serrated knife into 3 even layers.
Make the espresso coffee and let it cool for a few minutes. Set aside while you are making the mascarpone cream.
Make the mascarpone cream
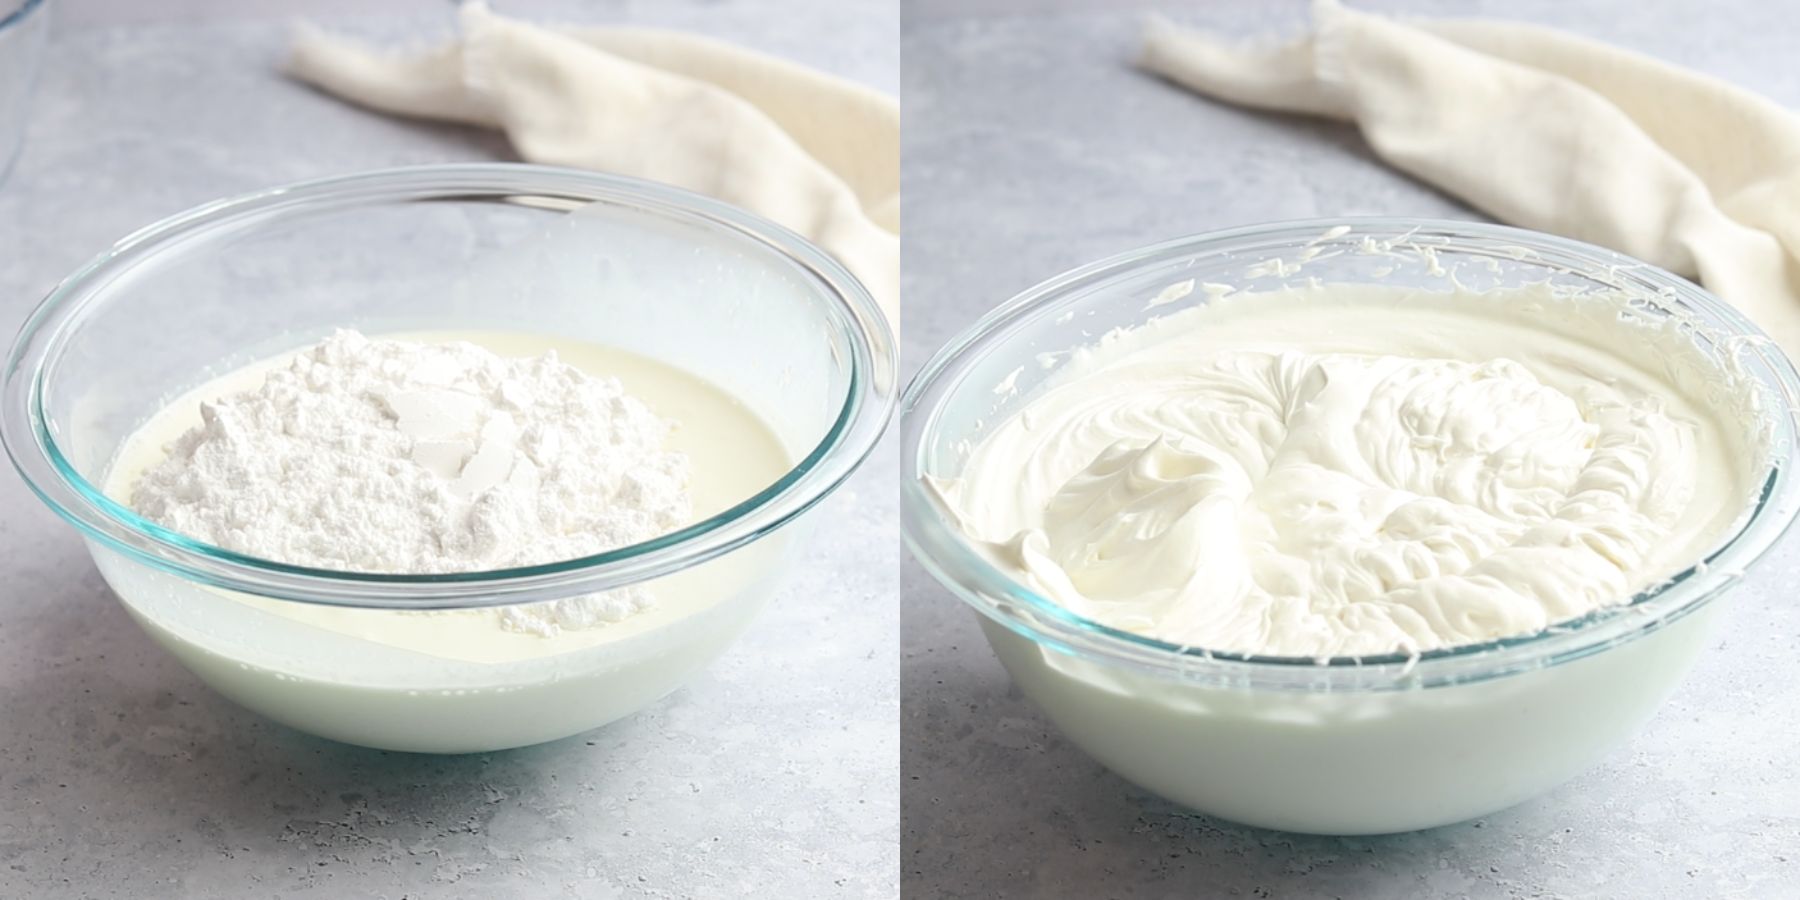
Into a big mixing bowl, add the heavy cream, kosher salt, vanilla extract, and sugar and mix with an electric hand mixer until stiff peaks form. (don't overbeat the mixture so you don't create butter)
Add the mascarpone cheese (which is at room temperature) and mix it lightly into the whipped cream using a spatula until a creamy mixture forms.
Assemble the cake
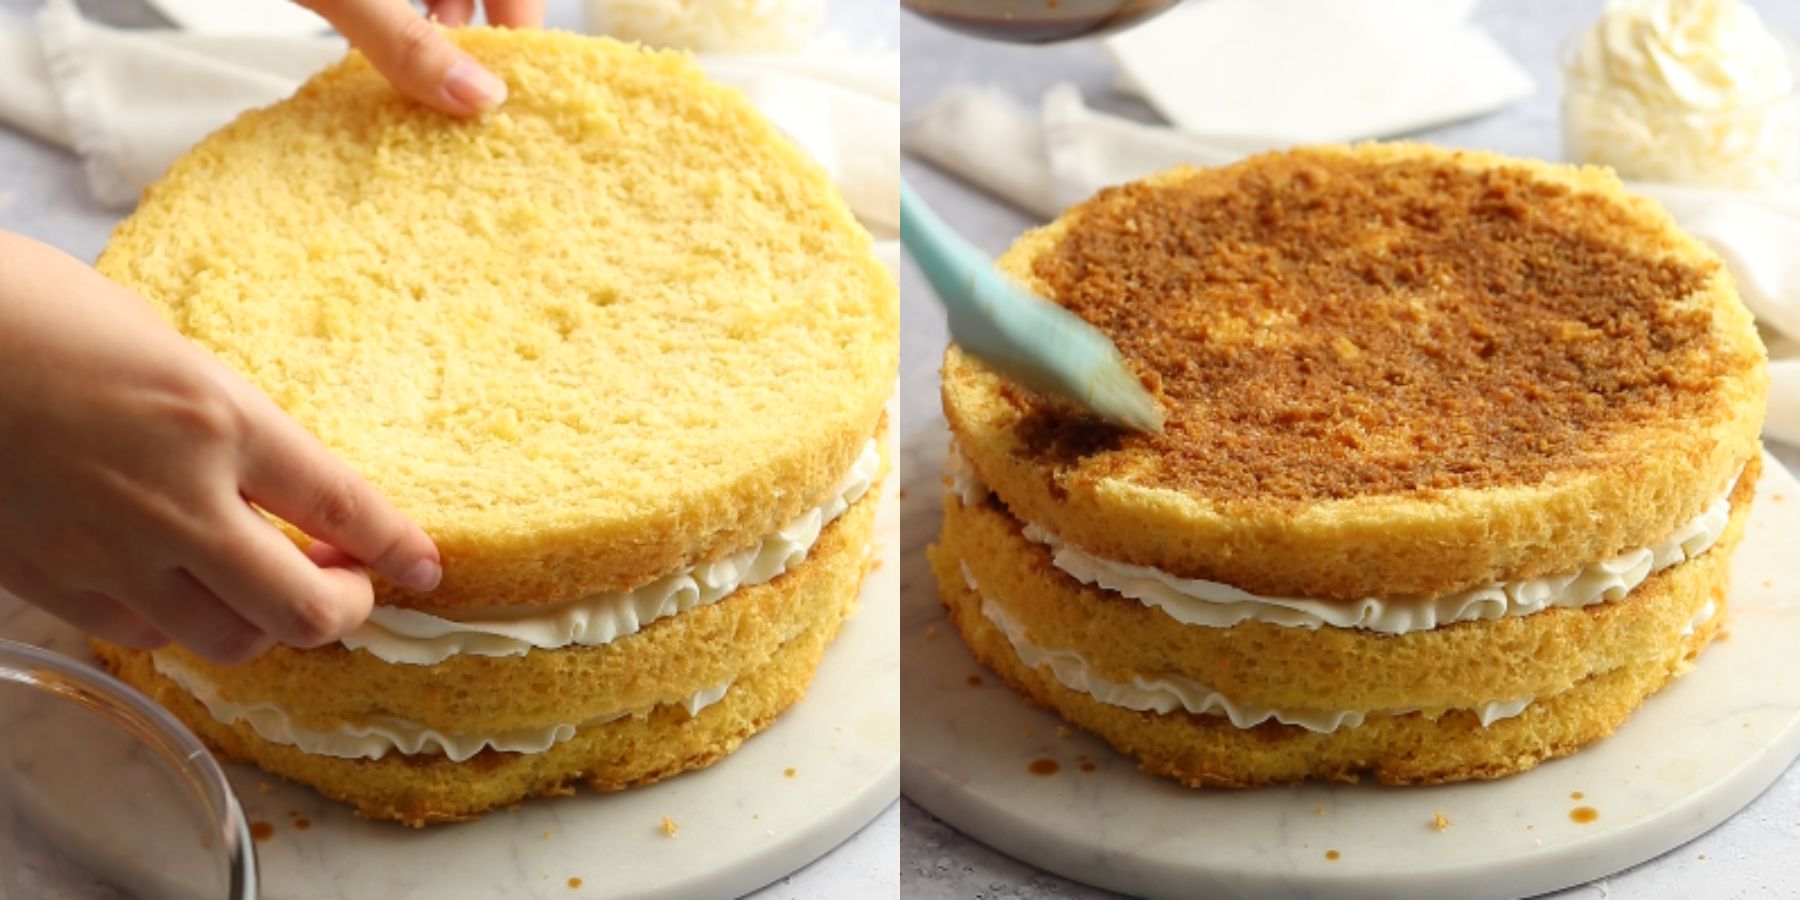
Pipe a small dollop of the cream on the surface that you will frost on. Lay the first cake layer over the frosting dot. Brush the cake with espresso.
Top the first cake layer with about ⅓ of the cream and spread an even layer of the cream with a spatula.
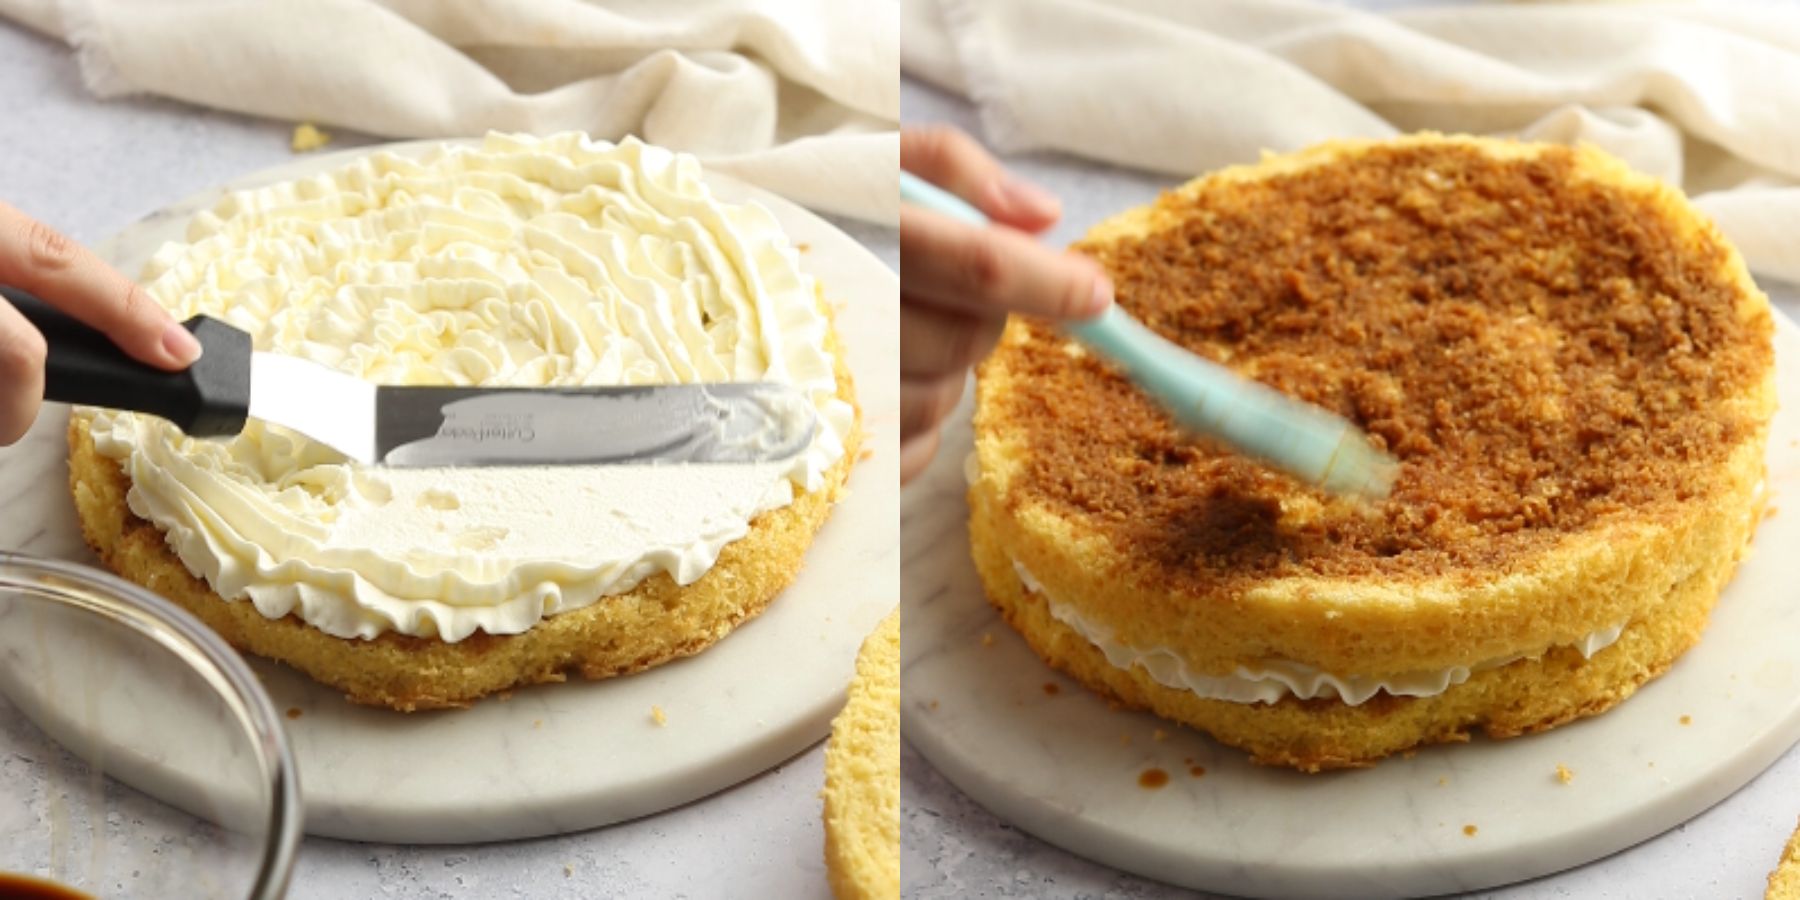
Top the cake with the second cake layer. Repeat brushing the cake with the coffee and smoothing out the cream and topping with the third cake layer. Brush the third cake layer with espresso and frost the cake.
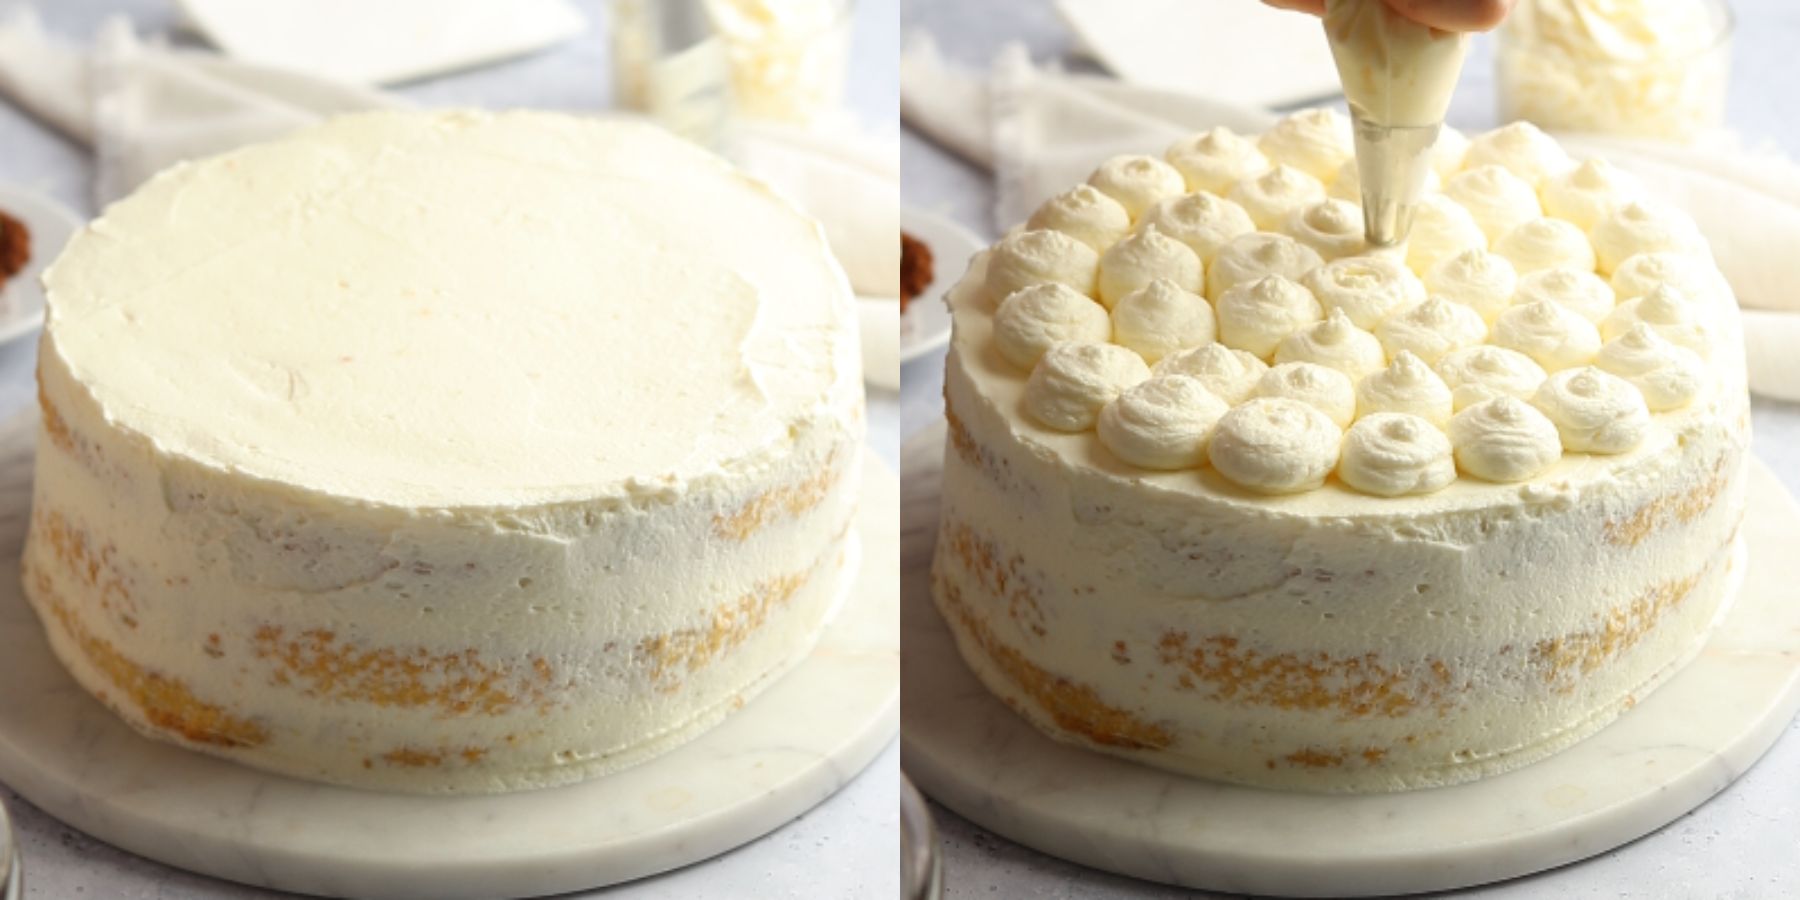
I like scraping some of the remaining cream to reveal the beautiful layers of the cake for a seminaked cake look, but it's not a must.
Fill a pastry bag with the remaining cream and pipe dollops of the cream on top of the cake as shown. Store the cake in an airtight container in the fridge and let it sit in the fridge for at least 4 hours.
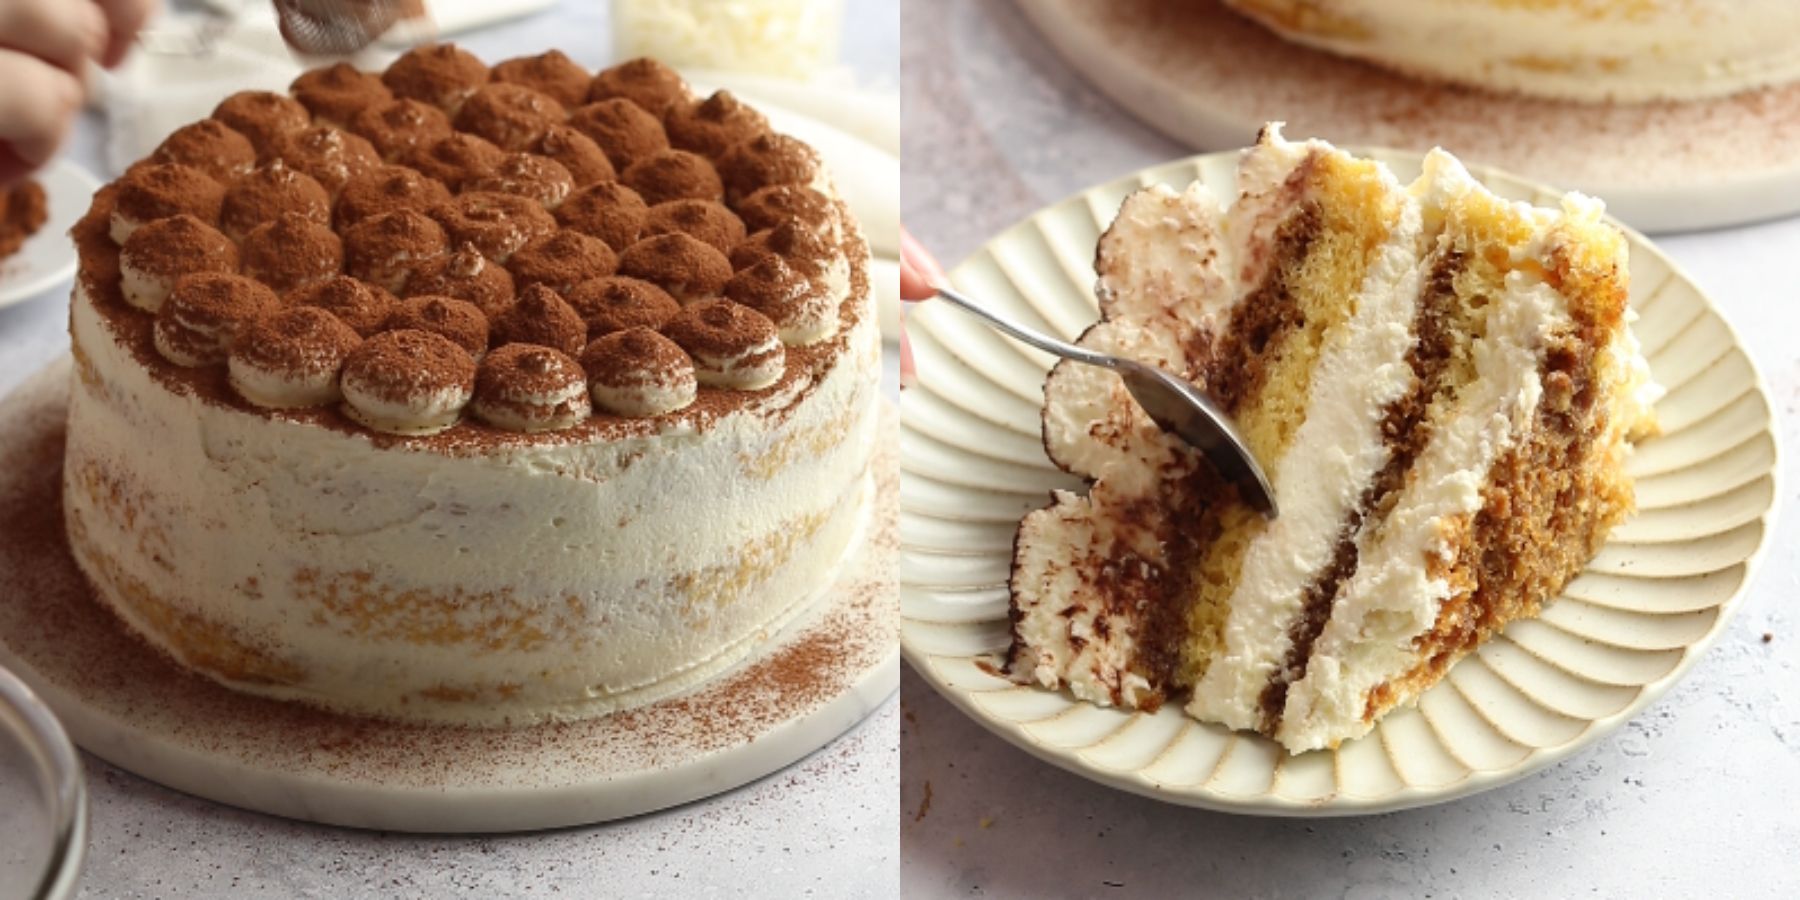
When you are ready to serve, sprinkle a generous amount of cocoa powder on top and serve!
Expert Tips
- Use room temperature ingredients. It is important that you use room-temperature ingredients like eggs. This step ensures that your mixture mixes into a homogenous mixture and bakes perfectly.
- Use high-fat mascarpone cheese. Using full-fat cream mascarpone ensures that your dessert will be stable.
- Don’t overmix the batter, you don’t want to develop the gluten in the flour. This step ensures you have moist cake and not dense and dry cake.
- Measure your flour correctly! When measuring your flour, avoid scooping it with a measuring cup. Instead, stir the flour with a spoon to create as many air pockets as possible, and spoon it into your measuring cup. Finally, level it with a back of a knife.
- Be patient! I know it’s extremely tempting to frost this cake as it is pulled out of the oven, but let the cake cool for at least 1 hour so it will be firmer and won’t crumble up, and prevent the frosting from melting.
- Scrape down the sides of the bowl frequently to ensure that you have a homogeneous mixture that has no cheese lumps.
- Let your cake chill in the fridge for at least 3 hours. I know it’s very hard to resist eating this delicious dessert right away, but you have to let it chill and soak up the flavors. I like to let it sit in the fridge overnight.
Faq's
If you absolutely have to, you can replace the mascarpone cheese with cream cheese. The best result will be with mascarpone cheese.
Yes! Simply skip it. There is no need to replace it with anything.
The taste is a delicious blend of sweet and slightly bitter flavors, with hints of coffee and cocoa complementing the luscious creaminess of the dessert.
Storing
This cake will last up to 4 in the fridge. Cover the cake with plastic wrap or foil to prevent it from drying out. This cake tastes even better the day after.
Freezing
Cake layers- Freeze the cake layers after they cooled completely in an airtight freezer-friendly container for up to 3 months. Wrap each cake layer in a few layers of plastic wrap, then place them into freezer bags and try to get rid of as much air as possible.
Thaw the cake layers in the fridge overnight or at room temperature for 1-2 hours.
Assembled cake- after letting the cake chill in the fridge for at least 4 hours, freeze either the whole cake or cake slices in an airtight container.
I usually wrap the cake slices with plastic wrap (2 layers) making sure everything is covered, and then transfer it into a freezer-friendly ziplock bag. Freeze for up to 2 months. Thaw in the fridge overnight.
Make it ahead
You can make this cake ahead by freezing the cake layers ahead of time. Wrap each cake layer with a few layers of plastic wrap and freeze for up to 2 months. Thaw at room temperature for 1-2 hours or in the fridge overnight.
When you are ready to frost and assemble the cake, make the frosting, and the espresso, and assemble the cake!
Substitutions
Gluten-free - if you want to make this recipe gluten-free, replace the flour with gluten-free flour.
Mascarpone cheese- substitute the mascarpone cheese with cream cheese, or ricotta cheese. Use full-fat cheese for this tiramisu cake for a thick and stable cream.
The best cheese for this recipe is mascarpone cheese which will give you the best result.
Variations
Chocolate- make this cake into a chocolate tiramisu cake by adding ⅓ cup of cocoa powder to the mascarpone cream.
Alcohol-free- leave out the alcohol-free for a kid-friendly dessert.
Decaf- make this cake decaf by using a strong decaf coffee. You can use instant coffee or coffee from a coffee machine.
Liquor- elevate your cake with a splash of your favorite liqueur such as Kahlua, Baileys Irish Cream, or amaretto. Add a splash of your favorite liquor to the coffee mixture.
Seasonal twist- embrace seasonal flavors by incorporating ingredients like pumpkin puree and warm spices in the mascarpone filling for a fall-inspired tiramisu layer cake.
Nutty twist- give your cake some crunch and texture by sprinkling chopped nuts like toasted almonds, hazelnuts, or pistachios between the layers for a delightful contrast of textures.
Fruity- add a refreshing twist to your tiramisu cake by incorporating layers of fresh berries such as raspberries, strawberries, or blueberries between the cake layers.
Serving Tips
Garnish- Elevate the presentation of your tiramisu cake by garnishing it with cocoa powder, chocolate shavings, or fresh berries.
Serve with Coffee or Liqueur- Enhance the overall experience by serving tiramisu cake with a side of espresso or a shot of liqueur such as amaretto or Frangelico.
Equipment
- Mixing bowl (set of 3)
- Whisk Set (pack of 3) to whisk the ingredients together
- 8-inch cake pans
- Cake Strips
- Electric hand mixer
- Rubber spatula
More tiramisu recipes
Easy tiramisu cups- These individual tiramisu cups are an easy twist on the classic dessert, made with layers of creamy mascarpone, ladyfingers, and cocoa powder, this makes the perfect dessert!
Easy eggless tiramisu- This easy tiramisu is made with coffee-soaked ladyfingers, easy eggless mascarpone cream, and topped with cocoa powder!
Lemon Tiramisu- This fresh lemon tiramisu is made with lemon curd, lemon mascarpone cream, and ladyfingers dipped in limoncello.
If you tried this recipe, don’t forget to leave a rating and a comment below. We love hearing from you.
If you liked this recipe
📖 Recipe
The Best Tiramisu Cake With Mascarpone Cream
Ingredients
Sponge cake
- 6 Eggs room temp, large
- 1 cup Granulated sugar
- 1 teaspoon Vanilla extract
- ⅓ teaspoon Kosher salt
- 1 cup Flour
- ½ teaspoon Baking powder
Mascarpone cream
- 25.39 oz Mascarpone cheese room temp for 30 minutes, full fat!
- 3 cups Heavy cream cold!
- 2 cups Powdered sugar
- ½ teaspoon Kosher salt
Assembly
- ¾ cup Espresso
- 2 tablespoon Cocoa powder
- 2 tablespoon Coffee liquor Amaretto, Kahlua, etc. Optional
Instructions
- Preheat the oven to 180c (350f) and prep a parchment paper-lined 8-inch cake pan.
- Into a large mixing bowl, add the eggs (room temp), granulated sugar, kosher salt, and vanilla extract. Mix with an electric hand mixer or use a stand mixer with the balloon attachment.
- Mix for about 10 minutes on high speed (be patient) until you get a fluffy and light mixture.
- Sift the flour and baking powder into the whipped mixture and gently fold with a spatula until there are no streaks of flour visible.
- Pour the cake batter into a parchment paper-lined 8-inch baking pan and bake in a 180c (350f) preheated oven for 25-30 minutes or until a toothpick inserted into the cake comes out clean.
- If you can, bake the cake in 3 separate 8-inch cake pans for about 18 minutes.
- Let the cake cool completely before frosting so the frosting won't melt off the cake. If you made the cake in one pan, cut it with a serrated knife into 3 even layers.
- Make the espresso coffee and let it cool for a few minutes. Set aside while you are making the mascarpone cream.
Make the mascarpone cream
- Into a big mixing bowl, add the heavy cream, kosher salt, vanilla extract, and sugar and mix with an electric hand mixer until stiff peaks form. (don't overbeat the mixture so you don't create butter)
- Add the mascarpone cheese (which is at room temperature) and mix it lightly into the whipped cream using a spatula until a creamy mixture forms.
Assemble the cake
- Pipe a small dollop of the cream on the surface that you will frost on. Lay the first cake layer over the frosting dot. Brush the cake with espresso.
- Top the first cake layer with about ⅓ of the cream and spread an even layer of the cream with a spatula.
- Top the cake with the second cake layer. Repeat brushing the cake with the coffee and smoothing out the cream and topping with the third cake layer. Brush the third cake layer with espresso and frost the cake.
- I like scraping some of the remaining cream to reveal the beautiful layers of the cake for a seminaked cake look, but it's not a must.
- Fill a pastry bag with the remaining cream and pipe dollops of the cream on top of the cake as shown. Store the cake in an airtight container in the fridge and let it sit in the fridge for at least 4 hours.
- When you are ready to serve, sprinkle a generous amount of cocoa powder on top and serve!
Notes
- Use room temperature ingredients. It is important that you use room-temperature ingredients like eggs and milk. This step ensures that your mixture mixes into a homogenous mixture and bakes perfectly. you don’t want to place cold batter into the oven.
- Use high-fat mascarpone cheese. Using full-fat cream mascarpone ensures that your dessert will be stable.
- Don’t overmix the batter, you don’t want to develop the gluten in the flour. This step ensures you have moist cake and not dense and dry cake.
- Measure your flour correctly! When measuring your flour, avoid scooping it with a measuring cup. Instead, stir the flour with a spoon to create as many air pockets as possible, and spoon it into your measuring cup. Finally, level it with a back of a knife.
- Be patient! I know it’s extremely tempting to frost this cake as it is pulled out of the oven, but let the cake cool for at least 1 hour so it will be firmer and won’t crumble up, and prevent the frosting from melting.
- Scrape down the sides of the bowl frequently to ensure that you have a homogeneous mixture that has no cheese lumps.
- Let your dessert chill in the fridge for at least 3 hours. We know it’s very hard to resist eating this delicious dessert right away, but you have to let it chill and soak up the flavors. We like to let it sit in the fridge overnight.


Maria
This tiramisu cake is a creative twist on a traditional favourite and it does not disappoint. The genoise cake layers soaked with espresso and filled with creamy and silky mascarpone cream create a light and soft texture that simply melts in your mouth.
Making this delicious dessert is incredibly simple. With straightforward instructions and accessible ingredients, even a beginner baker can create a stunning cake that's sure to impress. Whether it's for a special occasion or just because, this tiramisu cake is sure to be a hit.
In conclusion, this recipe is a must-try for anyone who loves coffee-flavoured desserts. The ease of preparation and the delicious taste makes it a winner in the kitchen. Don't hesitate to try this amazing twist on a traditional favourite!