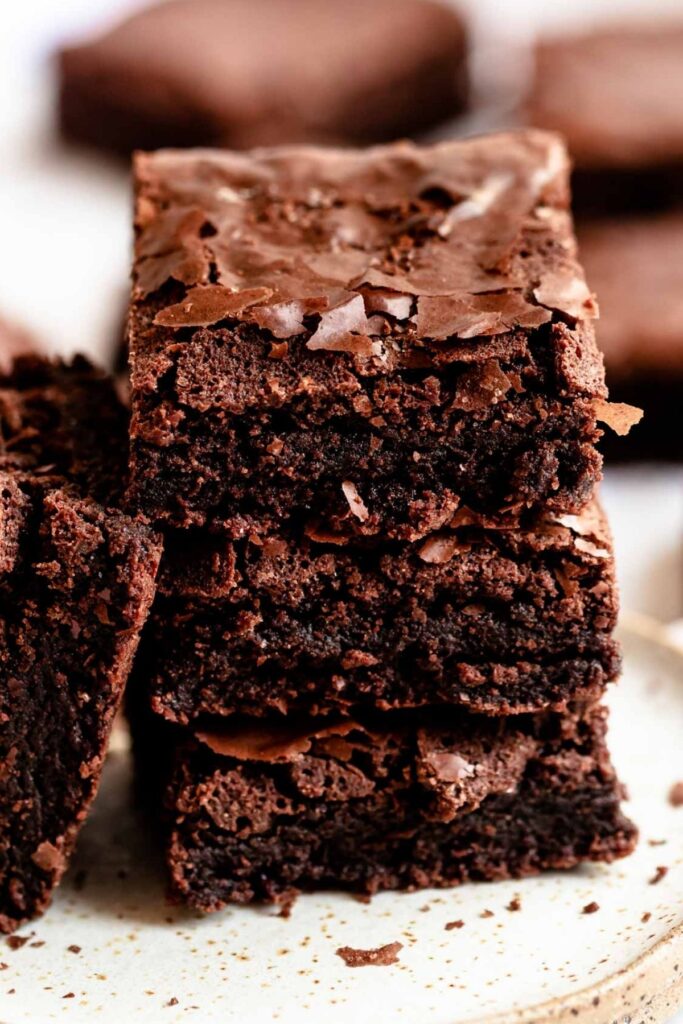
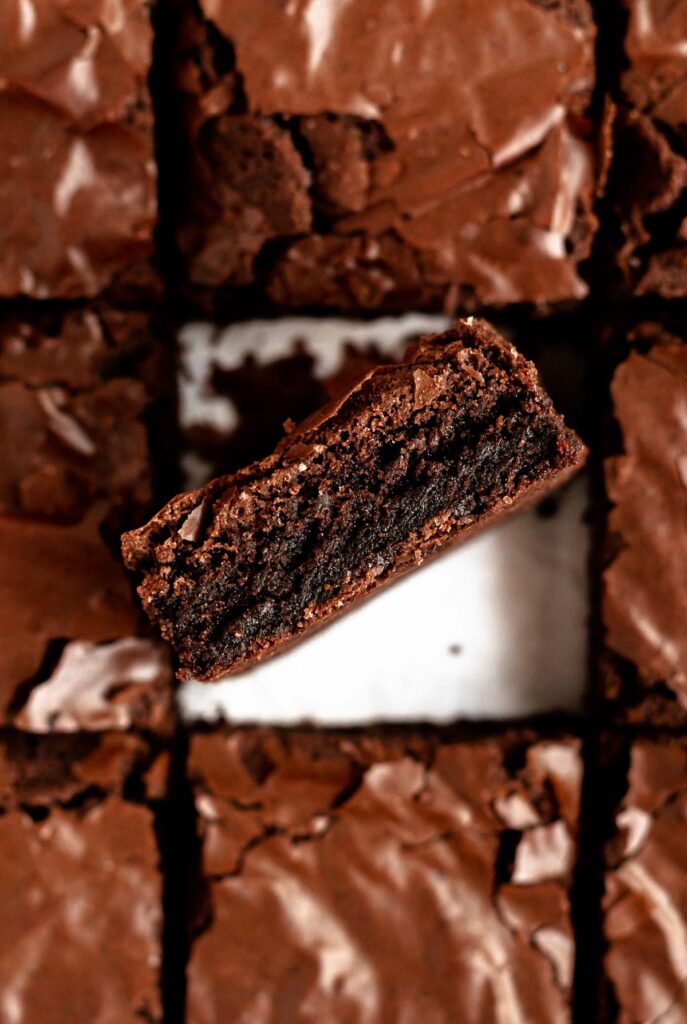
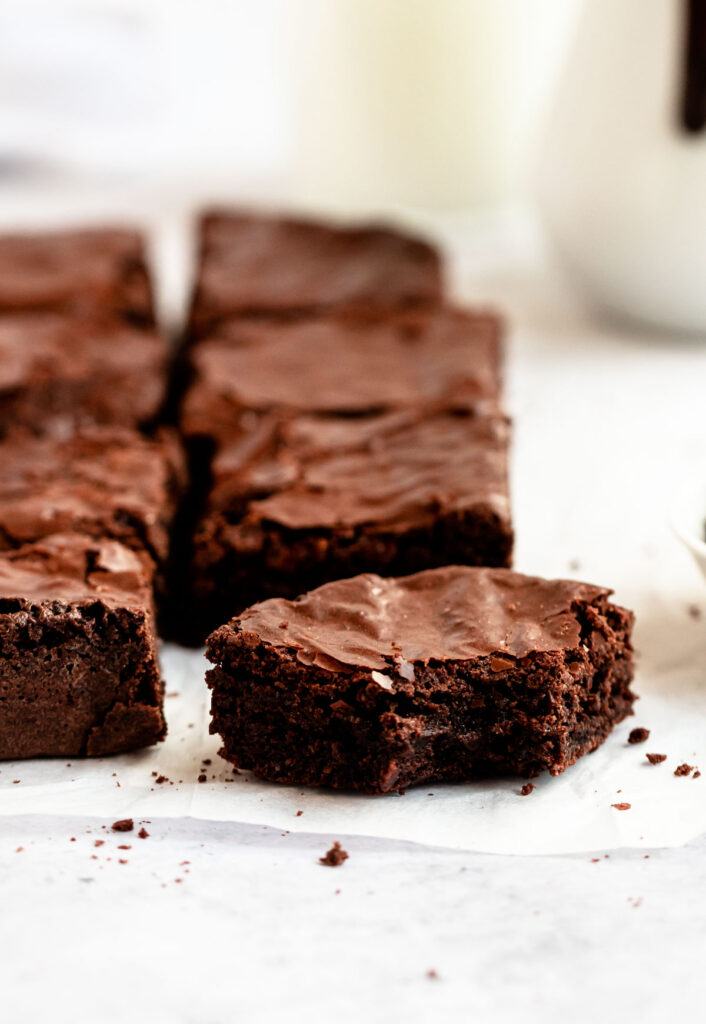
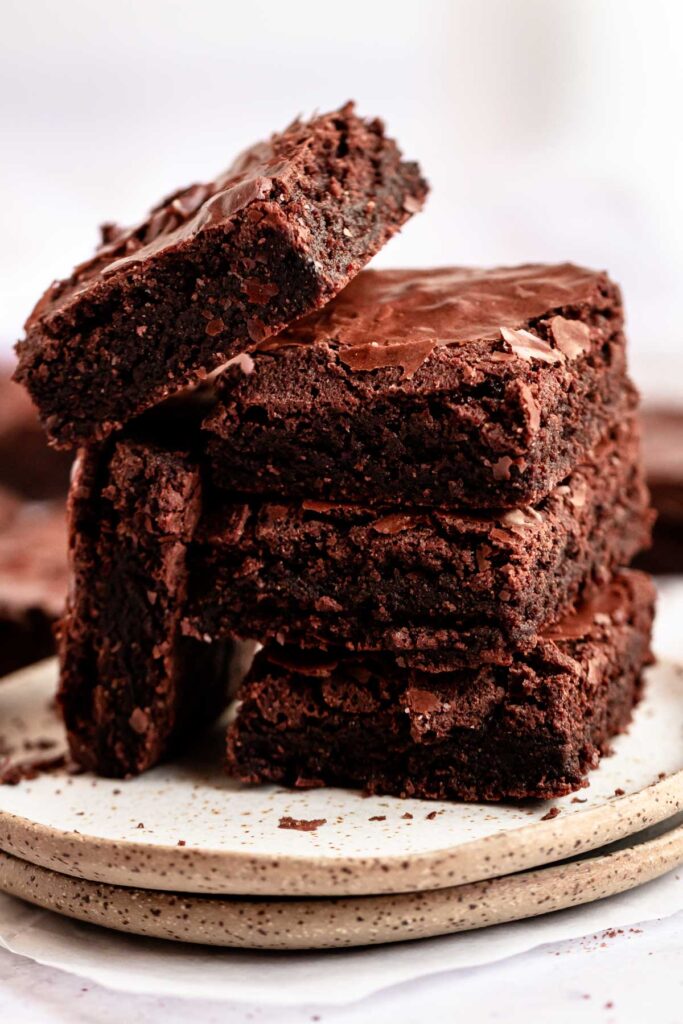
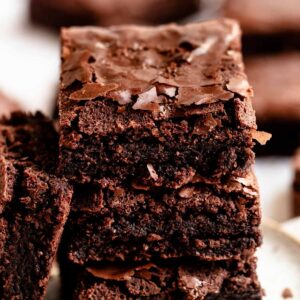
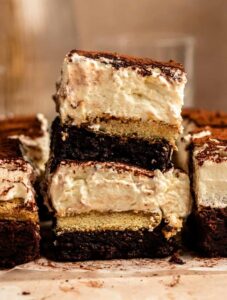
These fudgy and rich dairy free brownies are made without butter and have a dreamy crinkly top that makes the perfect brownie!
These dairy-free brownies are a delicious alternative if you are lactose intolerant or following a dairy-free diet.
They are made without any dairy ingredients such as butter, or milk, instead, they use vegetable oil, and dark chocolate to achieve the same rich and fudgy texture.
What makes these brownies so delish is that they are made with both dark chocolate and cocoa powder to give them a rich chocolate flavor.
These brownies have a perfect texture with a fudgy center and a slightly crispy top. They also come together in just one bowl and take under an hour to make from start to finish.
For more brownie recipes, check out my brownie bites, small batch brownies, sprinkle brownies, oreo brownies, biscoff brownies, and our dulce de leche brownies.
Jump to:
Why this recipe works
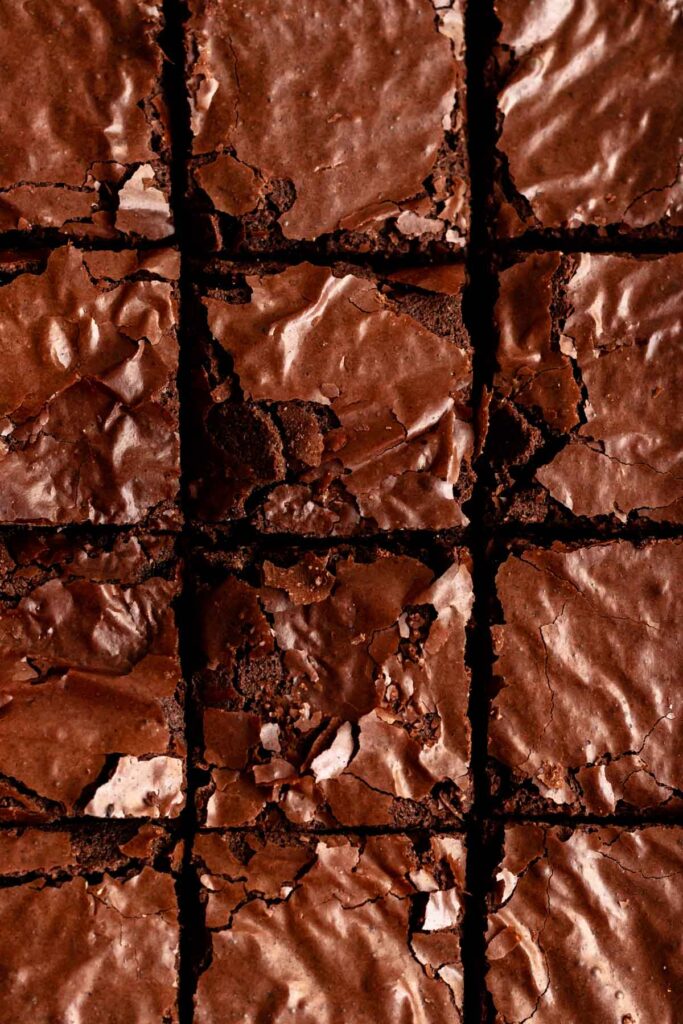
- Texture- these brownies are chewy on the inside with a slightly crispy top, giving you the perfect bite every time. Although they are made without dairy, they still have a perfect brownie texture.
- Chocolate flavor- the flavor of these brownies is rich and intense. Using both cocoa powder and dark chocolate brings out a deep, chocolaty taste that satisfies any sweet tooth.
- Dairy free- for those who are lactose intolerant or allergic to dairy, these brownies are a perfect treat. You can enjoy them without worrying about digestive issues or allergic reactions.
- One bowl brownies- these brownies are easy to make with minimal cleanup required. You only need one bowl and a whisk to mix all the ingredients, which makes the baking process quick and convenient.
- Time- this brownie recipe is made in under an hour from start to finish! Its great if you need a quick dessert if you are craving brownies or having friends or family over.
Ingredients
Before you start to make this recipe, measure and prepare your ingredients so the cooking process will go smoothly and easily.
Full measurements are in the recipe card below.
Flour– I used all-purpose flour for this recipe, self-rising flour, and cake flour will work great as well.
Dutch cocoa powder– I like to use Dutch-process cocoa powder for our brownies because we like the deep and rich chocolate taste, but the natural cocoa powder will work great as well!
Granulated sugar– I like to use granulated sugar, also the most common sugar used in baking. Caster sugar will work great as well.
Eggs– make sure you’re using room-temperature eggs. You will need two large eggs and one egg yolk for this recipe.
Vegetable oil – I used vegetable oil for this recipe. Canola oil, olive oil, and coconut oil will work great for this recipe.
Espresso powder- use your favorite brand of espresso powder for this. The espresso powder enhances the chocolate flavor and gives it a rich chocolate flavor.
Vanilla extract- vanilla extract adds extra flavor. For extra vanilla flavor, use vanilla bean extract.
Salt– I used kosher salt for this recipe. Salt doesn’t give the brownies a salty taste, it helps to enhance the chocolate flavor.
Dark chocolate- use the best quality dark chocolate for the best flavor. I used 60% dark chocolate for a bitter taste that is not too strong. Feel free to use a higher percentage of dark chocolate.
Instructions
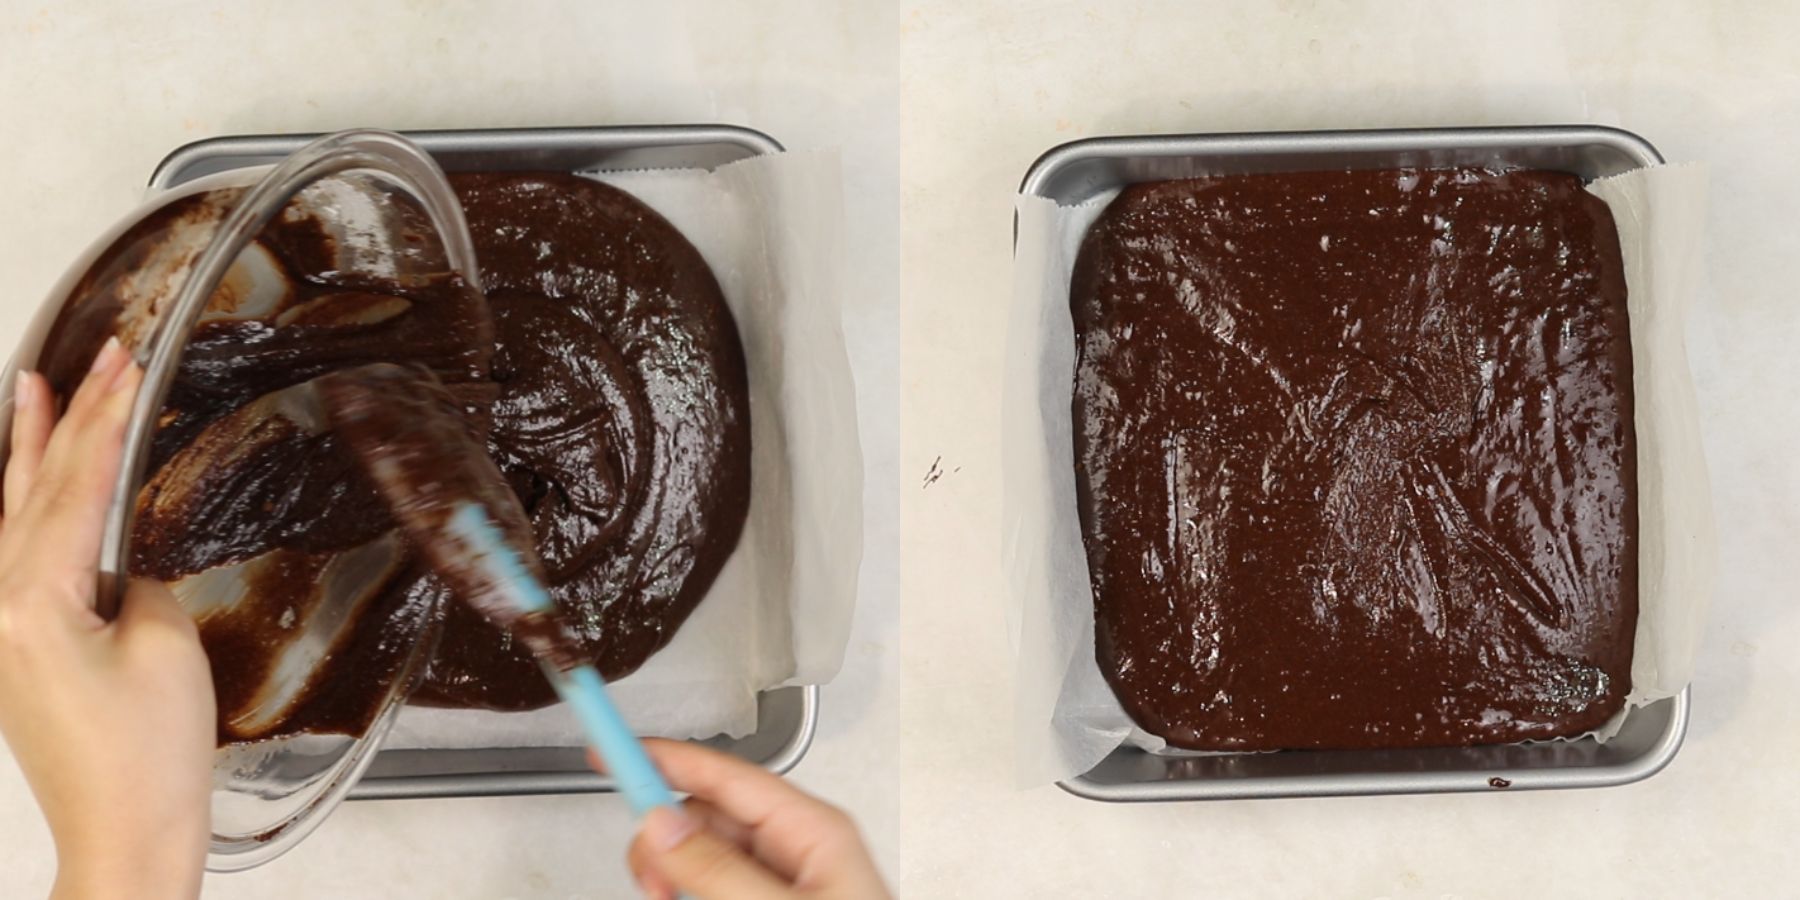
Preheat an oven to 180c (350f) and prep a parchment paper-lined 8 by 8-inch baking pan.
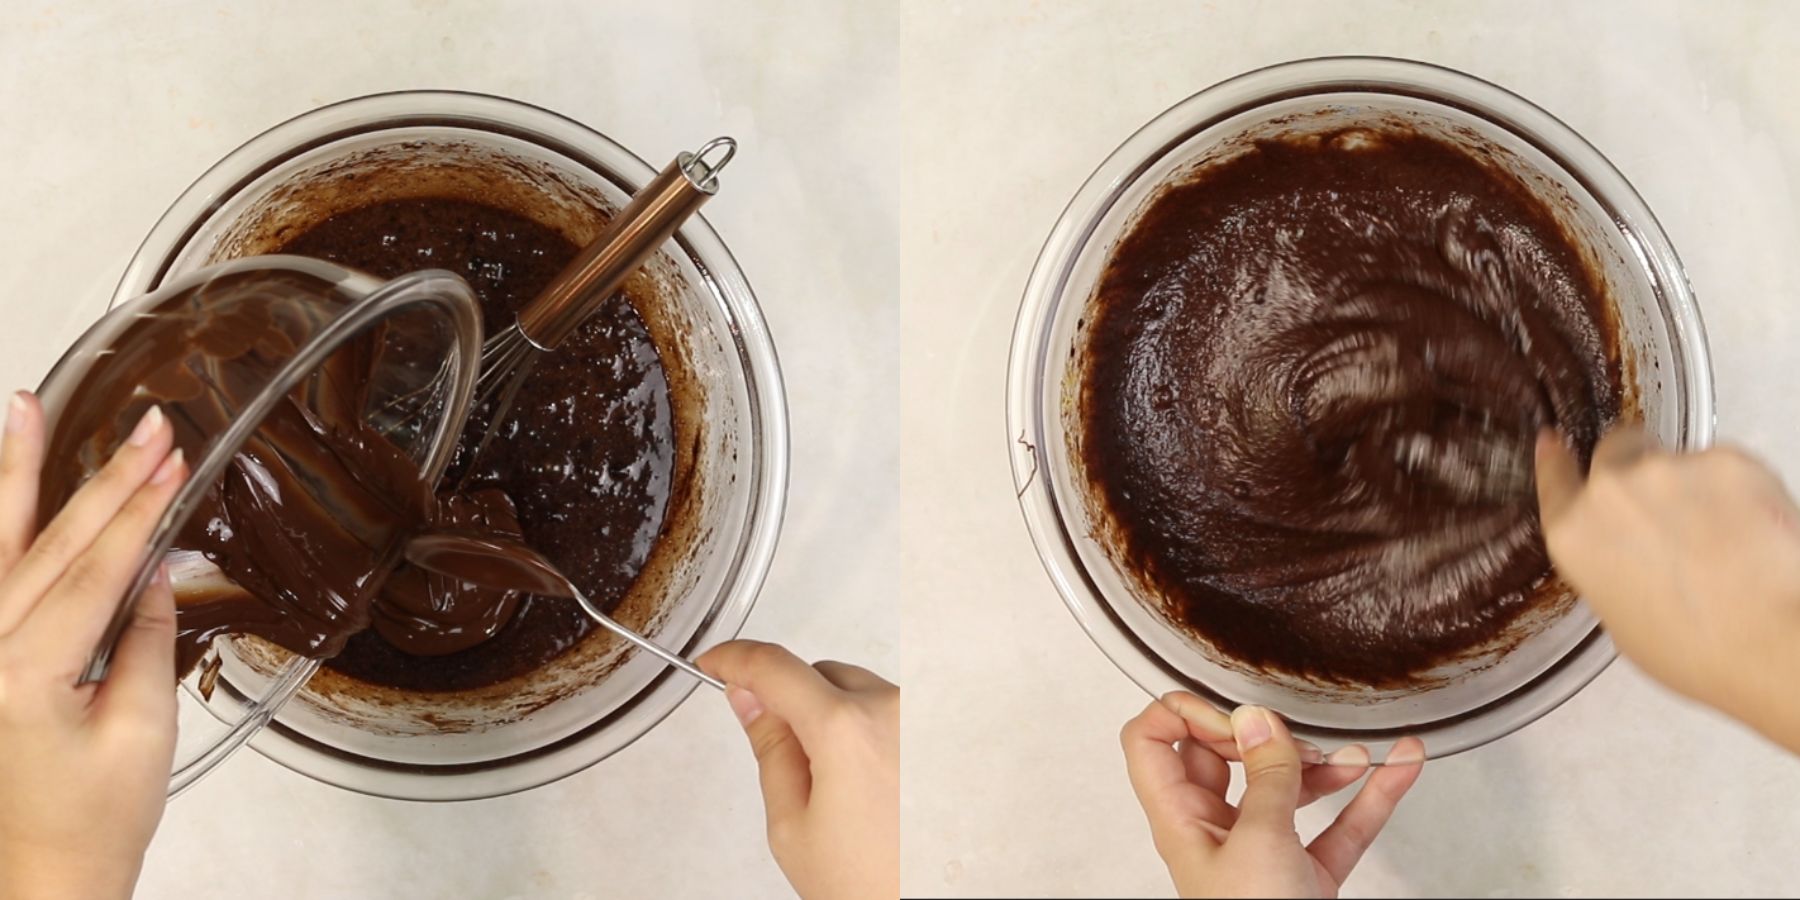
In a large mixing bowl, add the wet ingredients: sugar, vegetable oil, eggs, egg yolk, salt, espresso powder, and vanilla extract, and sift the cocoa powder. Stir with a whisk until the mixture is combined.
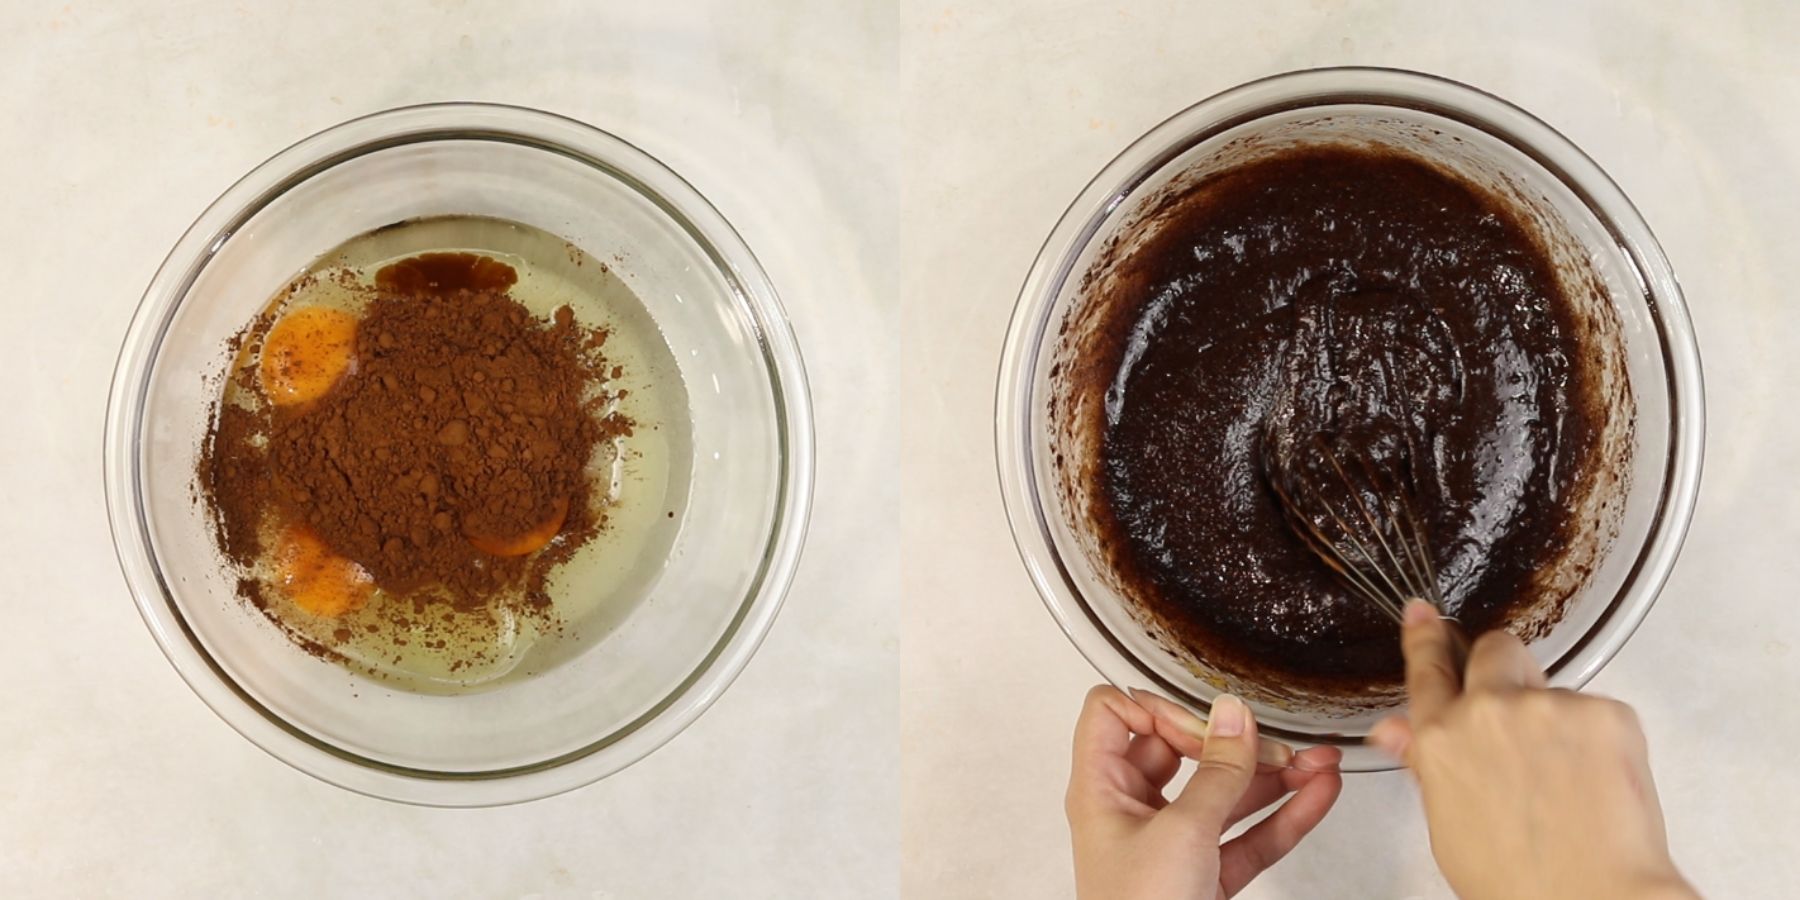
Add melted chocolate (melt it in the microwave or on a bain-marie) and mix well with a whisk.
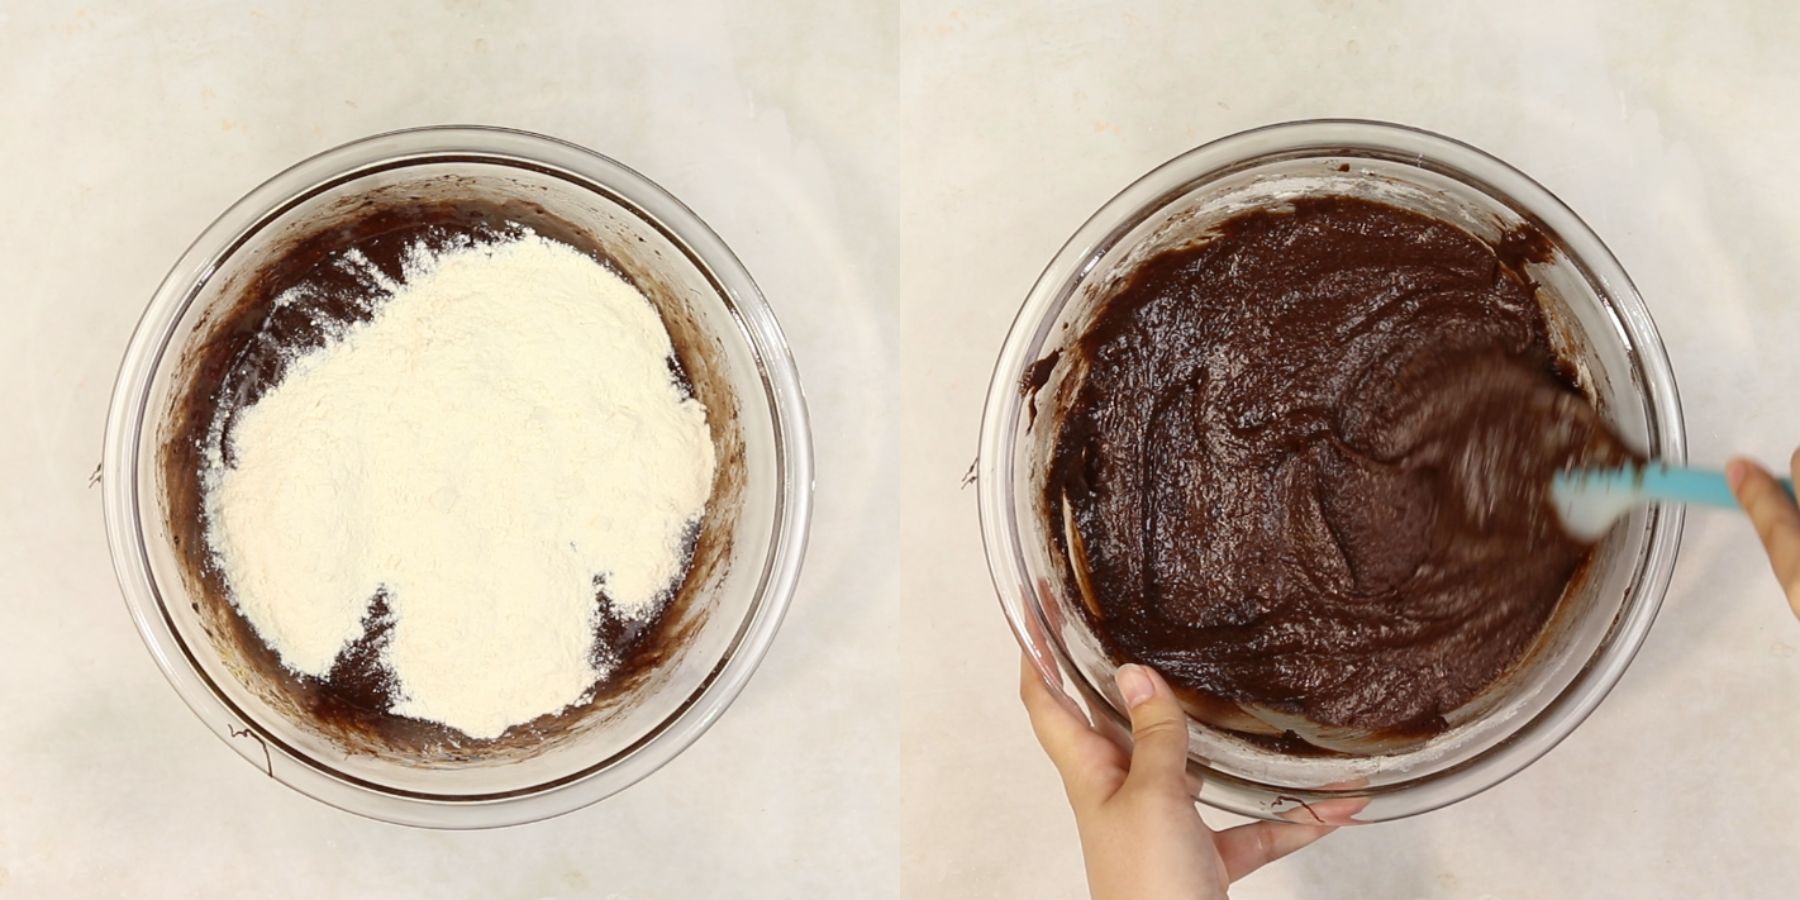
Add the flour and mix until just combined. You don’t want to develop the gluten in the flour. This step ensures you have fudgy and moist brownies and not dense and dry brownies.
Pour the batter into a parchment paper-lined baking pan and bake in a 180c (350f) preheated oven for about 30 minutes or until the tops of the brownies are crinkly.
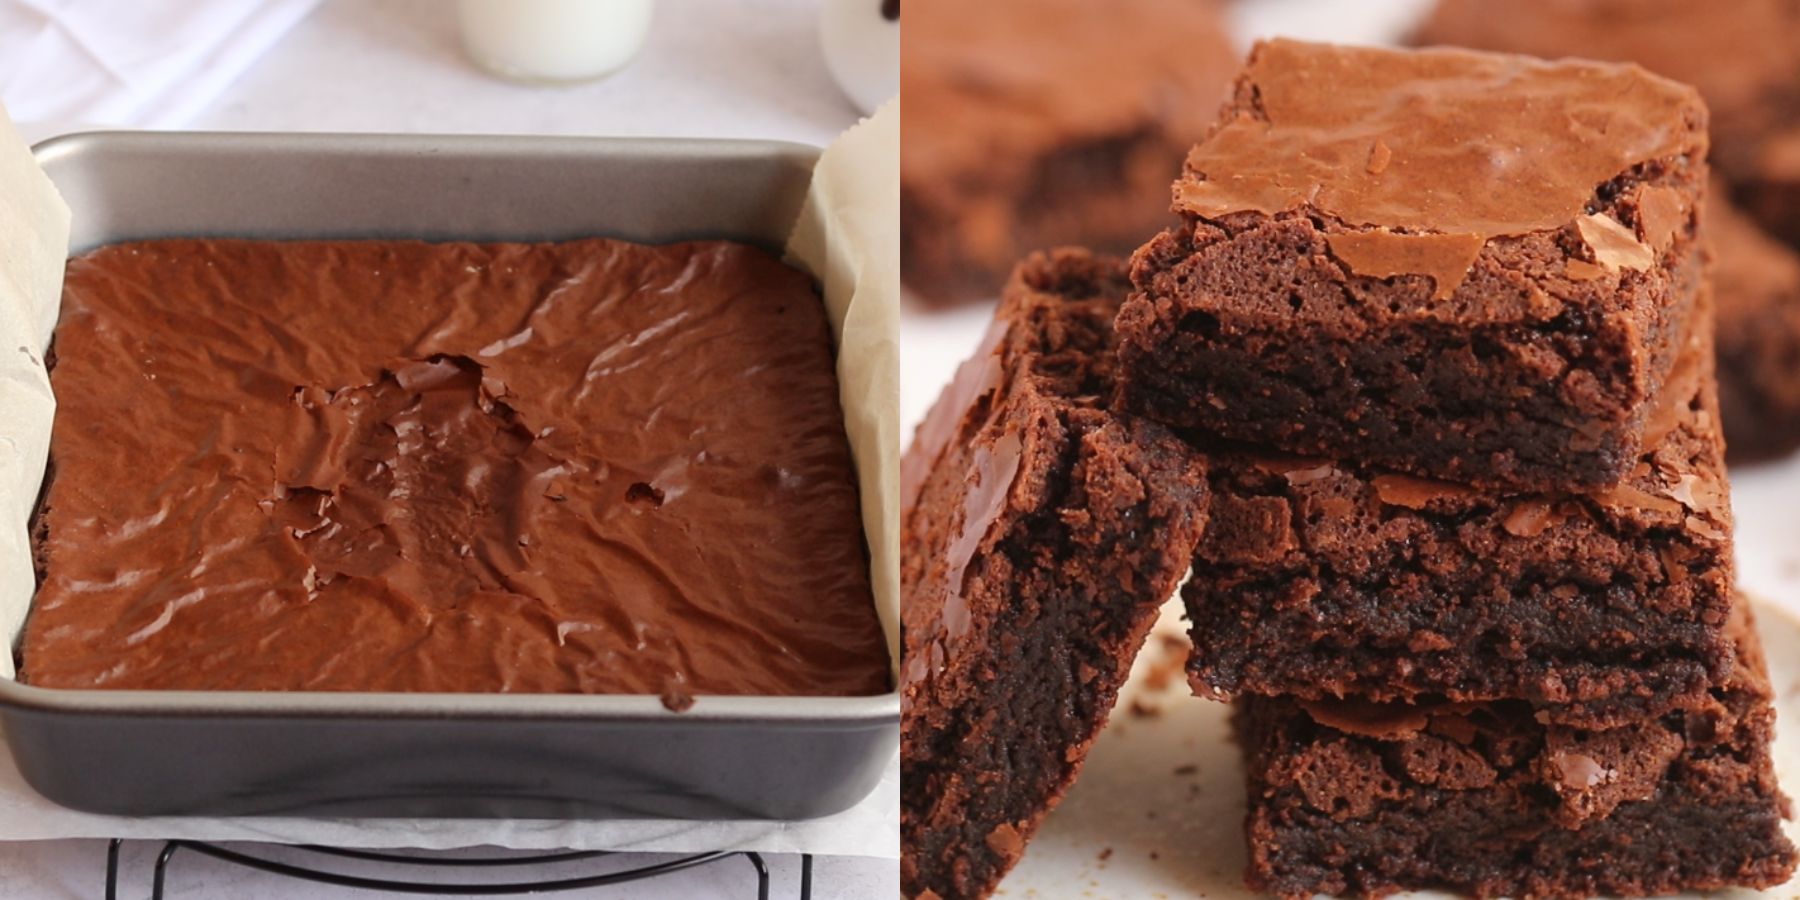
Allow the brownies to cool for about 1 hour before slicing, so they won't crumble and fall apart. Slice and enjoy!
Expert Tips
- Use room temperature ingredients. It is important that you use room-temperature ingredients like eggs. This step ensures that your mixture mixes into a homogenous mixture and bakes perfectly.
- Use high-quality chocolate. The quality of chocolate directly impacts the flavor of your brownies. Opt for high-quality dark or semi-sweet chocolate to achieve a deep, rich taste.
- Don’t overmix batter. Once you’ve combined your wet and dry ingredients, mix just until incorporated. Overmixing can lead to tough brownies due to gluten development in the flour.
- Measure your flour correctly! When measuring your flour, avoid scooping it with a measuring cup. Instead, stir the flour with a spoon to create as many air pockets as possible, and spoon it into your measuring cup. Finally, level it with a back of a knife.
- Experiment with add-Ins. Customize your brownies by adding nuts, chocolate chips, or swirls of caramel or peanut butter into the batter for added texture and flavor.
- Use a metal brownie pan! Metal pans conduct heat more efficiently and evenly than glass or ceramic, ensuring uniform baking. They also cool down faster, reducing the risk of overbaking. Using a metal pan helps achieve a fudgy center with slightly crispy edges.
- Check doneness early. Brownies continue to cook after being removed from the oven due to residual heat in the pan. Start checking them a few minutes before the recommended baking time by inserting a toothpick into the center. It should come out with moist crumbs attached but not wet batter.
- Cool completely before cutting. Allow the brownies to cool completely in the pan before cutting them into squares. This helps them set properly and makes slicing easier.
- Line your pan with parchment paper. For easy removal and clean-up, line your baking pan with parchment paper or aluminum foil with an overhang on the sides.
Faq's
To know when your brownies are done baking, insert a toothpick into the center of the pan. If it comes out with a few moist crumbs but not wet batter, the brownies are ready.
The edges should also start to pull away from the sides of the pan.
If your brownies are dry, common mistakes could be overmixing the batter, adding too much flour, or overbaking.
Using too much flour or not enough fat can also result in dryness. Mix until just combined and monitor baking time closely to achieve perfect brownies.
When making brownies, the best pan to use is a metal baking pan. Metal pans conduct heat more evenly than glass or ceramic, ensuring that your brownies bake uniformly.
A light-colored, non-stick metal pan is ideal because it prevents over-browning and makes it easier to remove the brownies once they are done.
Storing
Store these delicious brownies at room temperature. Simply seal them in an airtight container to keep them moist and flavorful for up to 4 days.
Freezing
To freeze these brownies properly, start by allowing the brownies to cool completely after baking.
Once they are at room temperature, cut them into individual portions for easier storage and thawing.
Wrap each piece tightly in plastic wrap to prevent freezer burn and then place the wrapped brownies in an airtight container or heavy-duty freezer bag. Freeze for up to 2 months.
When you're ready to enjoy them again, simply thaw the brownies in the refrigerator overnight or at room temperature for a few hours before serving.
Substitutions
Chocolate- you can swap the dark chocolate with milk chocolate or semisweet chocolate!
Vegan butter- if you don't want to use oil in your brownies, you can use 150 g of dairy free butter instead.
Gluten-free- you can swap the flour with gluten-free flour to make these gluten-free. I never tested this recipe with gluten-free flour, but it should work.
Cake mix- for a simpler and quicker dairy-free brownie recipe, use a 15.25 oz. box of chocolate cake mix that is dairy-free. Add ½ cup of oil, 2 large eggs, and 1 egg yolk.
Variations
Chocolate chips- add ½ cup of dairy-free chocolate chips to the brownie batter for an extra chocolate flavor!
Marshmallows- add ½ cup of mini marshmallows to the brownie batter for extra texture and flavor!
Nuts- sprinkle chopped almonds, walnuts, or pecans on top of your brownie batter before baking for a crunchy and nutty twist.
Fruit- add fresh or dried fruit! I like adding strawberries, raspberries, and blackberries!
Caramel- after baking, drizzle dairy-free caramel sauce over the cooled brownies and sprinkle with sea salt for a sweet and salty contrast.
Zest- add 1 teaspoon of lemon zest or orange zest for a citrusy touch.
Oreos- add 1 cup of chopped Oreos for an Oreo brownie flavor! Make sure to fold in the chopped Oreos gently so they are evenly distributed
Serving tips
Whipped cream- top each slice of brownie with a dollop of homemade or store bought dairy free whipped cream.
Vanilla ice cream- add a large scoop of dairy-free vanilla ice cream next to a slice of this brownie.
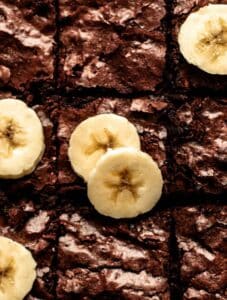
Fresh fruit- another way to serve brownies is next to fresh fruit like strawberries, blueberries, raspberries, etc.
Equipment
- Mixing bowl (set of 3)
- Whisk Set (pack of 3) to whisk the ingredients together.
- Brownie pan
- Rubber spatula
More brownie recipes
S'mores Brownies- These S'mores brownies are made with a graham cracker crust, a fudgy brownie layer, and topped with a fluffy Swiss meringue.
3 Ingredients Brownies- These incredibly easy 3 ingredient brownies are fudgy and chewy have a crackly top and have the perfect texture and flavor.
Dark Chocolate Brownies- These dark chocolate brownies are fudgy and moist and are made with Dutch cocoa powder and high-quality dark chocolate.
If you tried this recipe, don’t forget to leave a rating and a comment below. We love hearing from you.
If you liked this recipe
📖 Recipe
Fudgy Dairy Free Brownies
Ingredients
- ¾ cup Vegetable oil or canola oil
- 1 ½ cups Granulated sugar
- 1 teaspoon Vanilla extract
- 2 Eggs
- 1 Egg yolk
- ½ teaspoon Kosher salt
- ⅓ cup Cocoa powder
- ½ teaspoon Espresso powder
- 7.05 oz Dark chocolate or semisweet
- ¾ cups Flour
Instructions
- Preheat an oven to 180c (350f) and prep a parchment paper-lined 8 by 8-inch baking pan.
- In a large mixing bowl, add the wet ingredients: sugar, vegetable oil, eggs, egg yolk, salt, espresso powder, and vanilla extract, and sift the cocoa powder. Stir with a whisk until the mixture is combined.
- Add melted chocolate (melt it in the microwave or on a bain-marie) and mix well with a whisk.
- Add the flour and mix until just combined. You don’t want to develop the gluten in the flour. This step ensures you have fudgy and moist brownies and not dense and dry brownies.
- Pour the batter into a parchment paper-lined baking pan and bake in a 180c (350f) preheated oven for about 30 minutes or until the tops of the brownies are crinkly.
- Allow the brownies to cool for about 1 hour before slicing, so they won't crumble and fall apart. Slice and enjoy!
Notes
- Use room temperature ingredients. It is important that you use room-temperature ingredients like eggs. This step ensures that your mixture mixes into a homogenous mixture and bakes perfectly.
- Use high-quality chocolate. The quality of chocolate directly impacts the flavor of your brownies. Opt for high-quality dark or semi-sweet chocolate to achieve a deep, rich taste.
- Don’t overmix batter. Once you’ve combined your wet and dry ingredients, mix just until incorporated. Overmixing can lead to tough brownies due to gluten development in the flour.
- Measure your flour correctly! When measuring your flour, avoid scooping it with a measuring cup. Instead, stir the flour with a spoon to create as many air pockets as possible, and spoon it into your measuring cup. Finally, level it with a back of a knife.
- Experiment with add-Ins. Customize your brownies by adding nuts, chocolate chips, or swirls of caramel or peanut butter into the batter for added texture and flavor.
- Use a metal brownie pan! Metal pans conduct heat more efficiently and evenly than glass or ceramic, ensuring uniform baking. They also cool down faster, reducing the risk of overbaking. Using a metal pan helps achieve a fudgy center with slightly crispy edges.
- Check doneness early. Brownies continue to cook after being removed from the oven due to residual heat in the pan. Start checking them a few minutes before the recommended baking time by inserting a toothpick into the center. It should come out with moist crumbs attached but not wet batter.
- Cool completely before cutting. Allow the brownies to cool completely in the pan before cutting them into squares. This helps them set properly and makes slicing easier.
- Line your pan with parchment paper. For easy removal and clean-up, line your baking pan with parchment paper or aluminum foil with an overhang on the sides.

Kayla says
These came out super well! I baked them for exactly 30 minutes, they were super fudgy and had a thick cracked top when I cut it. Not shiny or flaky, but still crunchy while gooey and fudgy on the inside. I love the use of chocolate and cocoa powder together, it really enhances the flavor!