This homemade pita bread recipe is super easy to make, made with simple ingredients, and creates fluffy and pillowy pita pockets that you can fill with anything!
Pita bread is one of our favorite bread to bake, in this post, I'm sharing my dad's tips and tricks for making real and fluffy pitas. Making your own homemade pitas is easy, inexpensive, simple, and delicious.
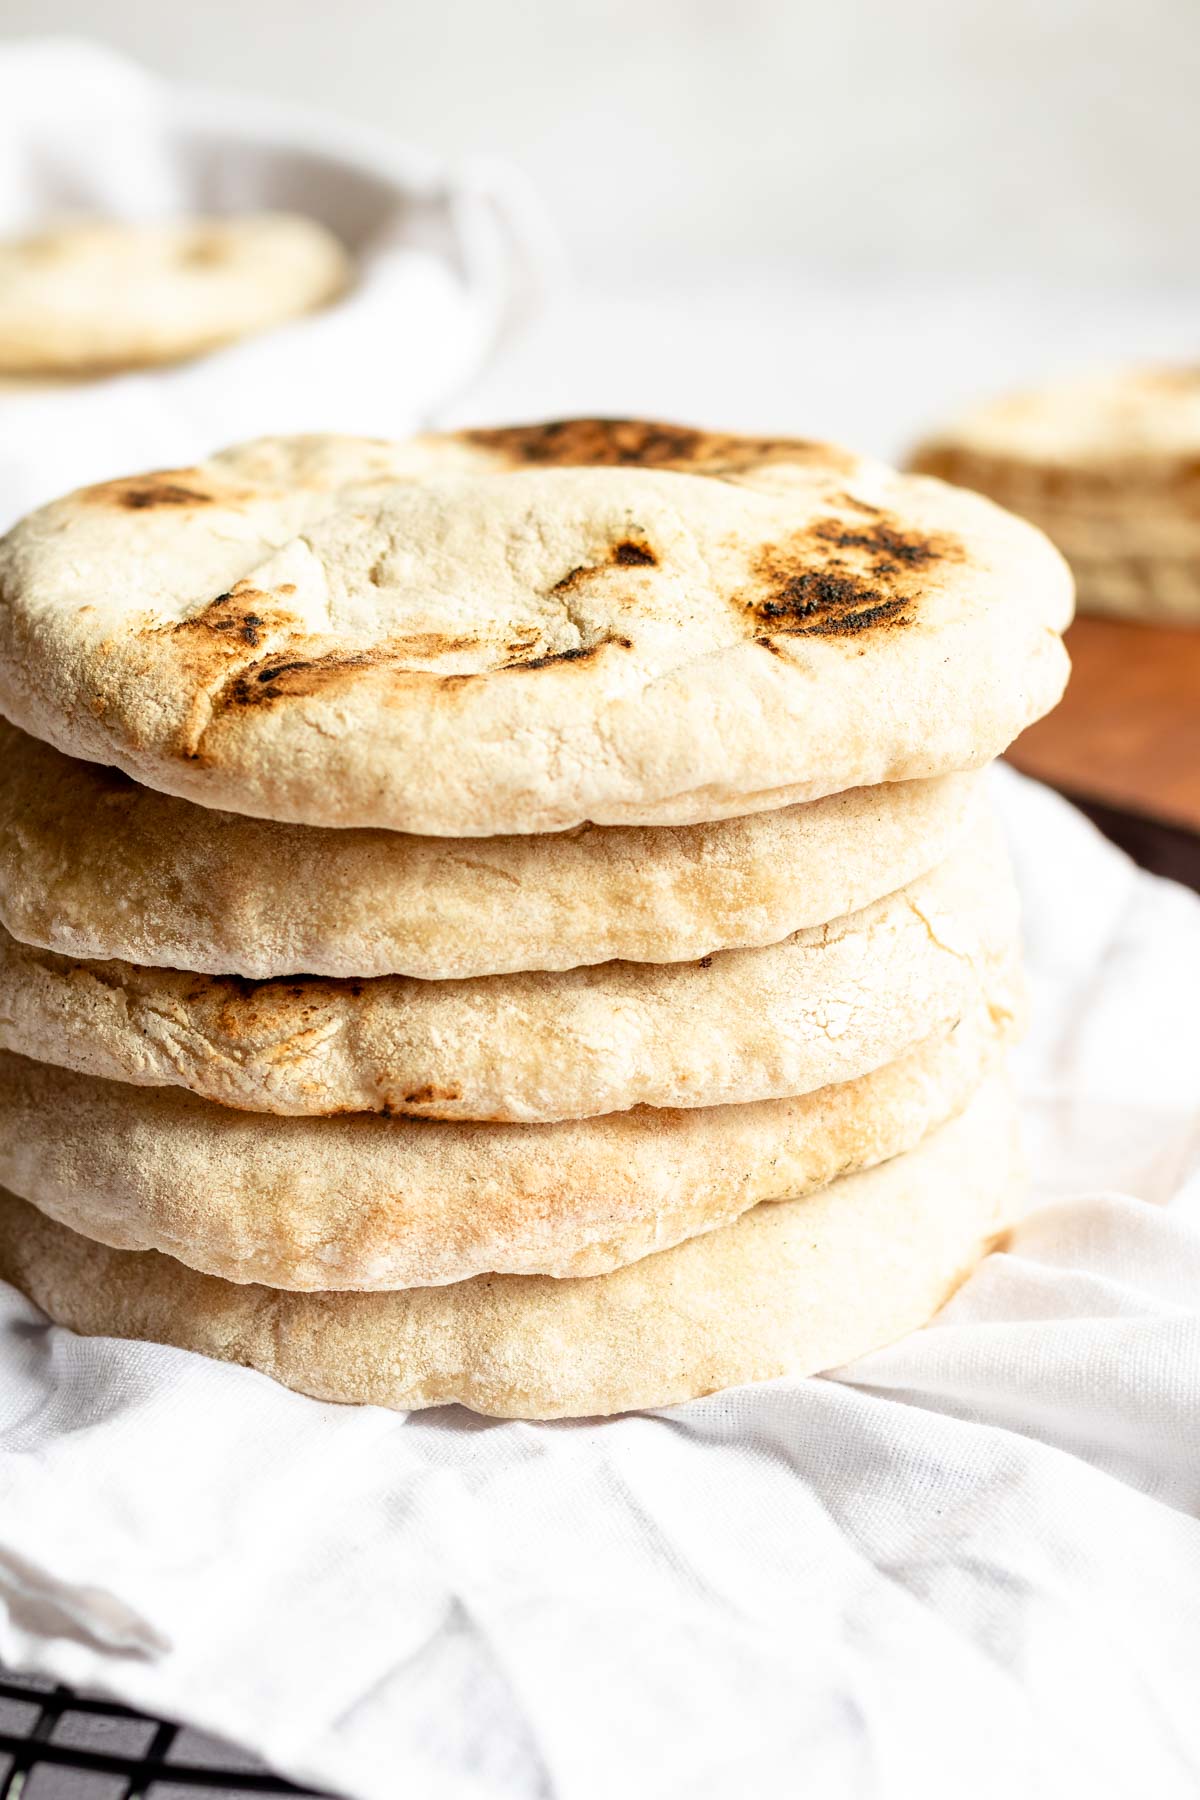
Whether you're making falafel or hummus, pitas are one of the best ways to enjoy sandwiches. This recipe makes you soft, fluffy, and flavorful pitas that go with anything, grilled cheese, sloppy joes, kebab, salads, etc.
If you like making homemade bread recipes, you should check out our no knead focaccia bread, greek pita bread, brioche rolls, and our 3 ingredient naan bread.
Jump to:
Why this recipe works
- Ease- this easy pita bread is super easy to make and is made with simple ingredients.
- Simple- All you will need is simple ingredients, a big mixing bowl, a wooden spoon, and a towel.
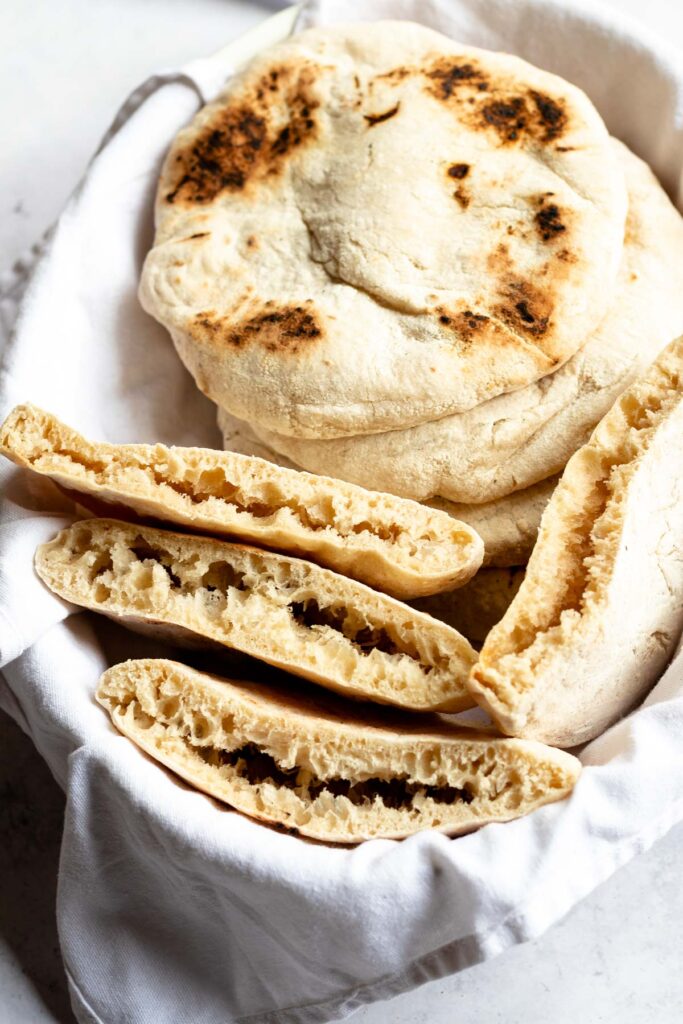
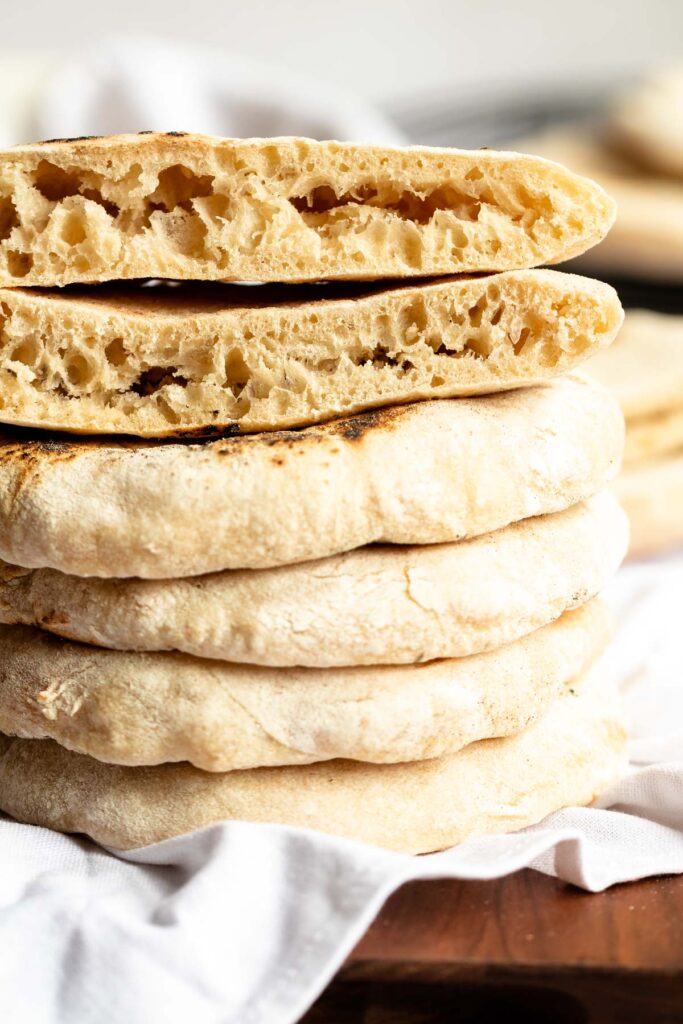
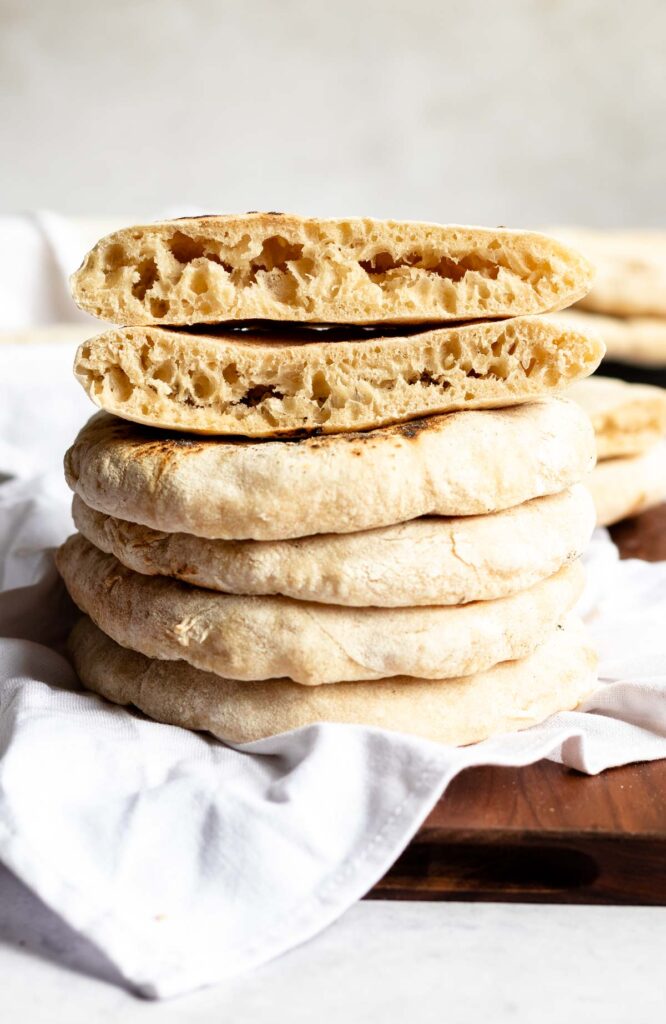
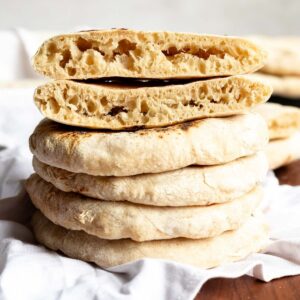
- Texture- this pita is not a thin pita bread as you know from grocery stores, this pita is fluffy and soft! You are going to love this recipe.
- Versatile- You can fill these with anything! Make a sandwich, use it with dips, stuff them with different fillings, etc!
- Freezer friendly- these pitas freeze amazingly! Every time you want fresh pita bread, remove one from the freezer, defrost it in the microwave, and then reheat it in the oven!
Ingredients
Before you start to make this pita pocket recipe, measure and prepare your ingredients so the cooking process will go smoothly and easily.
Flour- we use all-purpose flour for this recipe. Bread flour will work well.
Yeast- we used instant yeast for this recipe. make sure that your yeast isn’t expired. Instant yeast doesn't require the activation step, you can mix it into the dough right away.
That's why we love using instant yeast. If you don't have instant yeast, simply replace it with the yeast that you do have and activate it if needed.
Granulated sugar– we like to use granulated sugar, also the most common sugar used in baking. Caster sugar will work great as well.
Salt– We used kosher salt for this recipe. we love using kosher salt in baking because it's super easy to measure, and we like that the grains of the salt are small in size.
Water- use room temperature water.
Instructions
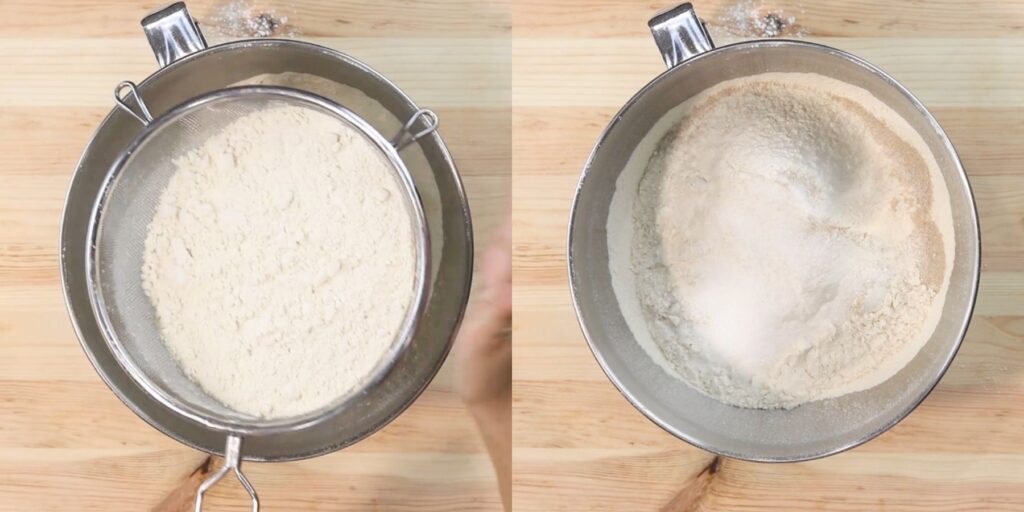
In a big mixing bowl, sift the flour. Add in the dry yeast, and sugar and mix well. Add the salt and mix, then add the water.
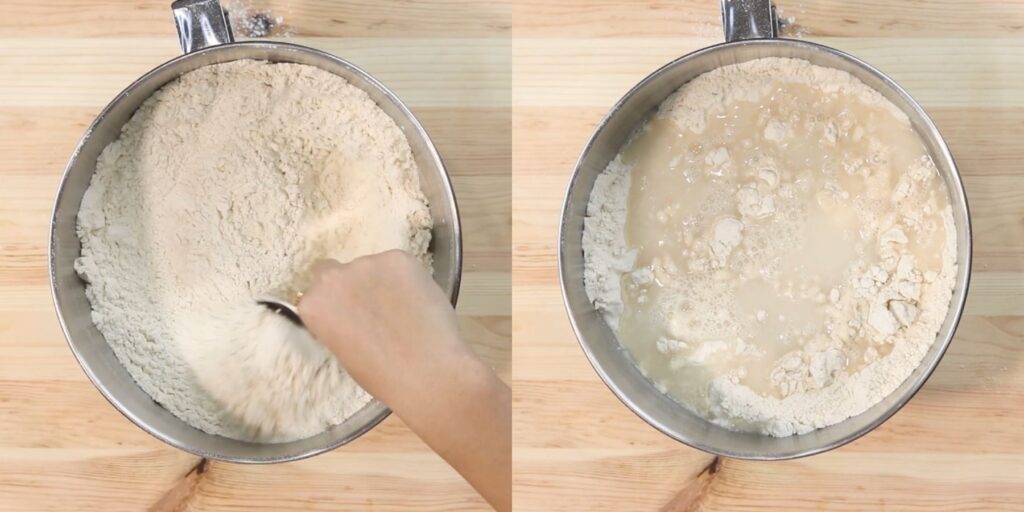
Mix for about 8 minutes until you get a soft dough.
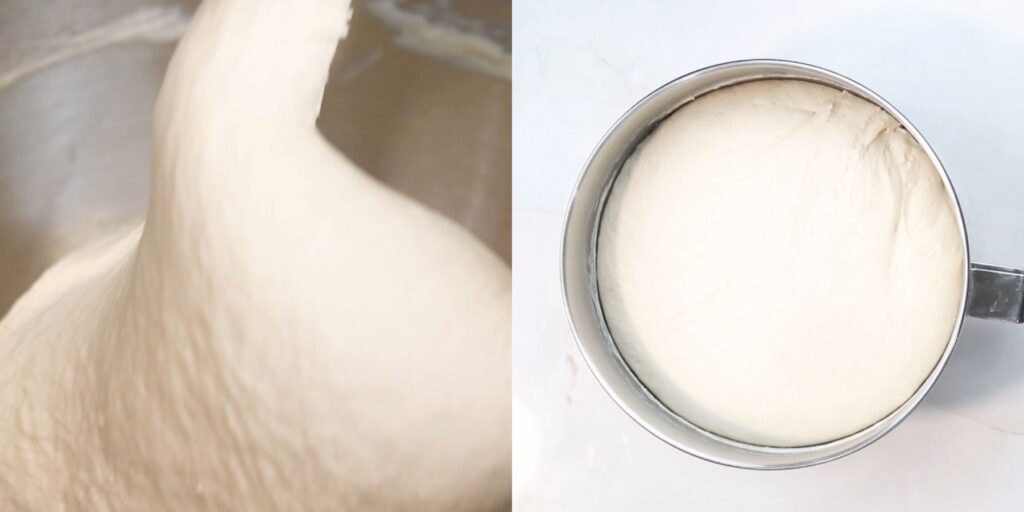
Let the dough rise and cover with a towel for 1 hour or until doubled in size.
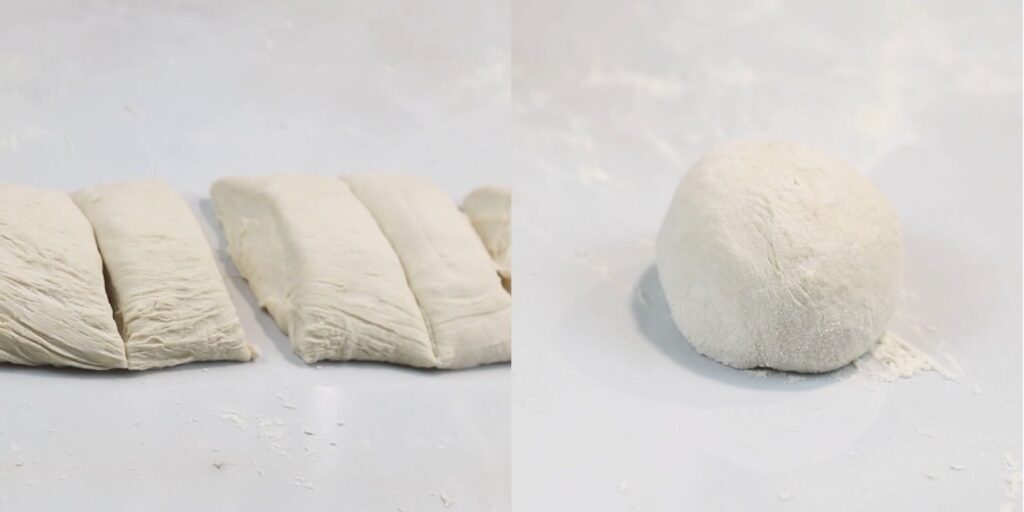
Punch down the risen dough and transfer the dough onto a floured surface.
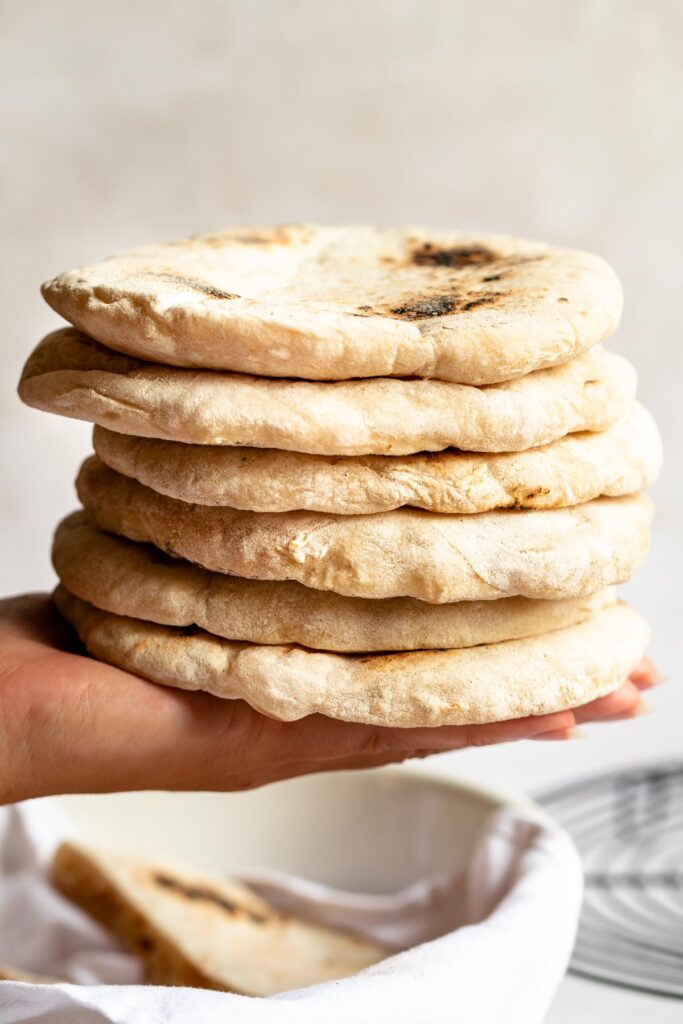
Stretch the dough into a log, and divide it into 10-12 equal pieces.
Shape each piece into a ball. Cover with a towel for 30 minutes. Preheat the oven to its highest temperature.
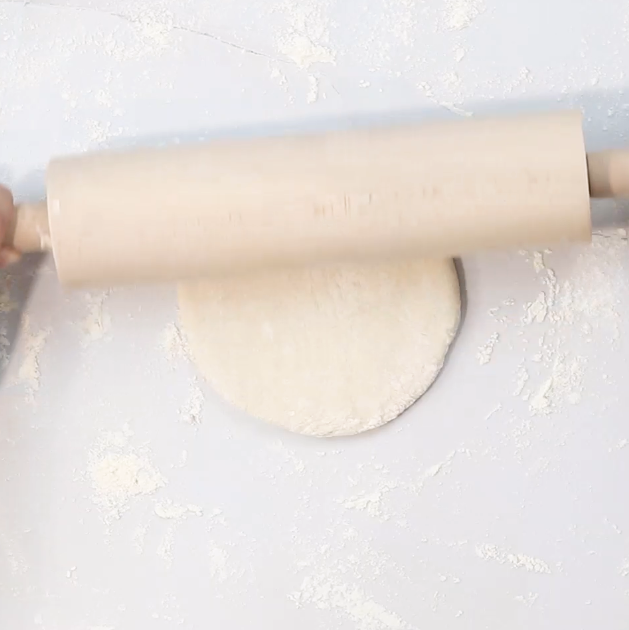
Sprinkle a small amount of flour on a work surface and roll each piece into a circle using a floured rolling pin.
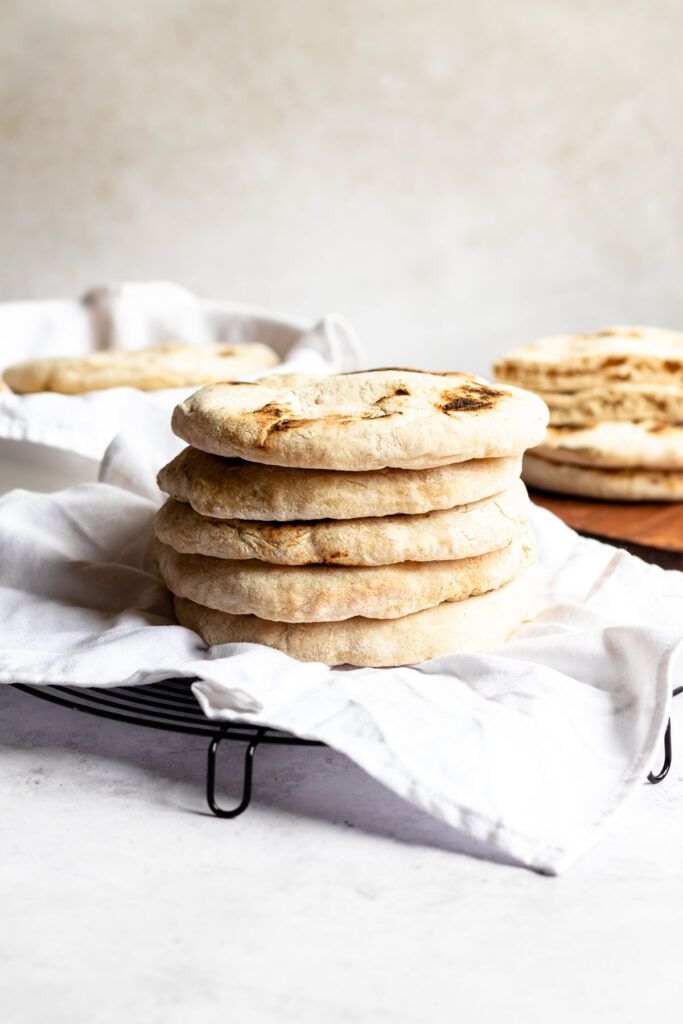
Bake in a preheated oven (preheated to its highest temperature) with a baking sheet for 3-5 minutes or until the bread begins to puff up and create a pocket, and the bottom has brown spots.
Expert Tips
- Make sure that your yeast isn't expired. You can check if your yeast is expired by mixing a teaspoon of dry yeast with ¼ cup of room temperature water, waiting 10 minutes, and if the yeast has bubbles in it and it puffed a bit, your yeast is alive and good, if there are no bubbles in your yeast mixture, your yeast is probably expired.
- Be patient! Let the dough rise at least until it doubles its size.
- Use bread flour! We like to use either all-purpose flour or bread flour for making bread. Bread flour contains more gluten, which makes the dough more stretchy and easy to work with.
- When rolling the dough balls, be generous with the flour because the dough is pretty sticky. Sticky dough is the secret to fluffy pitas!
- Make sure that your ingredients are fresh! Make sure that your flour and yeast are fresh and not expired. This step ensures that you will have great dough to work with.
Faq's
Yes! pita pocket is made with simple ingredients that are vegan! All you will need to make pitas is plain flour, yeast, granulated sugar, kosher salt, and water.
The pitas will last for about 3 days at room temperature, stored in an airtight container.
Yes. Heat a cast iron pan (or a regular pan) over medium to high heat, you can drizzle some olive oil if you want, and carefully place the pita bread dough on the pan.
Cook the pita bread for 1-2 minutes on each side, until bubbles start to form, checking constantly that the pita doesn't burn from the high heat.
This recipe makes about 10-12 pitas, depending on the size. You can make them smaller or bigger.
You can eat this pita bread in so many ways! It is great for making sandwiches, enjoying it with a dip, making it into a pita pizza, cutting it into triangles and baking it with olive oil, and making it into chips!
Storing
Store the leftover pita bread at room temperature in an airtight container or an airtight ziplock bag for up to 3 days.
If you have leftovers for more than 3 days, I recommend freezing the pitas to keep them fresh when you reheat them.
Freezing
After baking the pitas, let them cool completely and freeze them in an airtight container for up to 3 months.
When ready to use, defrost at room temperature for 30 minutes and reheat in a toaster oven for 2-3 minutes.
Reheating tips
Reheat this in the microwave for 30 seconds or in the toaster oven or oven that is preheated to 180c (350f) for 3-5 minutes until its warm and soft.
Substitutions
Whole wheat- To make pitas with wholewheat flour, simply replace ½ of the flour with wholewheat flour. We suggest not making these pitas with %100 wholewheat flour, because the pita will turn out dense and not fluffy.
Serving tips
There are many options to enjoy pitas.
Dips- pitas are one of the best bread to dip in different dips like tzatziki sauce, yogurt dill sauce, and boom boom sauce.
Falafel- make homemade falafel and fill the pita with Israeli salad, hummus, tahini sauce, and falafel for the perfect dish!
Shakshuka- use the pitas as bread to serve with your homemade shakshuka. You can make a classic tomato one or a green shakshuka!
Chocolate- one of my favorite snacks is a pita filled with Nutella or any chocolate spread. So good!
Sandwiches- pitas are perfect for sandwiches. Be creative and fill it with your favorite sandwich variation from peanut butter and jelly to a meat sandwich.
Pita pizza- make a pita pizza by cutting your pita in half into two open slices, and top each slice with tomato sauce, cheese, and toppings!
Kebabs- make delicious kebabs like chicken kebabs or beef kebabs and fill the pita with the kebabs, add a simple salad, and drizzle it with tahini sauce. Perfection!
Equipment
More side dishes
Dairy free mashed potatoes- These dairy free mashed potatoes are the perfect side dish, creamy, smooth, and savory, and come together in 30 minutes!
Crispy greek fries- These crispy greek fries are tender on the inside and extra crispy on the outside and are coated with dried herbs, lemon zest, garlic, and olive oil.
Green beans and potatoes- These green beans and potatoes are the perfect easy and healthy side dish for any main dish! It takes 30 minutes to make and uses simple ingredients.
If you tried this recipe, don’t forget to leave a rating and a comment below. We love hearing from you.
If you liked this recipe:
- Follow us on Facebook, Instagram, and Pinterest.
- Share/pin this recipe to Pinterest.
- Leave a comment down below!
📖 Recipe
Homemade Pita Bread (Pita Pocket)
Ingredients
- 1 Kg Flour
- 1 tablespoon Active dry yeast
- 2 teaspoon Granulated sugar
- 1 tablespoon Kosher salt
- 3 cups Water
Instructions
- In a big mixing bowl of a stand mixer, sift the flour, dry yeast, and sugar and mix well.
- Add the salt and mix, then add the water. Mix on medium speed for about 10 minutes until you get a soft dough.
- Let the dough rise and cover with a towel for 1 houror until doubled in size.
- Punch down the risen dough and transfer the doughonto a floured surface.
- Stretch the dough into a log, and divide it into 10-12 equal pieces.
- Shape each piece into a ball. Cover with a towel for 30 minutes.
- Preheat an oven to its highest temperature.
- Sprinkle a small amount of flour on a work surfaceand roll each piece into a circle using a floured rolling pin.
- Bake each pita bread in a preheated oven with abaking sheet for 3-5 minutes or until bread begins to puff upand the bottom has brown spots.
Notes
- Make sure that your yeast isn't expired. You can check if your yeast is expired by mixing a teaspoon of dry yeast with ¼ cup of room temperature water, waiting 10 minutes, and if the yeast has bubbles in it and it puffed a bit, your yeast is alive and good, if there are no bubbles in your yeast mixture, your yeast is probably expired.
- Be patient! Let the dough rise at least until it doubles its size.
- Use bread flour! We like to use either all-purpose flour or bread flour for making bread. Bread flour contains more gluten, which makes the dough more stretchy and easy to work with.
- When rolling the dough balls, be generous with the flour because the dough is pretty sticky. Sticky dough is the secret to fluffy pitas!
- Make sure that your ingredients are fresh! Make sure that your flour and yeast are fresh and not expired. This step ensures that you will have a great dough to work with.
Geo says
What type of pan? Would a pizza stone be better?
Thanks Geo
RichandDelish says
Just a regular pan, but a pizza stone will be even better!
Trisha says
Recipe sounds great don't normally give a rating until I've tried it, but need to know if you can make a single large loaf? Love baking bread since I retired. Have looked for a fluffy pita for ages,Thank you Trying to find recipe for more of a round loaf of bread. If you know of a different kind please let me know!!
RichandDelish says
Hi Trisha, I never tried it, but let me know if it works!
Anita says
Hi! It was my third attempt at making pita breads for the first time - and your recipe did wonders! I made half the size and they turned out so well! The simplicity and the visuals of your recipe gave clear concise instruction which helped a novice baker like me be successful - thank you! Highly recommend
Cami says
Have you frozen the dough before fter first rising? Or have you frozen the pitas after baking? Do they turn out okay after frozen?
RichandDelish says
Hi! For freezing these pitas, I recommend baking them and letting them cool and then freezing them covered in a plastic bag or wrapping them with plastic wrap.
Jhon says
The best pita bread I've ever had! so fluffy and delicious.
Ann says
Could these be made with wholewheat flour?
RichandDelish says
I never tried making these with wholewheat flour, but I think that 50% all-purpose flour and 50% whole wheat flour will work! Let me know how it turns out!
Vanessa says
Did you use all purpose flour or bread flour?
Rich and Delish says
Hi Vanessa! We used all-purpose flour for this recipe, but bread flour will work great as well!
Sara says
The recipe says to bake in a preheated oven, but I don't see a temperature listed anywhere. What temp should the oven be preheated to?
Rich and Delish says
Hi Sara! You should preheat your oven to the highest temperature possible, thanks for letting me know I will list the temperature in the post right away!
neen says
do you need a stand mixer?
Rich and Delish says
Hi neen, yes, if you don't own a stand mixer, knead the dough by hand for at least 5-8 minutes, or until the dough is smooth and flexible.