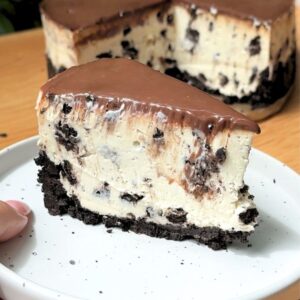
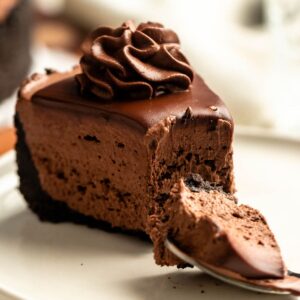
This No-Bake Oreo Cheesecake is creamy, rich, and loaded with Oreo chunks. With a crunchy cookie crust, a fluffy center, and a smooth chocolate ganache topping.
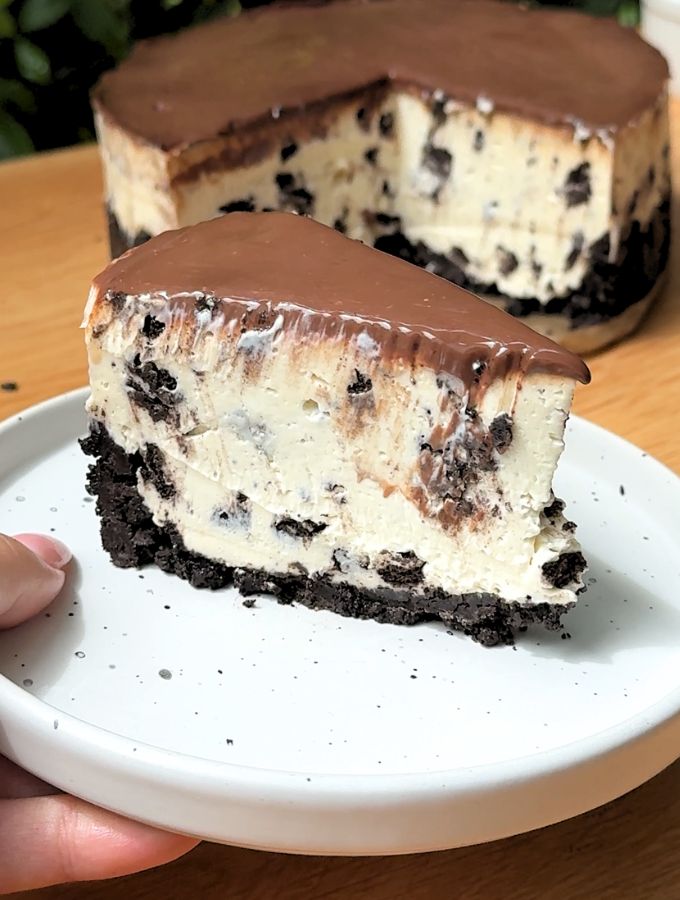
Because it’s a make-ahead recipe, it’s perfect for hosting. Just set it in the fridge and forget it until your guests arrive. No oven, no water baths, and no cracking, just a perfect, foolproof dessert every time.
You can get the work done early and just enjoy it when your guests arrive. For more no-bake cheesecakes to make ahead, check out my no-bake chocolate cheesecake and no-bake mango cheesecake.
Jump to:
Why this recipe works
- One-Bowl Method: You do not need to whip the cream separately. Everything happens in one large bowl for easy cleanup.
- No Oven Required: Keep your kitchen cool while making this cheesecake on hot summer days.
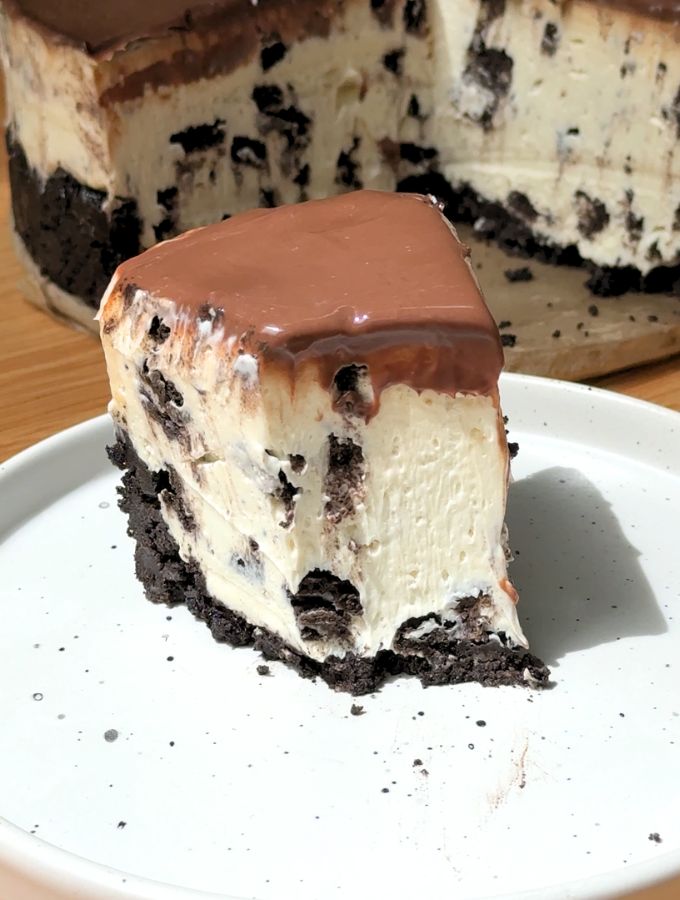
- Foolproof Texture: This recipe sets perfectly in the fridge, giving you a smooth, light texture every time.
- Beautiful Finish: The rich chocolate ganache topping makes this look professional and beautiful, and adds a delicious, creamy chocolate flavor.
Ingredients & Notes
For the Oreo Crust
- Oreo Cookies: Use the classic chocolate sandwich cookies. Crush them into a fine dust so the crust holds together firmly.
- Salted Butter: Use melted butter to bind the cookie crumbs. It acts as the "glue" for your crust.
For the Cheesecake Filling
- Cream Cheese: Use full-fat brick cream cheese. My preference is Philadelphia, but use your favorite brand! Important: It must be softened to room temperature so you don't get lumps in your filling.
- Sour Cream: Adds a little tang and makes the cheesecake feel lighter.
- Powdered Sugar: Gives the cheesecake a smooth, velvety sweetness without the grittiness of granulated sugar.
- Pure Vanilla Extract: Adds depth of flavor; make sure to use pure extract rather than imitation for the best taste.
- Heavy Whipping Cream: Keep it very cold until the second you mix it. This is the secret to keeping the cheesecake firm and fluffy.
- Oreo Cookies: Chop them into big pieces so you get Oreo chunks in every bite.
For the Chocolate Ganache
High-Quality Chocolate: Choose a brand you love, as the flavor will really shine. You can use dark, milk, or white chocolate depending on your preference.
Heavy Whipping Cream: This is the liquid that melts your chocolate into a smooth glaze.
Important Ratio Note: Because different chocolates have different textures, use these ratios for the perfect set:
- Dark/Semi-Sweet Chocolate: 1 part chocolate to 1 part cream (1:1).
- Milk Chocolate: 2 parts chocolate to 1 part cream (2:1).
- White Chocolate: 3 parts chocolate to 1 part cream (3:1).
Instructions
Prepare the Oreo crust
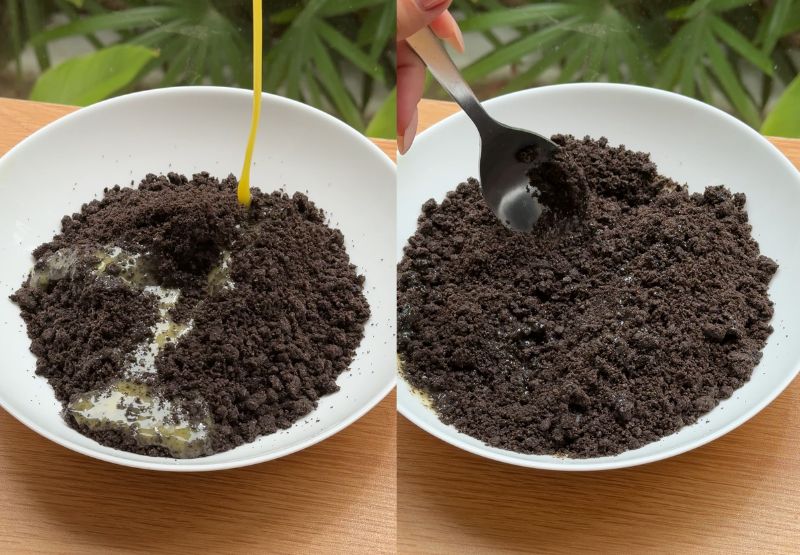
1. Crush: Use a food processor or a plastic bag to crush the cookies into a fine, sandy dust.
2. Mix: In a medium bowl, stir the cookie crumbs and melted butter together until the mixture looks like wet sand.
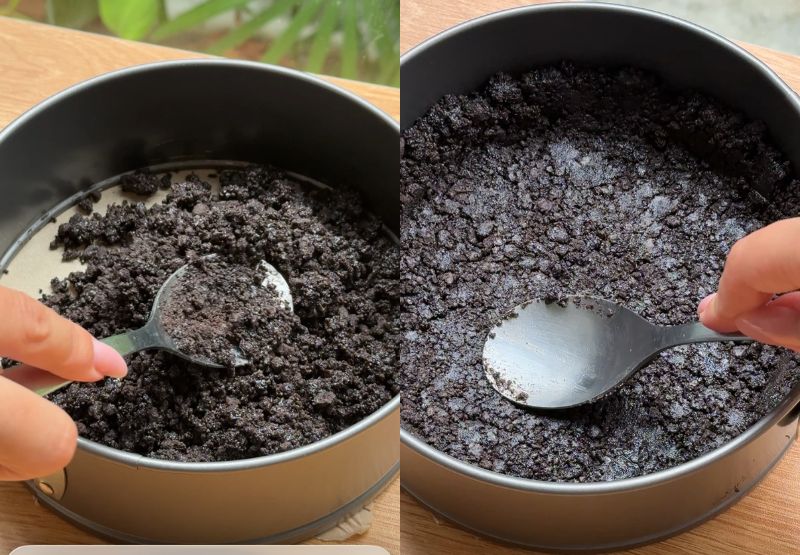
3. Press: Pour the crumbs into your pan and press them down firmly using the back of a measuring cup or a spoon. Place the pan in the fridge to harden while you make the filling.
Make the One-Bowl Filling
4. Beat the Base: In a large mixing bowl, beat the soft cream cheese, sour cream, powdered sugar, and vanilla extract with an electric hand mixer until the mixture is smooth and creamy.
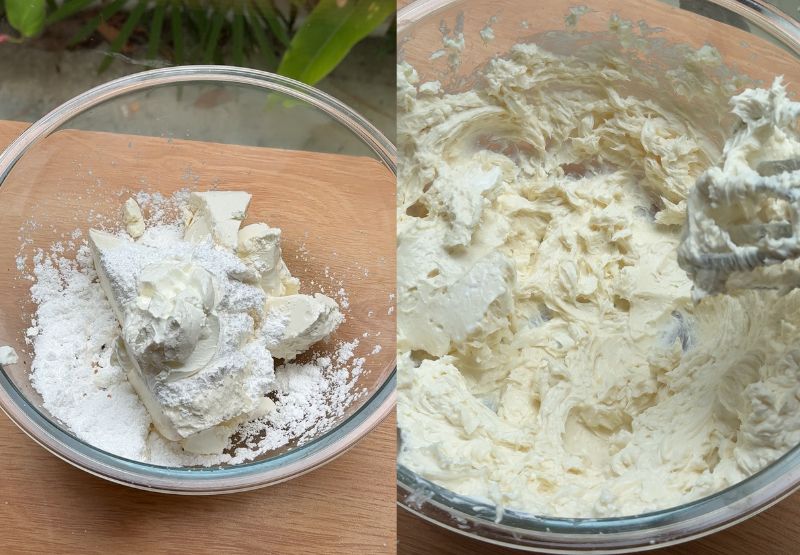
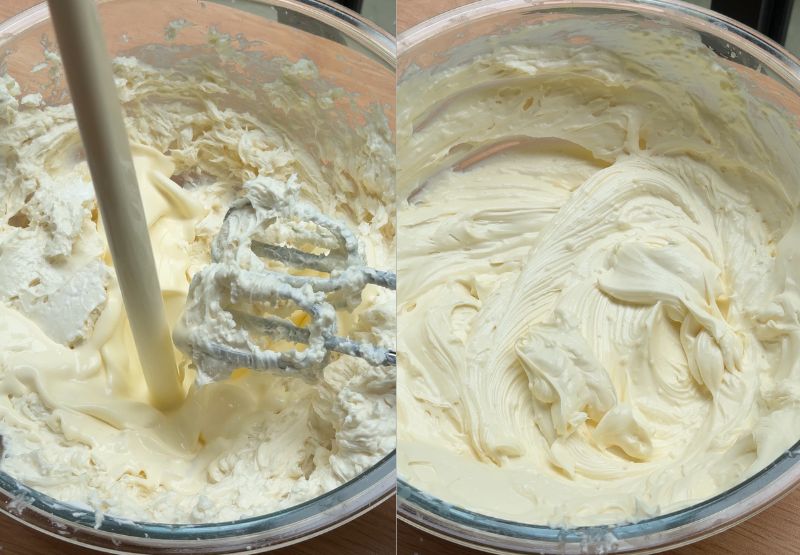
5. Whip to Peaks: Pour the ice-cold heavy whipping cream directly into the bowl with the cream cheese. Start your mixer on low speed to combine, then switch to high speed.
Beat until the mixture is thick and holds stiff peaks (meaning it stands up straight when you pull the mixer out).
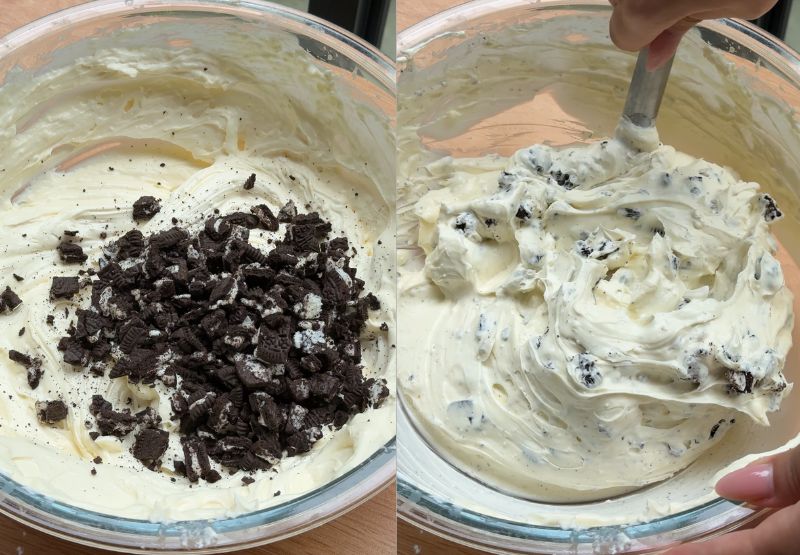
6. Add Cookies: Use a rubber spatula to gently fold the chopped Oreo chunks into the thick cream.
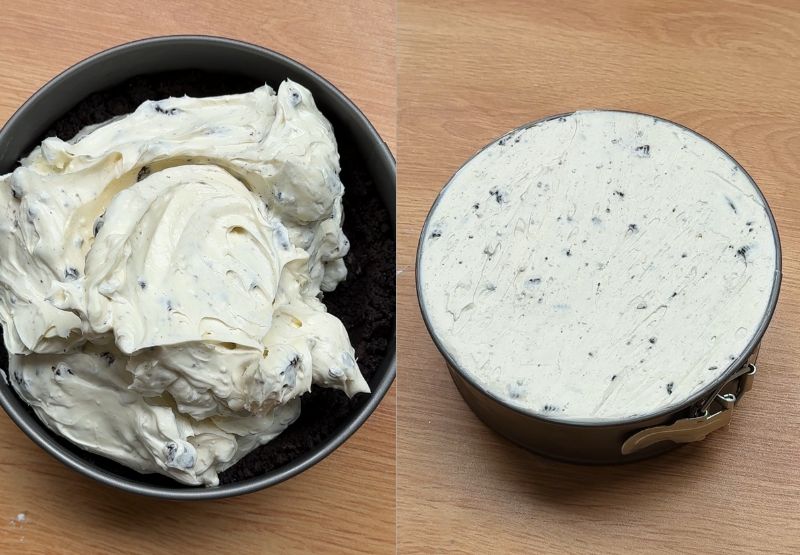
7. Fill: Spread the filling evenly over your chilled crust. Use a spatula to smooth the top.
Make and Add the Ganache
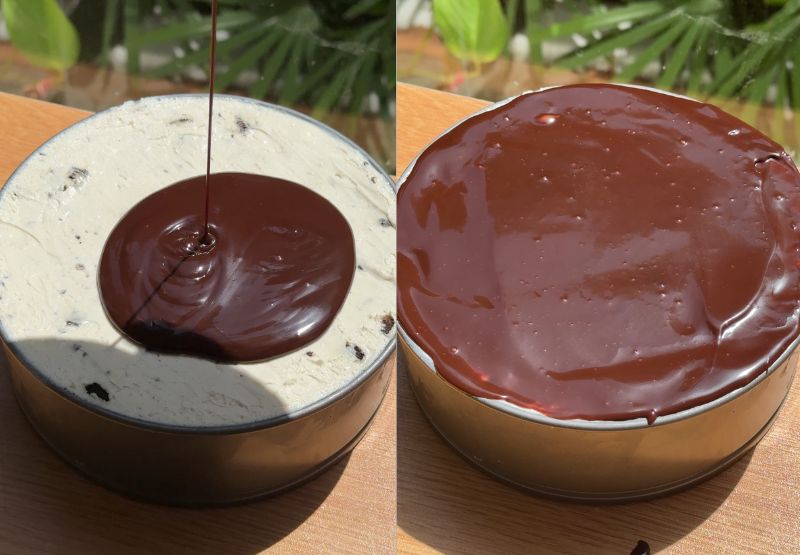
8. To make the topping, place your chocolate in a bowl and pour the hot, steaming cream directly over it. Let the mixture sit for two minutes, then whisk gently until it is completely smooth and glossy.
Once it has cooled slightly, pour it over the cheesecake and spread it into an even layer.
Expert tips
- Temperature is Key: Use room-temperature cream cheese to ensure a smooth, lump-free base. Ensure your heavy cream is ice-cold, so it whips up perfectly thick.
- Avoid Overmixing: As soon as your filling reaches the "stiff peak" stage, where the mixture stands up straight when you lift the beaters, stop your mixer. Mixing for too long can make the filling grainy.
- The "Clean Cut" Trick: For bakery-perfect slices, run a thin knife under hot water and wipe it clean with a damp paper towel between every single cut.
- High-Quality Chocolate: Since the ganache has so few ingredients, the quality of the chocolate is the star. Use a brand you enjoy eating on its own for the best results.
Troubleshooting
My filling is too soft: This usually happens if the cream wasn't cold enough or wasn't whipped long enough. If it is still soft after chilling, put it in the freezer for 30 minutes to help it firm up.
My ganache is lumpy: This means the chocolate didn't melt all the way. You can fix this by placing the bowl over a pot of simmering water (a double boiler) and whisking until the lumps disappear.
The ganache melted my filling: You likely poured the ganache while it was too hot. Always wait until it is just warm to the touch before pouring it over the cheesecake.
My crust is crumbling: This happens when the crumbs are too large, or there isn't enough butter to hold them. Make sure to crush the cookies into a fine, sandy powder and press them very firmly into the pan.

Faq's
No. This recipe uses the "one-bowl" method, which requires liquid heavy whipping cream. Cool Whip cannot be beaten into the cream cheese the same way and will not hold the right texture.
No. This recipe uses the reaction between the fat in the heavy cream and the cream cheese to set the cake in the fridge. There is no need for gelatin, making the texture much smoother.
You can, but it will be very hard to get the slices out without breaking them. If you don't have a springform pan, line a regular pan with parchment paper, leaving enough extra paper hanging over the sides to use as "handles" to lift the cheesecake out once it is set.
Storing
Store in an airtight container or tightly wrapped in the springform pan for up to 5 days.
Freezing and Thawing
To freeze the cheesecake, flash-freeze the set cake for 1 hour to harden the ganache, then double-wrap it tightly in plastic wrap and aluminum foil to block freezer odors and prevent moisture loss for up to 3 months.
Always thaw the cake in the refrigerator for 24 hours rather than at room temperature to prevent condensation from dulling the glossy finish.
For the best professional results, pipe the fresh chocolate whipped cream dollops only after the cake is fully thawed to maintain their stability and aeration.
Make it ahead of time
This recipe is designed to be made in advance. It needs at least 6 hours in the fridge to set, so preparing it one day before serving is ideal.
Letting it chill overnight allows the flavors to meld and ensures the firmest, cleanest slices.

Substitues
Gluten-Free Crust: Use gluten-free chocolate sandwich cookies in place of standard Oreos.
Cookie Options: If you don't have Oreos, use chocolate graham crackers, chocolate wafers, or dark chocolate digestive biscuits.
Variations
Oreo flavor- Change the Oreo flavor by swapping standard Oreos for Mint, Golden, or Peanut Butter Oreos.
Lemon zest- Mix 1 teaspoon of fresh lemon zest into the cream cheese base.
Chocolate Oreo cheesecake- Use the recipe for my no-bake chocolate cheesecake and add crushed Oreos, like in this recipe.
More cheesecake recipes to try:
No-bake Biscoff cheesecake- This No-Bake Biscoff Cheesecake has a buttery Biscoff cookie crust, a velvety cookie butter-infused filling, and a decadent melted Biscoff drip.
Tiramisu cheesecake- This tiramisu cheesecake features an Oreo crust, no-bake mascarpone filling, coffee-soaked ladyfingers, and a dusting of cocoa powder.
Mini no-bake cheesecakes- These no-bake mini cheesecakes are creamy, easy to make, and perfect with berries on top. These are made with simple ingredients and take minutes to prep!
Connect With Us
Review: Leave a rating and comment below if you enjoyed this recipe. Socials: Follow on Facebook, Instagram, and Pinterest. Save: Pin this recipe to Pinterest for later.
📖 Recipe
Easiest No Bake Oreo Cheesecake (Creamy & Light)
Ingredients
For the crust
- 17 Oreo cookies
- ¼ cup Salted butter
For the Oreo cheesecake filling
- 18 oz Cream cheese full fat, room temperature
- ⅔ cup Powdered sugar
- 2 tablespoon Sour cream
- 1 teaspoon Vanilla extract
- 1 ⅓ cups Heavy cream cold
- 1 cup Oreos crushed
For the chocolate ganache (optional)
- 2.5 oz Heavy cream
- 2.5 oz Dark chocolate high quality
Instructions
Make the Oreo crust
- Use a food processor or a plastic bag to crush the cookies into a fine, sandy dust.
- In a medium bowl, stir the cookie crumbs and melted butter together until the mixture looks like wet sand.
- Pour the crumbs into your pan and press them down firmly using the back of a measuring cup or a spoon. Place the pan in the fridge to harden while you make the filling.
Make the Oreo cheesecake filling
- In a large mixing bowl, beat the soft cream cheese, sour cream, powdered sugar, and vanilla extract with an electric hand mixer until the mixture is smooth and creamy.
- Pour the ice-cold heavy whipping cream directly into the bowl with the cream cheese. Start your mixer on low speed to combine, then switch to high speed.
- Beat until the mixture is thick and holds stiff peaks (meaning it stands up straight when you pull the mixer out).
- Use a rubber spatula to gently fold the chopped Oreo chunks into the thick cream.
- Spread the filling evenly over your chilled crust. Use a spatula to smooth the top.
Make the ganache
- To make the topping, place your chocolate in a bowl and pour the hot, steaming cream directly over it. Let the mixture sit for two minutes, then whisk gently until it is completely smooth and glossy.
- Once it has cooled slightly, pour it over the cheesecake and spread it into an even layer.
Notes
- Temperature is Key: Use room-temperature cream cheese to ensure a smooth, lump-free base. Ensure your heavy cream is ice-cold, so it whips up perfectly thick.
- Avoid Overmixing: As soon as your filling reaches the "stiff peak" stage, where the mixture stands up straight when you lift the beaters, stop your mixer. Mixing for too long can make the filling grainy.
- The "Clean Cut" Trick: For bakery-perfect slices, run a thin knife under hot water and wipe it clean with a damp paper towel between every single cut.
- High-Quality Chocolate: Since the ganache has so few ingredients, the quality of the chocolate is the star. Use a brand you enjoy eating on its own for the best results.
Gordon says
Very good
Roghayeh says
Nice